

I have just started learning about Docker and Kubernetes and I thought I should share my journey with you guys. So, here's a quick guide on how to create and publish docker images.
1. Create Docker Image
Let's create a docker image of a simple python application.
Prerequisite:
- Docker is already installed on our system. (Install Docker)
- DevDependencies of relevant programming language (e.g. Python) are already resolved.
- Account registered in DockerHub.
Procedures:
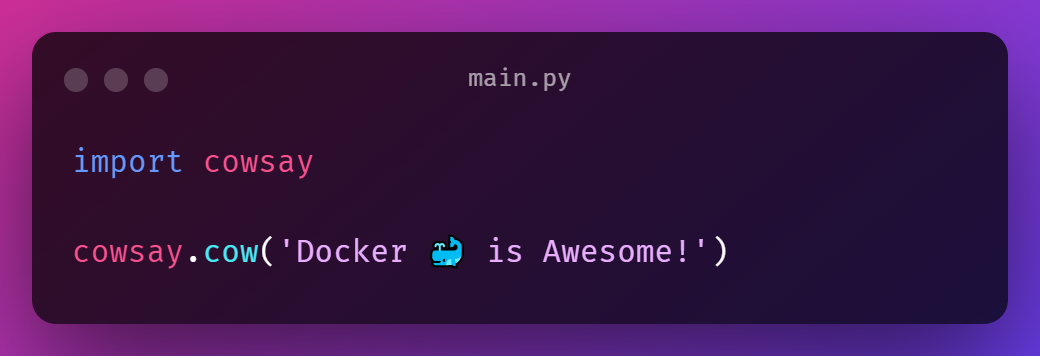
Step-1: Create a Python Application
Let's create a simple python application using one of my favorite python packages.
Step-2: Create a Dockerfile
Create a file exactly named as "Dockerfile" (without any file extensions).
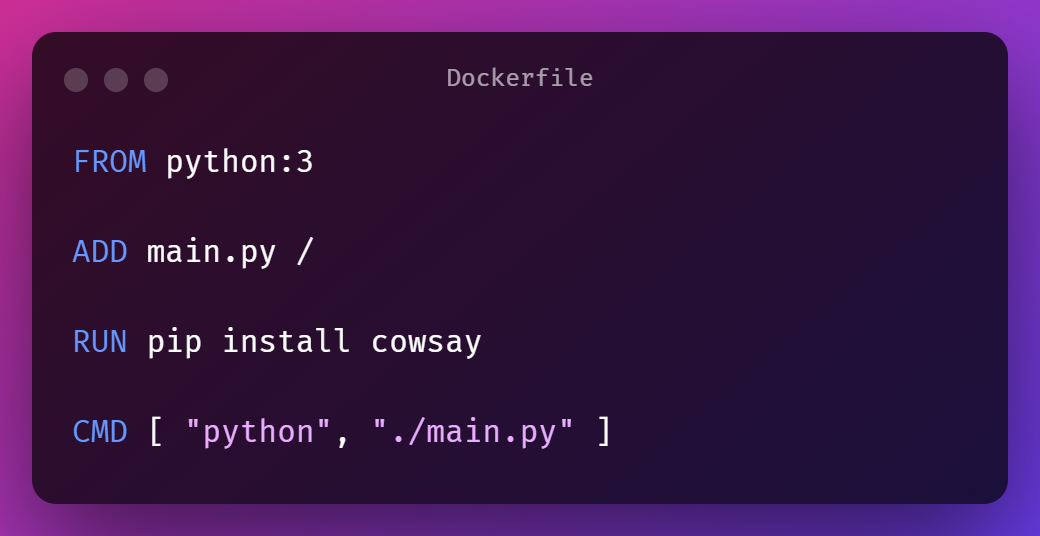
- FROM - The FROM instruction initializes a new build stage and sets the Base Image for subsequent instructions. As such, a valid Dockerfile must start with a FROM instruction. The image can be any valid image (e.g. python:3). It is especially easy to start by pulling an image from the Public Repositories.
- ADD - Copies new files, directories or remote file URLs from [source] and adds them to the filesystem of the image at the path [destination].
- RUN - It will execute any commands in a new layer on top of the current image and commit the results. The resulting committed image will be used for the next step in the Dockerfile.
- CMD - There can only be one CMD instruction in a Dockerfile. If you list more than one CMD then only the last CMD will take effect. The main purpose of a CMD is to provide defaults for an executing container.
Step-3: Create Docker Image
Navigate to your file directory where "Dockerfile" is stored.
Then create a docker image using this command. "username" refers to your DockerHub Username.
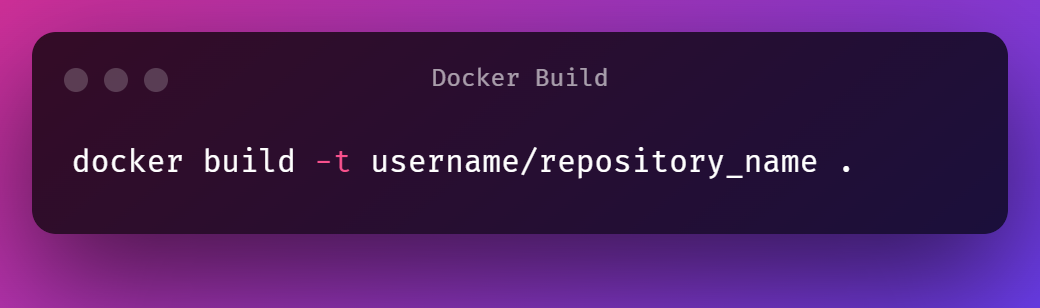 For example -
.png)
Step-4: Run Docker Image
 If you went through all the steps correctly then you should see the following output when you run the docker image.
.png)
2. Publish Docker Image
The Docker Image has been created successfully. Now it's time to publish it to DockerHub.
Procedures:
Step-1: Login in DockerHub
Login in DockerHub in your Terminal CLI.
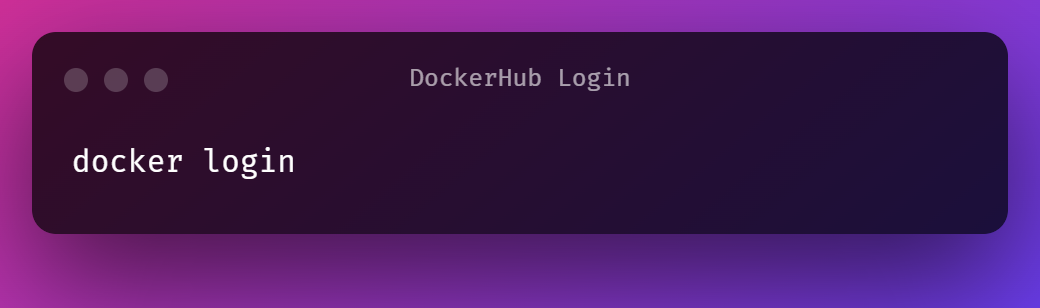 If it's your first time logging in then it should ask for "username" and "password".
Otherwise, it should say -
If it's your first time logging in then it should ask for "username" and "password".
Otherwise, it should say -
Authenticating with existing credentials... Login Succeeded
Our Amazing SponsorsDigitalOcean offers a simple and reliable cloud hosting solution that enables developers to get their website or application up and running quickly.View Website
Laravel News keeps you up to date with everything Laravel. Everything from framework news to new community packages, Laravel tutorials, and more.View Website
A Laravel Starter Kit that includes Authentication, User Dashboard, Edit Profile, and a set of UI Components. Learn more about the DevDojo sponsorship program and see your logo here to get your brand in front of thousands of developers.View Website
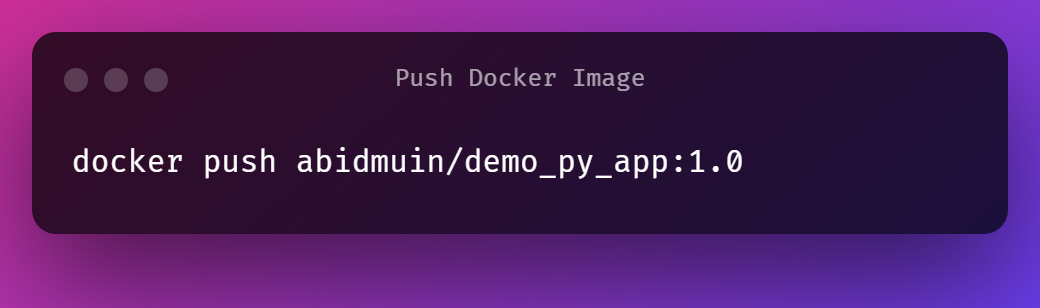
Step-2: Push Docker Image to DockerHub
The final step is to push your docker image.
Now go to your DockerHub Repositories using your web browser. You should see your docker image which you just published.
If you are having a hard time getting your head around Terminal CLI, it is highly recommended that you download Docker Desktop. But still you will need to use the Terminal for most of the cases. Better get comfortable with it as early as you can.
I hope this quick guide came in handy for starting your Docker Journey. If so, I am glad to be a part of it. This is my first article on Docker. Any kind of feedback is highly appreciated. Good luck on your journey with Docker.
Cheers!
Comments (0)