What is Nginx?
Nginx is one of the most popular web servers in the world and is responsible for hosting some of the largest and highest-traffic sites on the internet. It is a lightweight choice that can be used as either a web server or reverse proxy.
In this guide, we’ll discuss how to install Nginx on your Ubuntu 20.04 server, adjust the firewall, manage the Nginx process, and set up server blocks for hosting more than one domain from a single server.
Step 1 – Installing Nginx
Because Nginx is available in Ubuntu’s default repositories, it is possible to install it from these repositories using the apt packaging system.
Since this is our first interaction with the apt packaging system in this session, we will update our local package index so that we have access to the most recent package listings. Afterwards, we can install nginx:
sudo apt update
sudo apt install nginx
After accepting the procedure, apt will install Nginx and any required dependencies to your server.
Step 2 – Adjusting the Firewall
Before testing Nginx, the firewall software needs to be adjusted to allow access to the service. Nginx registers itself as a service with ufw upon installation, making it straightforward to allow Nginx access.
List the application configurations that ufw knows how to work with by typing:
sudo ufw app list
You should get a listing of the application profiles:
Available applications:
  Nginx Full
  Nginx HTTP
  Nginx HTTPS
  OpenSSH
As demonstrated by the output, there are three profiles available for Nginx:
 View Website
 View Website
 View Website
- Nginx Full: This profile opens both port 80 (normal, unencrypted web traffic) and port 443 (TLS/SSL encrypted traffic)
- Nginx HTTP: This profile opens only port 80 (normal, unencrypted web traffic)
- Nginx HTTPS: This profile opens only port 443 (TLS/SSL encrypted traffic)
It is recommended that you enable the most restrictive profile that will still allow the traffic you’ve configured. Right now, we will only need to allow traffic on port 80.
sudo ufw allow 'Nginx HTTP'
You can verify the change by typing:
sudo ufw status
The output will indicated which HTTP traffic is allowed:
Status: active
To                         Action      From
--                         ------      ----
80                         ALLOW       Anywhere
443                        ALLOW       Anywhere
Nginx HTTP                 ALLOW       Anywhere
80 (v6)                    ALLOW       Anywhere (v6)
443 (v6)                   ALLOW       Anywhere (v6)
Nginx HTTP (v6)            ALLOW       Anywhere (v6)
Step 3 – Checking your Web Server
At the end of the installation process, Ubuntu 20.04 starts Nginx. The web server should already be up and running.
We can check with the systemd init system to make sure the service is running by typing:
systemctl status nginx
Output
● nginx.service - A high performance web server and a reverse proxy server
     Loaded: loaded (/lib/systemd/system/nginx.service; enabled; vendor preset: enabled)
     Active: active (running) since Sat 2021-09-11 12:37:03 UTC; 6min ago
       Docs: man:nginx(8)
   Main PID: 2146 (nginx)
      Tasks: 3 (limit: 2362)
     Memory: 4.4M
     CGroup: /system.slice/nginx.service
             ├─2146 nginx: master process /usr/sbin/nginx -g daemon on; master_process on;
             ├─2149 nginx: worker process
             └─2150 nginx: worker process
As confirmed by this out, the service has started successfully. However, the best way to test this is to actually request a page from Nginx.
You can access the default Nginx landing page to confirm that the software is running properly by navigating to your server’s IP address. If you do not know your server’s IP address, you can find it by using the icanhazip.com tool, which will give you your public IP address as received from another location on the internet:
curl -4 icanhazip.com
When you have your server’s IP address, enter it into your browser’s address bar:
http://your_server_ip
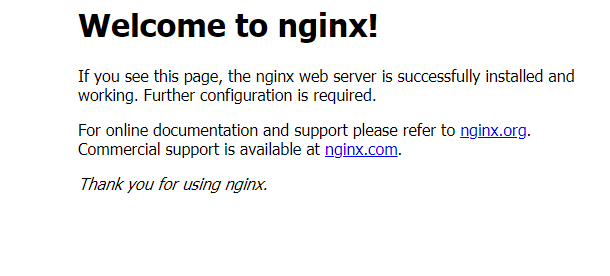
You should receive the default Nginx landing page:


Comments (0)