

The Laravel Scheduler allows you to schedule specific functionality to run at a particular time on your server. Check out the Laravel Scheduler if you are not familiar with it. To implement this functionality in your application, you will need to set up a Cron Job to run in the background.
In this tutorial, I will show you how easy it is to set-up up a Cron Job on your Cloudways server. BTW, if you want to get a free $50 hosting credit, be sure to use Promo code DEVDOJO at signup. (FYI: you will need to enter a form of payment to get this credit)
Ok, let's jump into it and learn how easy it is to set up the Laravel Scheduler in Cloudways.
Set-up a Laravel application
Before setting up the Laravel Scheduler to work, you will need to first launch a Laravel application on your Cloudways server.
You can learn how to do that in this previous article where we show you how to spin-up a Laravel app using cloudways.
After you have set up an application, we can then move on to creating a quick scheduler to run.
Set-up a Schedule
We'll need to add some simple functionality to test out that our scheduler is running; we can easily do that by opening up the following file: app/Console/Kernel.php. Inside this file, you will find a function called schedule(). Inside this function, we are going to add the following code:
protected function schedule(Schedule $schedule)
{
    $schedule->call(function(){
            \Log::info('we just got called');
    })->everyMinute();
}
What we are doing is simply logging out the message we just got called, which will output to our application storage/logs/laravel.log file.
To test this out, we could run the following artisan command from our project root:
 View Website
 View Website
 View Website
php artisan schedule:work
Next, if we open up a new terminal window and tail the output of our laravel.log file:
tail -f storage/logs/laravel.log
We will have to wait a minute, and we'll start to see the following output.
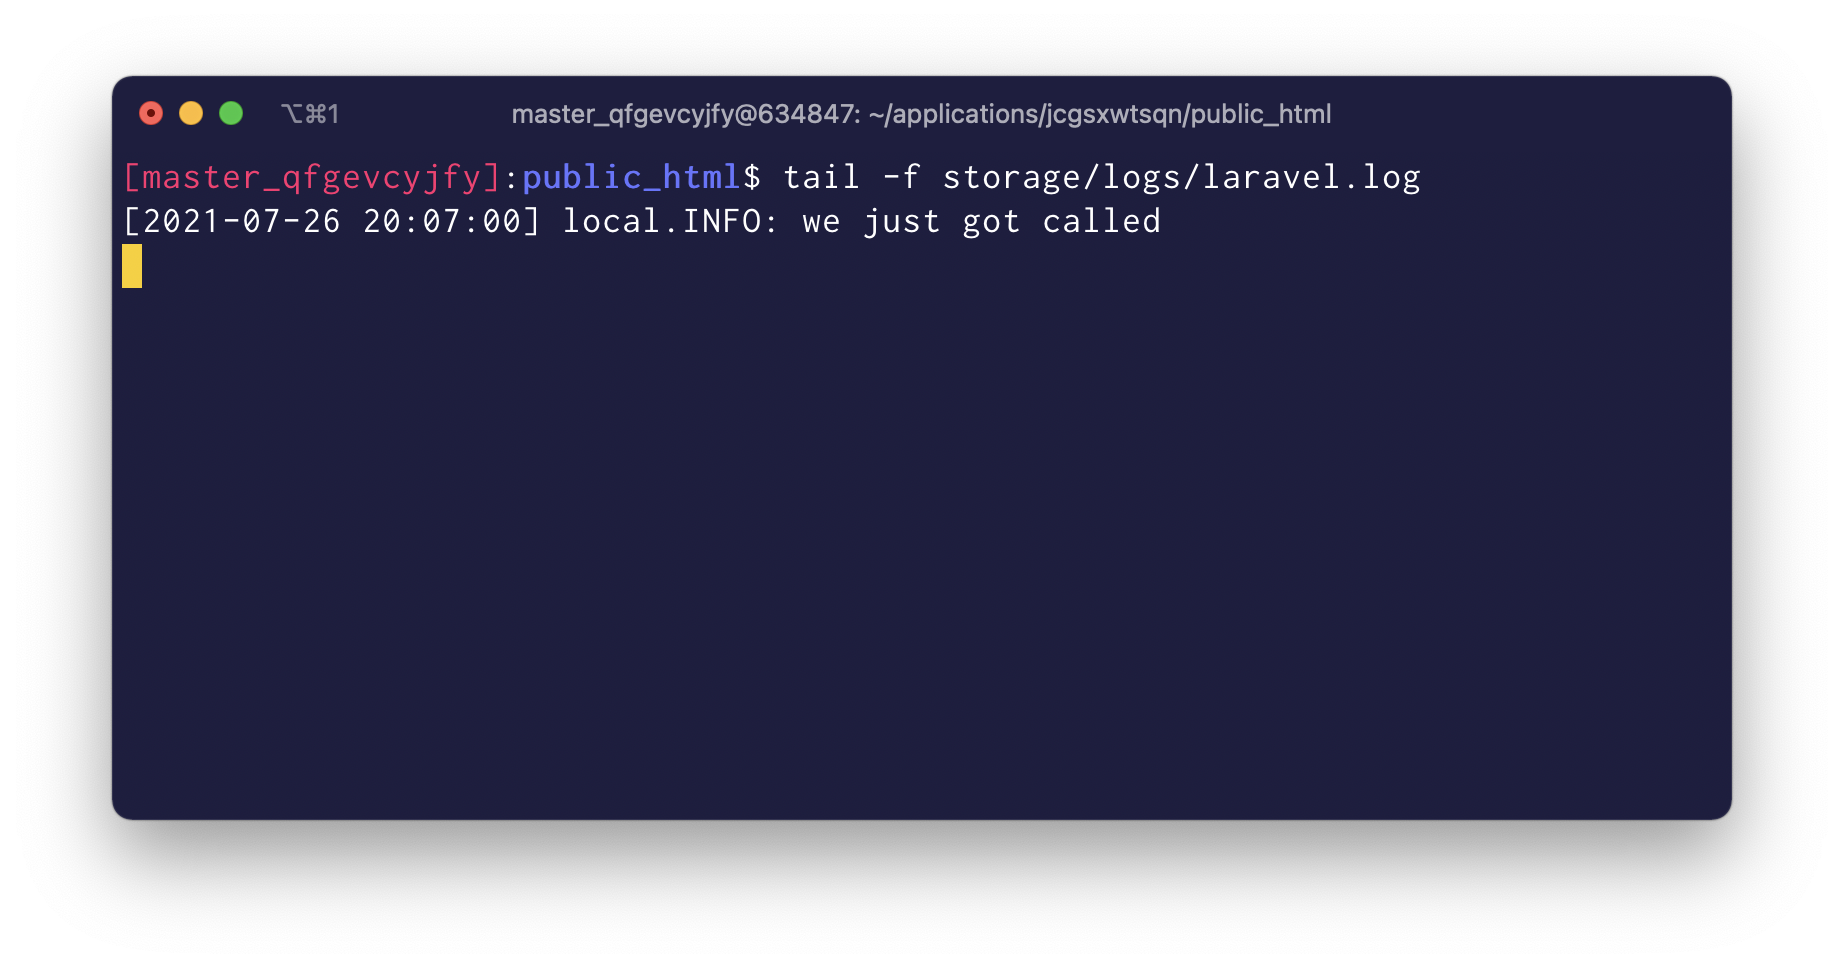
As you can see, our scheduler is working; however, we want our scheduler to run without needing to run the artisan schedule:work command. (because running this command will stop after we close our connection). Instead, setting up a background Cron Job will always execute our tasks, even if the server has rebooted 👏.
Set-up the Cron Job
If we take a look at the Laravel documentation for creating your Cron Job, we can see that they recommend adding the following code to set up our Cron Job:
* * * * * cd /path-to-your-project && php artisan schedule:run >> /dev/null 2>&1
We can easily modify this by changing the location of our application, like so:
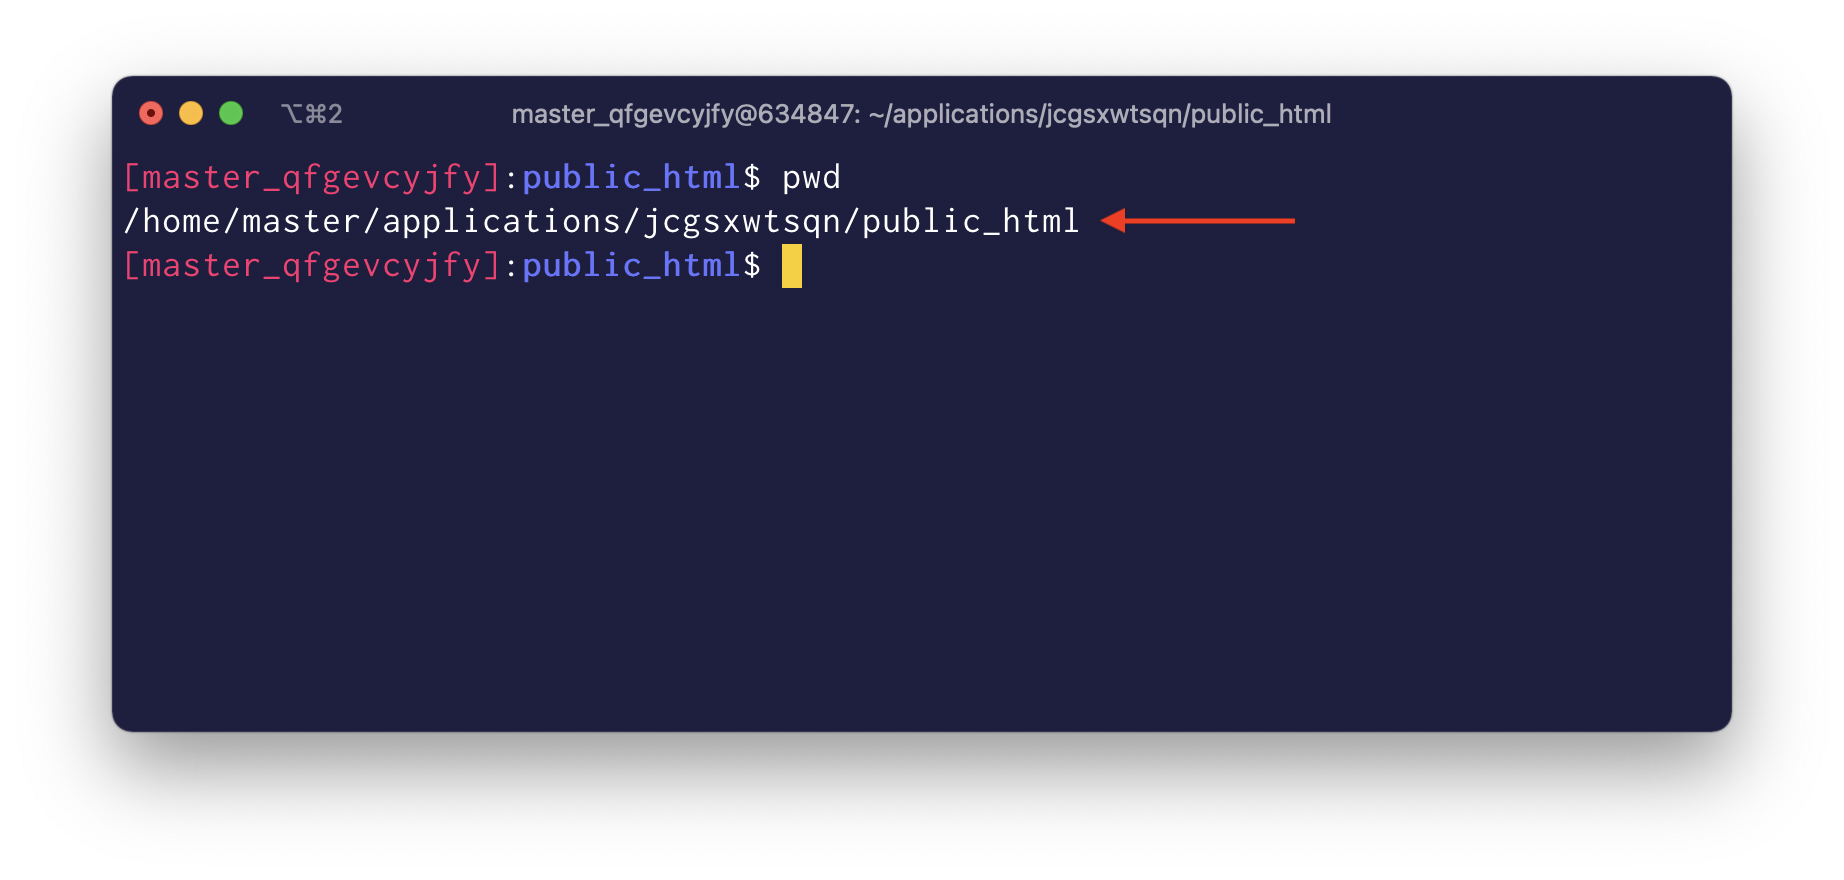
* * * * * cd /home/master/applications/jcgsxwtsqn/public_html && php artisan schedule:run >> /dev/null 2>&1
If you need to find the location of your laravel install, you can run pwd to print out the working location of your laravel application.
Next, inside of your application page settings on your Cloudways dashboard, you'll need to click Cron Job Management tab -> the Advanced Tab, and then enter in your Cron command:

Finally, click on the Save Changes button, and that's it! We've just finished setting up the Laravel Scheduler on your Cloudways server.
Testing the Scheduler
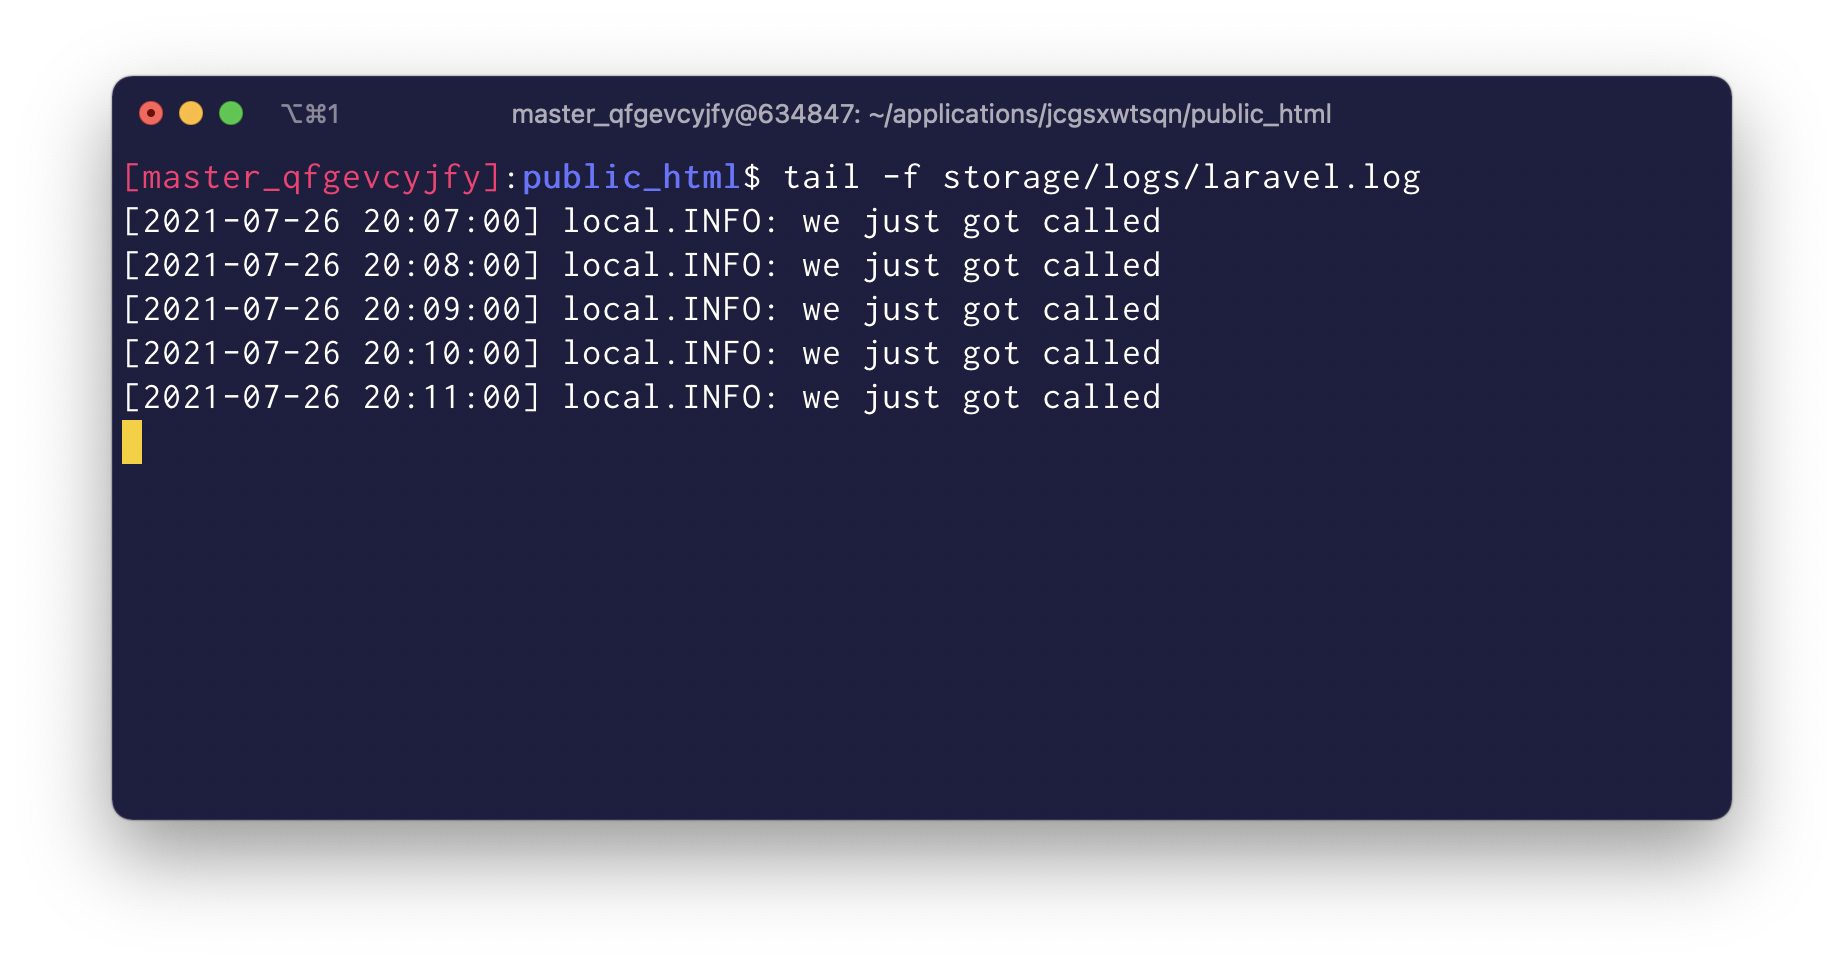
To confirm that our Cron Job is set up successfully, you can navigate to the root of your application and tail the output of the log file:
tail -f storage/logs/laravel.log
If everything is working correctly, you should be able to wait a few minutes and see that your log file will write out we just got called every minute.
Now you can add commands to your scheduler, and you'll be certain that they are going to run every minute, hour, day, or whatever the specific time you want them to run 🙌
Comments (0)