

This post is not for beginners. Here we'll discuss Redux, the JavaScript library used for managing React state. And also I will give you a practical guide to Redux.
Without further ado! Let's get into it.
Introduction
"A predictable state container for JS Apps" Simply put, Redux makes it easy to manage the state of your whole application.
How does it works?
This is how you'd do it without Redux.

If we do the same but now without redux.

This is what Redux does. And that's the reason it is awesome.
The Redux flow

Below you will see the actual code for this scheme to React.
First, let's start with installing Redux in our root react dir:
npm i --save redux react-redux
Then create a new javascript file into the react dir(let's name it Redux.js)
 View Website
 View Website
 View Website
const redux = require('redux');
const createStore = redux.createStore;

const initialState = {count: 0} // This is the default, example state we'll always pass to rootReducer

// Reducer -> The only thing that can interact directly with the store

const rootReducer = (state = initialState, action) => {
    //Simple😉. It takes the old state, updates it via action you passed and return the new,
    // updated state. But here, we'll just return the state without changing it.
    return state;
}

// Store (the place where the app satte is contained)
const store = createStore(rootReducer); // We pass reducer as argument
console.log(store.getState()) // The way we log the current state
Dispatching action
store.dispatch({type: 'ALWAYS_UPPERCASE_UNIQUE_FUNCTION',
value: 6});
After you invoke this dispatch method, it goes and automatically call the rootReducer and passes the current state and the action - which is all the data you've just passed to dispatch (Then in your rootReducer you can check this action passed and update the state in different ways correspondingly).
Now, the only thing left to do is to subscribe to the store and react to changes. Normally, we'd do this in a react component, but since we haven't embedded redux in React yet, we'll just do a simple subscription and log in to the console when the state changes:
store.subscribe(() => {
    // triggers on every state change.
    console.log('[subscription]', store.getState());
})
Now, you know why Redux is awesome and how theoretically it works, But aside from that how important is the theory even more important is to apply what all you've learned.
Practical Guide to Redux
Now I will give you a practical guide to Redux. Where you'll learn how to connect React to Redux in 5 Not simple 😉 steps.
Now we know a little about Redux (as we learned above). In this section, you'll learn how to practically implement and use this awesome react library.
I know you've already created your react app😅. Now install redux:
npm install --save redux react-redux
Now set up the file structure:
You'll have to create a new directory called "store" with a file inside called "reducer.js". Now put this directory into ./src of your project, Feel free to choose different file names. That's it :0.
Now in you reducer.js file, do the following:
const initialState = {
    apples: 0,
    peaches: 0
} //this is the default state of your app

// Now the reducer:
const reducer = (state = initialState, action) => {
    //Assume that reducer takes the old state and updates it in
    // dependence of the action object you pass. This object is entirely customised, that's how I use it:
    if (action.type === 'SET_APPLES') {
// action.type holds what we want to change. action.payload holds the new value
        return {
            ...state,
            apples: action..payload
        }
    } else if (action.type === 'SET_PEACHES') {
// The standard is to use ALL_UPPERCASE on this place
        return {
            ...state,
            peaches: action.payload
        } // As you can see, we never mutate the state directly!
    }
    return state; // if all if-else failed, return state unchanged.
}
That's the half of what you need to know 😧
Connecting React to Redux
In your index.js do the following. (Don't forget importing manual things)
import { createStore } from 'redux';
import reducer from './store/reducer'; //we created
import { Provider } from 'react-redux';

// we pass the reducer to creatStore
const store = createStore(reducer);

// the following is optional. It will log new store whenever it is changed.
store.subscribe(() => {
    console.log(store.getState());
});

reactDOM.render(
    <Provider store={store}>
    // Wrap everythng with a provider component and pass the store to the store prop
        <App />
    </Provider>,
    document.getElementById('root')
);
Connect Redux to the components
Now final step of connecting Redux to the components. And the final steps take place in App.js or any other high-level component. I will use App.js
(I have omitted the importing manual things like react but please don't or else you'll come here and comment that I did wrong🤣. )
import { connect } from 'react-redux';
const App = props => <div id="normal_regular_component" />;

// from now on, our goal is to pass the redux store
// and the methods we use to change it to the prips of the App component we just created above.
const map StateTo Props = state => { ...state };
//mapStateToProps will help us to pas the state as props so that later we can read the state .
const mapDispatchToProps = dispatch => {
    reutrn {
        // returns an object of methods used to change the state. Those methods are later available in the props of our component.
        setApples: (count) => dispatch({type: 'SET_APPLES', payload: count}),
        setPeaches: (count) => dispatch({type: 'SET_PEACHES', payload: count})
    }
}

export default connect(mapStateToProps, mapDispatchToProps)(App);

// It throws methods for changing state and the state itself as props to the App component.
How to use this setup?
Okay, so if you go back you'll see that our app component return just a div
const App = props => <div id="..." />;
In practice, you won't do that in a high-level component. Let's replace the previous line with something different, + I will show you how to now change the redux state from within this 'App' component.
const App = (props) => {
    //now, I will ask you again to go back above and look at the last piece of code you see.
    // Thankfully to it, now our props hold the gold we've been digging for up to now.
    console.log(props)

// THIS WILL BE LOGGED
// {
//   apples: 0,
//   peaches: 0,
//   setApples: ()=>{}, //method to change apples
//   setPeaches: ()->{} //method to changes peaches
// }

//and Here below, we use all of this:
return (
    <>
      <p>The current apples: {props.apples}</p>
      <button onClick={props.setApples(5)}>
    </>
 );
}
BONUS: How to access the newly creates state from an App's child component? Simple. For App, you just pass the props by: <ExampleComponent redux={props} /> 😉
That's it for now.
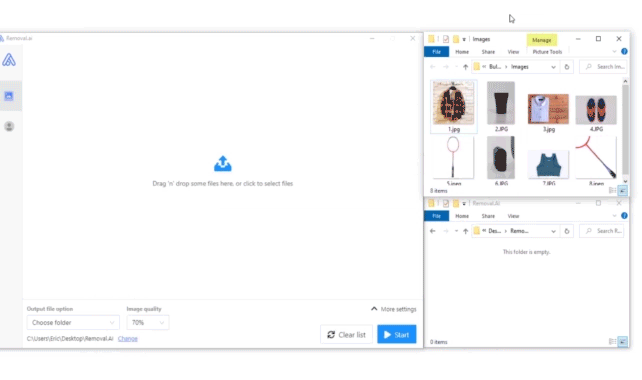
Removal.AI - [SPONSOR]
Remove background from multiple images in a single upload straight to your desktop using Bulk Photo Background Remover for Windows.
- ✅ Drag & Drop Multiple Images
- ✅ Optimize Product Images
- ✅ Select Your Background
- ✅ Set Your Output Size
- ✅ Exceptional Results
Visit -> Removal AI
Comments (0)