In this tutorial, I'll be showing you how to build a blog with Nuxt.js using the recently released content module.
Prerequisites
This tutorial assumes a basic knowledge of Nuxt.js.
Getting started
To get started, let’s create a new Nuxt.js application. We’ll be using create-nuxt-app:
npx create-nuxt-app nuxt-blog
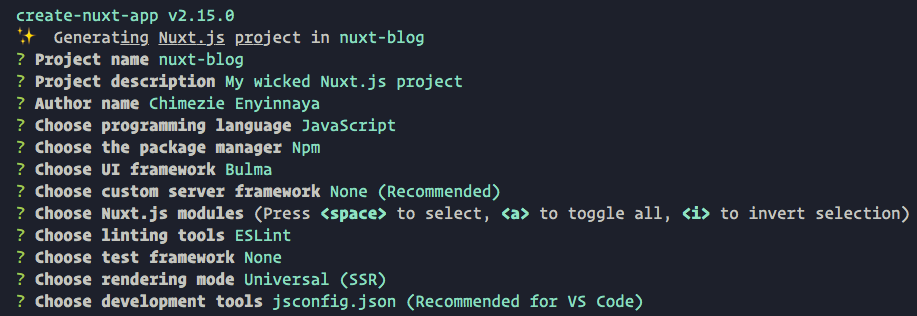
When prompted, select the options as in the image below:

To make use of the content module, we need to first install it:
npm install @nuxt/content
Once installed, add @nuxt/content to the modules section of nuxt.config.js:
// nuxt.config.js

{
  modules: [
    ...,
    '@nuxt/content'
  ]
}
Now, we can start using the module.
How the content module works
Before we dive into building our blog, let’s understand how the content module works. It makes use of a content directory as a data store. Basically, files created inside the content directory can be retrieved and their content parsed. The module supports the following file format: Markdown, JSON, YAML, and CSV. You can think of it as a kind of Git-based headless CMS.
 View Website
 View Website
 View Website
The module has an expressive API for fetching content. We can sort, filter, search, and do other kinds of stuff with the content module.
Creating posts
I have prepared some dummy posts we'll be using in this tutorial. First, let’s create the content directory.
mkdir content
The posts will be inside a posts directory:
cd content
mkdir posts
Next, let’s grab the posts from github repo and add them inside the posts directory.
Each post has a front matter block containing the title of the post and a brief description.
Fetching all posts
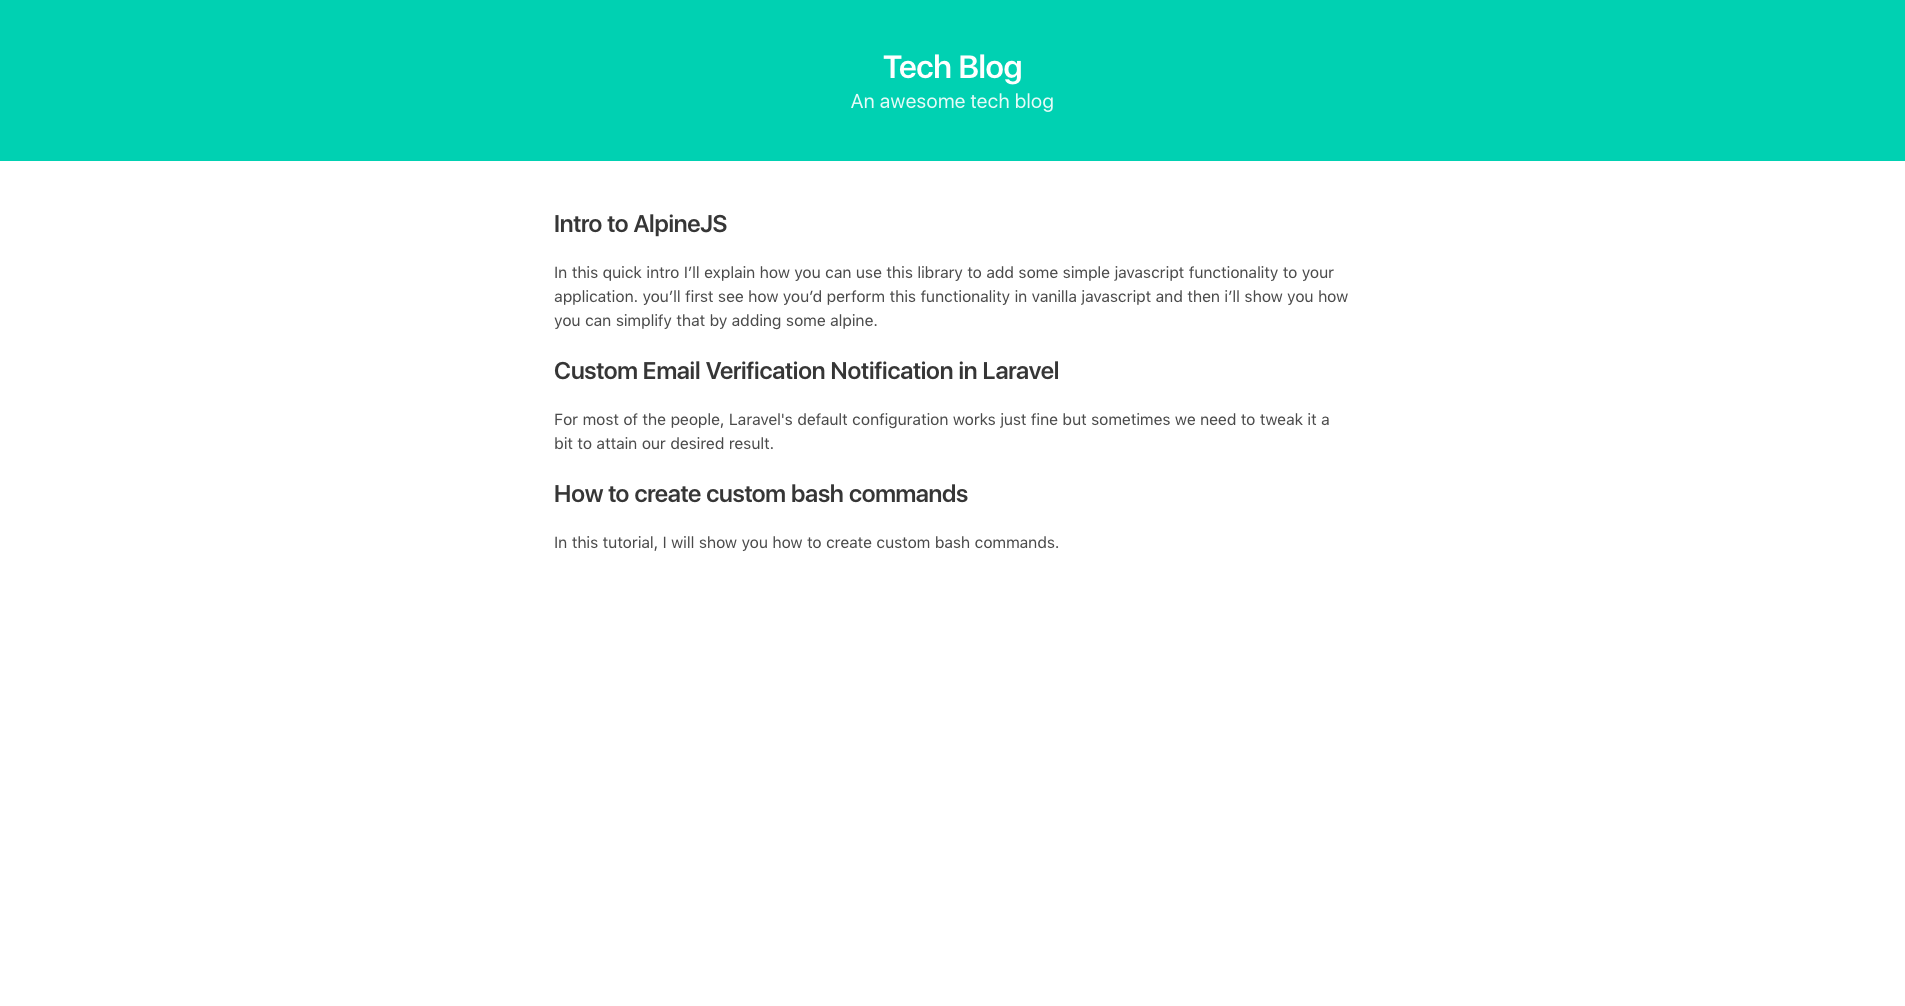
Now, let’s fetch all the created posts. We are going to display a list of posts created on the blog’s home. Update the index.vue file inside the pages directory as below:
<template>
  <div>
    <section class="hero is-primary has-text-centered">
      <div class="hero-body">
        <div class="container">
          <h1 class="title">
            Tech Blog
          </h1>
          <h2 class="subtitle">
            An awesome tech blog
          </h2>
        </div>
      </div>
    </section>

    <section class="section">
      <div class="container">
        <div class="columns">
          <div class="column is-three-fifths is-offset-one-fifth">
            <div v-for="post in posts" :key="post.slug" class="mb-5">
              <h3 class="title is-4">
                <nuxt-link :to="post.slug">
                  {{ post.title }}
                </nuxt-link>
              </h3>
              <div>
                {{ post.description }}
              </div>
            </div>
          </div>
        </div>
      </div>
    </section>
  </div>
</template>

<script>
export default {
  async asyncData ({ $content }) {
    const posts = await $content('posts').sortBy('createdAt', 'desc').fetch()
    return { posts }
  }
}
</script>

<style>
  h3 a {
    color: #363636;
  }
  h3 a:hover {
    color: #3273dc;
  }
</style>
Using the $content method, which is made available by the content module, we perform a query to fetch all posts inside the posts directory and sort them by their created date in descending order. Then inside the template, we loop through the posts and display the title and description of each of them with a link to view a particular post.

Showing a single post
You will notice from the list of posts that each post has a link to view the particular post. Now, let’s add the implementation logic. Create a _slug.vue file inside the pages directory, and paste the following snippet in it:
// pages/_slug.vue

<template>
</template>

<script>
export default {
  async asyncData ({ $content, params }) {
    const post = await $content('posts', params.slug).fetch()

    return { post }
  }
}
</script>
Again, using the $content method, we query the posts directory and fetch the post with the specified slug.
With the post fetched, let’s update the template section to display the post:
// pages/_slug.vue

<template>
  <section class="section">
    <div class="container">
      <div class="columns">
        <div class="column is-three-fifths is-offset-one-fifth">
          <h1 class="title is-1 has-text-centered">
            {{ post.title }}
          </h1>

          <nuxt-content :document="post" />

          <div class="mt-4 has-text-centered">
            <nuxt-link class="button is-primary is-light" to="/">
              View All Posts
            </nuxt-link>
          </div>
        </div>
      </div>
    </div>
  </section>
</template>
We are displaying the title of the post, which will be gotten from the front matter block. To display the actual page’s content, we need to make use of the <nuxt-content> component, which accepts a document props, which will be the post we want to display. The component will parse the markdown file and generate an array containing all h2 and h3 with their titles and ids, so we can link to them (useful for implementing table of contents). Finally, we add a link to view all posts.
To finish up, let’s add some custom styles to the page. <nuxt-content> component will automatically wrap the content with a .nuxt-content class, which we’ll use to customize the styles of the page. Add the following code after the script section:
// pages/_slug.vue

<style>
  .nuxt-content h2 {
    font-size: 1.25rem;
    font-weight: 600;
    line-height: 1.125;
    margin-top: 1.5rem;
    margin-bottom: 1.5rem;
  }
  .nuxt-content h2 > a::before {
    content: "#";
  }
  .nuxt-content h2 a .icon {
    height: 0.5rem;
    width: 0.5rem;
  }
</style>
We are styling how the headings will be displayed, as well as the links embedded within them.
Adding meta description
Our blog is now fully functional. Let’s add one more thing before we wrap up, which is meta descriptions. Add the following snippets inside _slug.vue after the asyncData method:
//_slug.vue

head () {
  return {
    title: this.post.title,
    meta: [
      { hid: 'description', name: 'description', content: this.post.description },
      { hid: 'og:title', property: 'og:title', content: this.post.title },
      { hid: 'og:description', property: 'og:description', content: this.post.description },
      { hid: 'twitter:title', name: 'twitter:title', content: this.post.title },
      { hid: 'twitter:description', name: 'twitter:description', content: this.post.description }
    ]
  }
}
Also, let’s update our blog title and meta description inside nuxt.config.js as well:
// nuxt.config.js

head: {
  title: 'Tech Blog',
  meta: [
    { charset: 'utf-8' },
    { name: 'viewport', content: 'width=device-width, initial-scale=1' },
    { hid: 'description', name: 'description', content: 'An awesome tech blog' }
  ],
  link: [
    { rel: 'icon', type: 'image/x-icon', href: '/favicon.ico' }
  ]
}
Conclusion
So we have seen how to build a blog with Nuxt.js and the content module. We have only scratched the surface of the functionality of the content module. To learn more about the content module, check out the docs.
The complete source code for this tutorial can be found on GitHub.


Comments (0)