
Abstract
Have you ever wanted to showcase a 3D model of some cool engine? Here is an actionable way of doing so, using some very basic maths: A simple exploded view 💣
To do so, we will use React-Three-Fiber, but it can work with native three.js (it is not deeply bound to r3f ecosystem, just faster to iterate for me).
By the way, it is my first blog post ever, feel free to contact me on twitter if you liked or disliked the post, if you found some of the things blurry, some typos, ...
Thank you in advance. ✨
Prepare the model
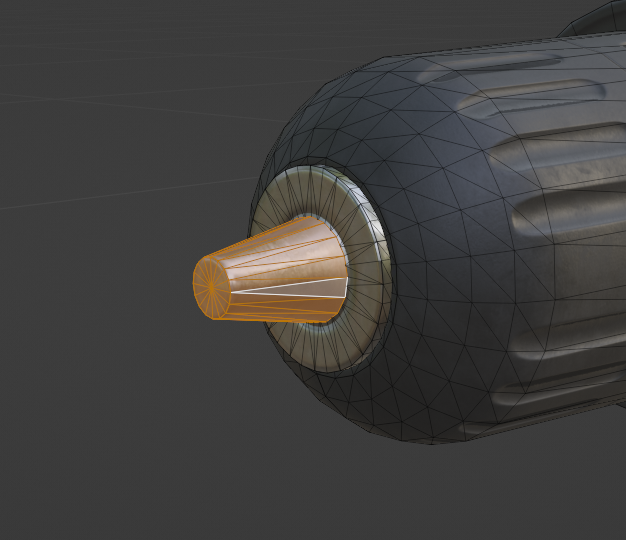
First, open your favorite modeling tool to split your model (if needed) in several parts.
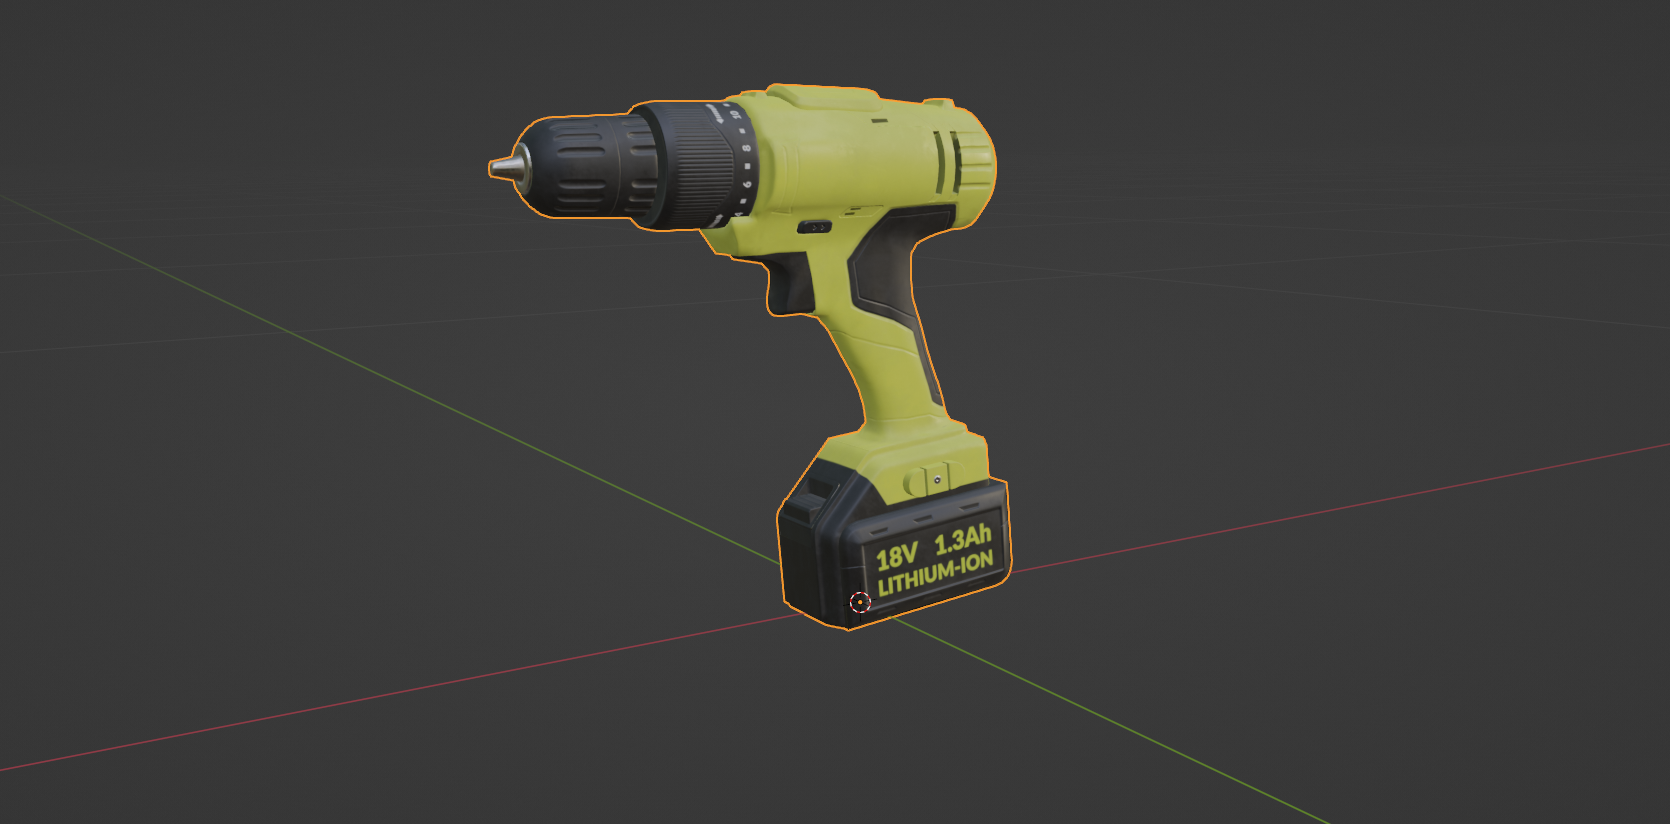
For instance, I am using this cool asset, which needs a bit of work before being able to use it.
- Select the model
- Go to
Edit mode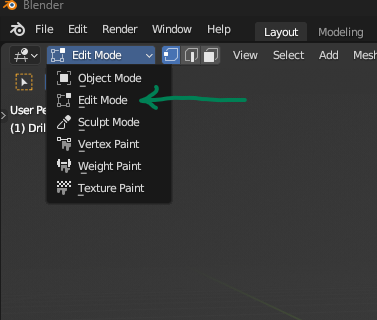
- Select a triangle that is part of the element you want to separate.
- Press Ctrl + L, that will select all the linked triangles. (Ensure that it selects the part you want or select all the triangles manually)
- Press F3 which enable the Quick Actions panel to show up, and begin to write
Separate. Select the first option.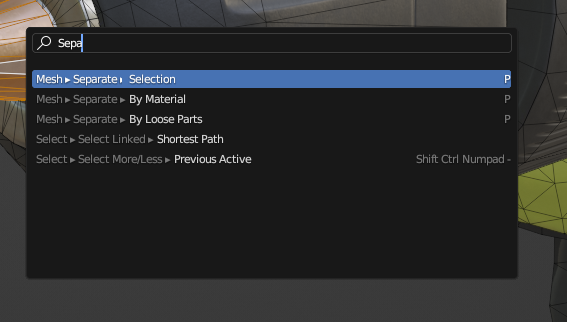
- Congratulations, you have now two separate meshes. Be sure to rename it in an understandable manner. Repeat the process ad nauseam, until you get all of the separate parts.
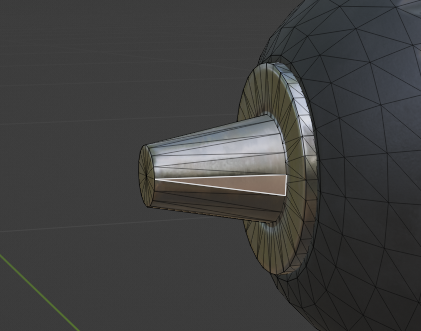
- Back in
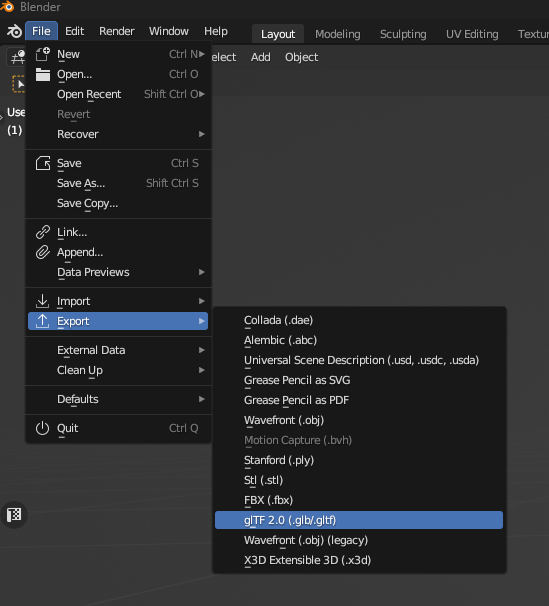
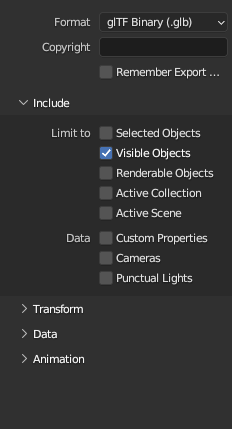
Object mode(press TAB), select all the elements (press A), press F3 and typecenterand select the optionOrigin to Center of Mass (Volume). It will basically set the center of each mesh to its center of mass, (some average point of the matter). - Export to GLB and you are good to go.
Exploded View Effect in React-Three-Fiber
Here is what becomes to be interesting. Let's see with my incredible drawings, how we can achieve somewhat of an automatic exploded view effect. First the theory, then the implementation.
(Boring?) Theory 📐
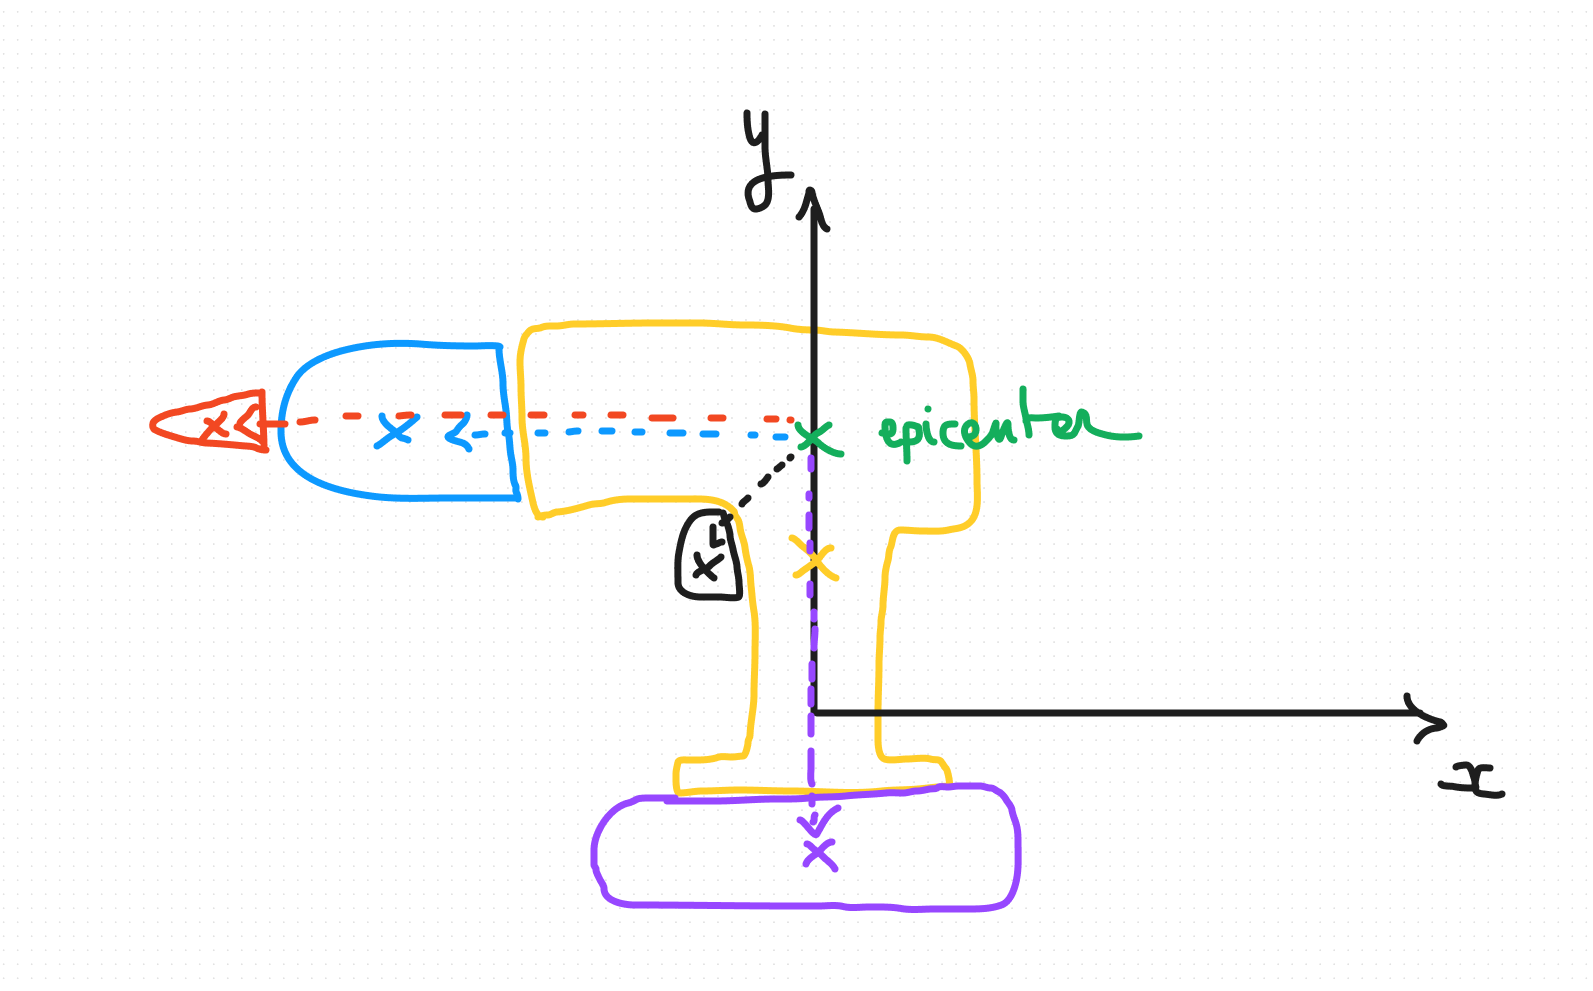
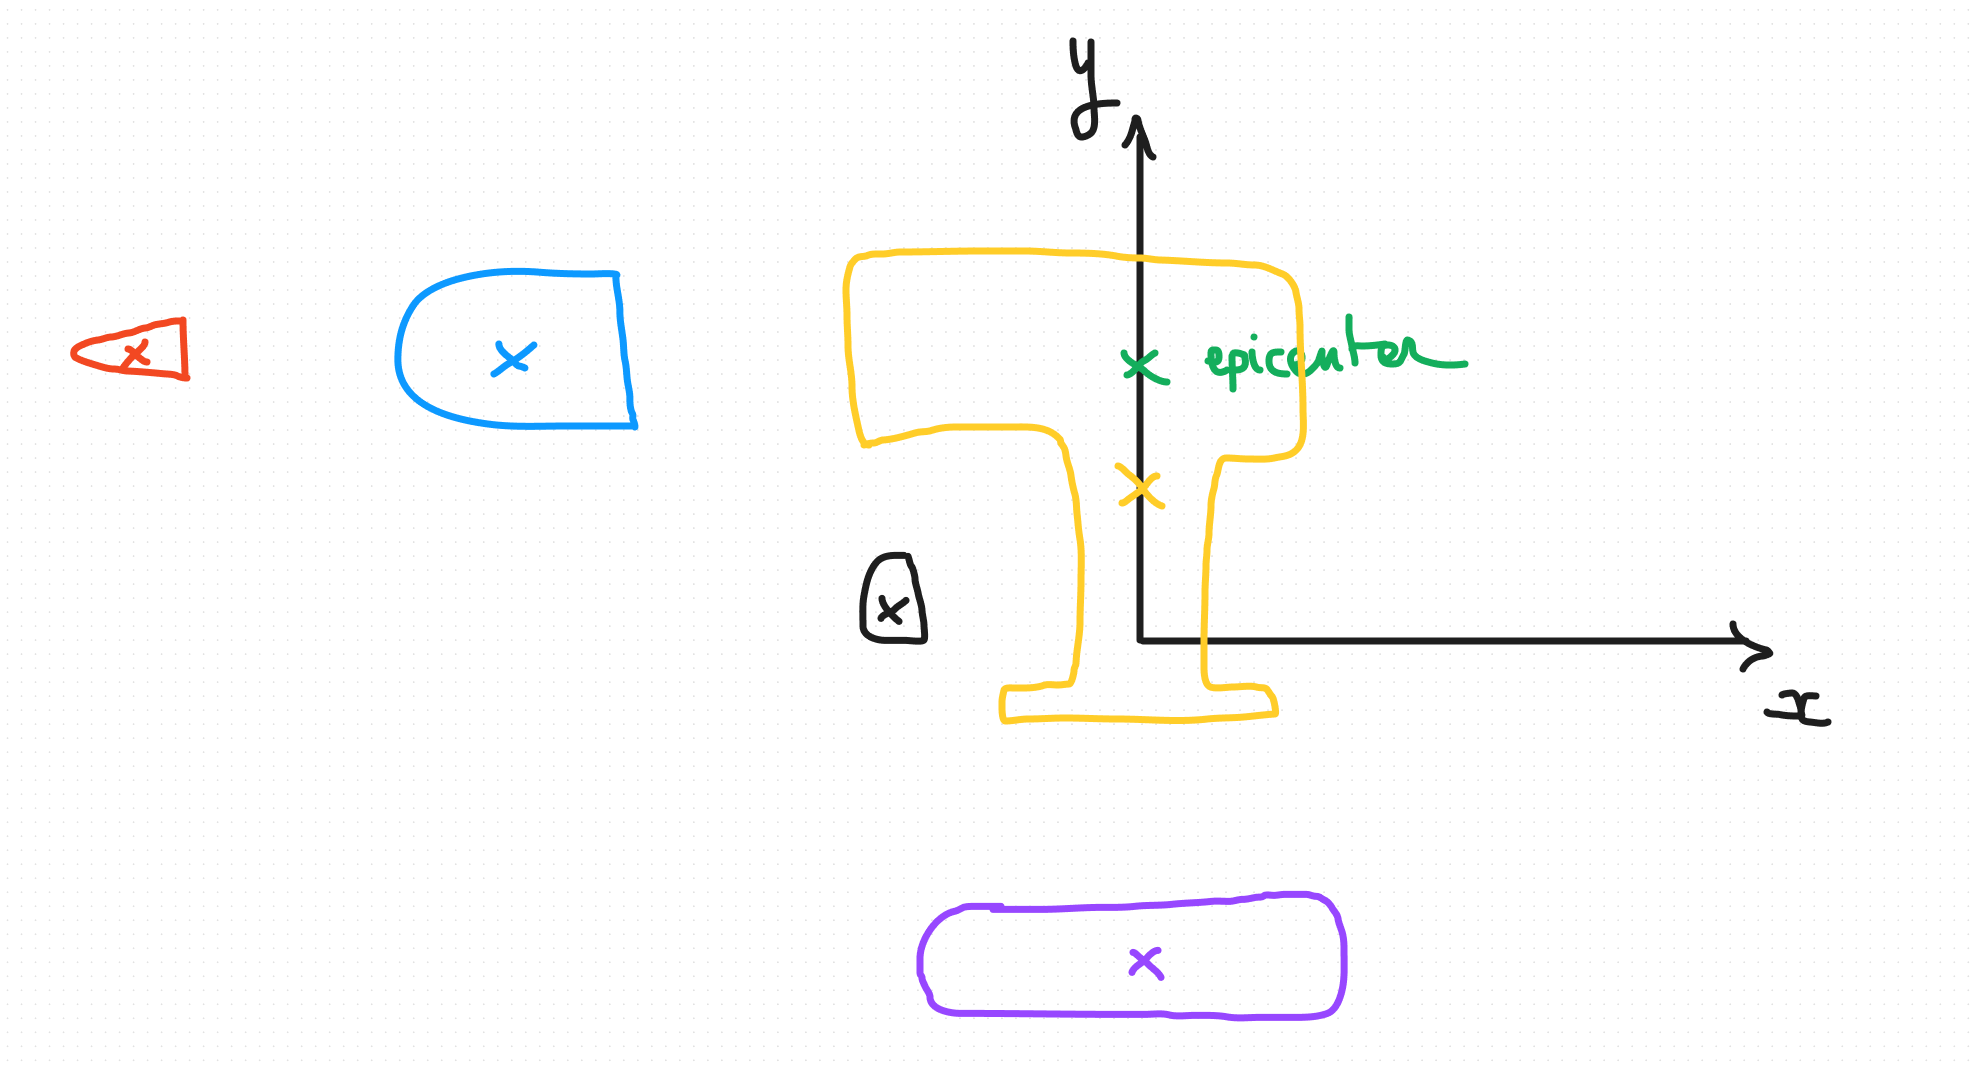
Here is the drill in 2D.
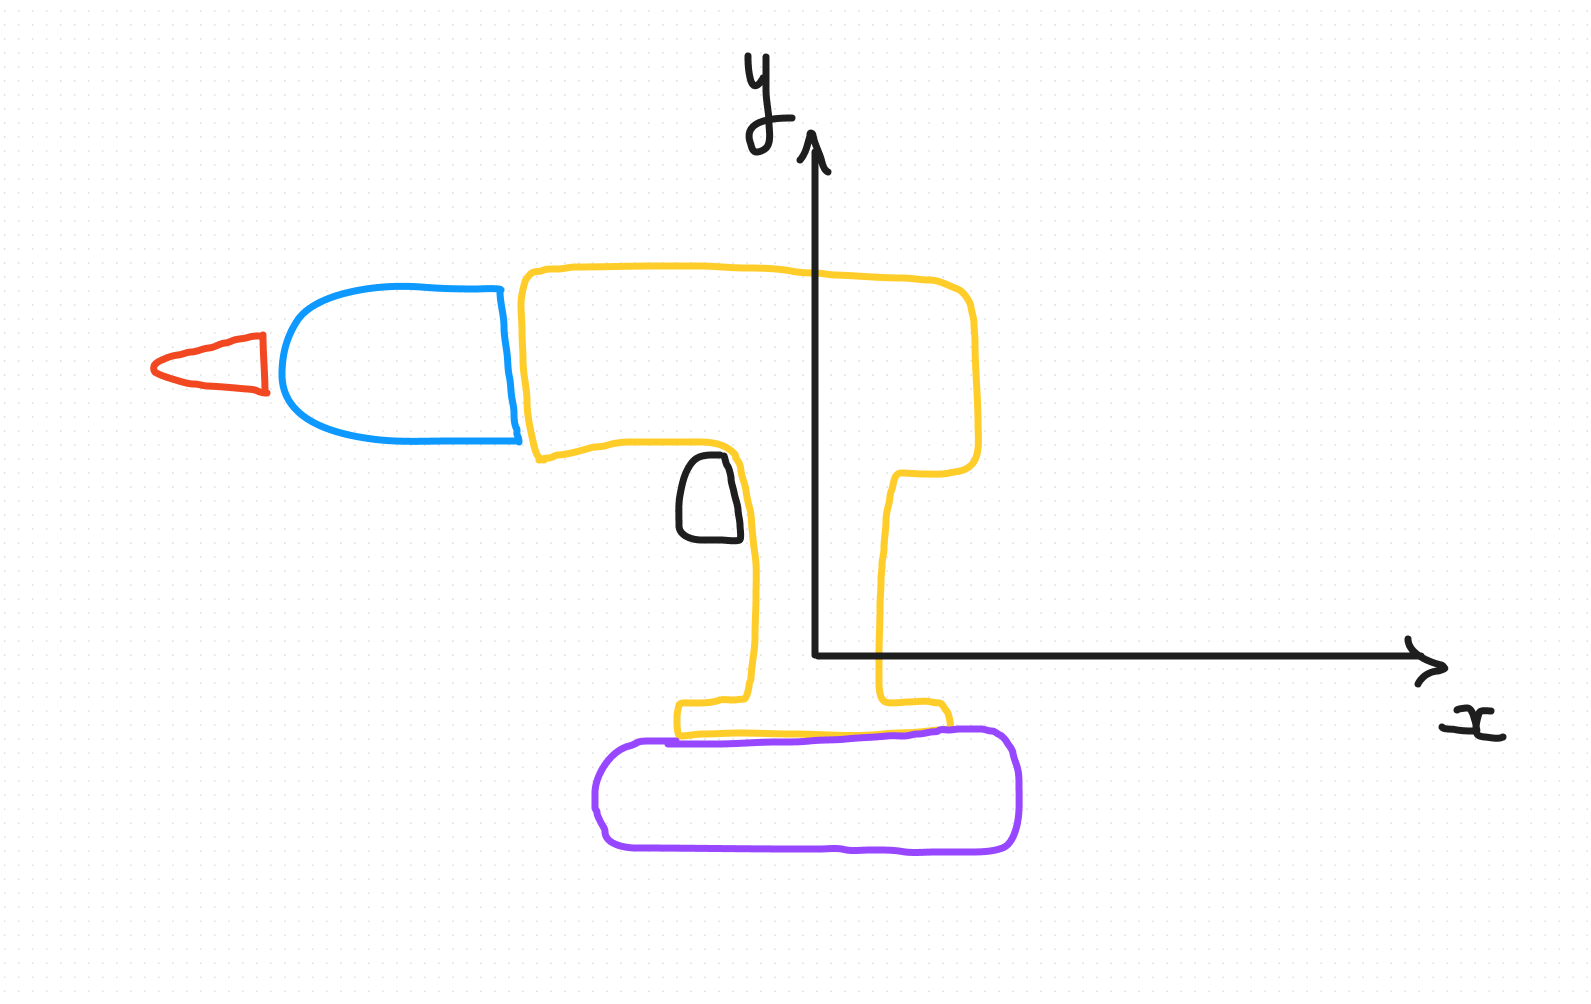 The most naive way of thinking is to take the world center (0,0,0) as the reference of our exploded view. For the drill, it will not be that pretty considering the shape.
We want the epicenter to be higher so the rotating part that are on the same rotating axis, are moving forward. But anyway it is the same principle whatever is your epicenter point.
The most naive way of thinking is to take the world center (0,0,0) as the reference of our exploded view. For the drill, it will not be that pretty considering the shape.
We want the epicenter to be higher so the rotating part that are on the same rotating axis, are moving forward. But anyway it is the same principle whatever is your epicenter point.
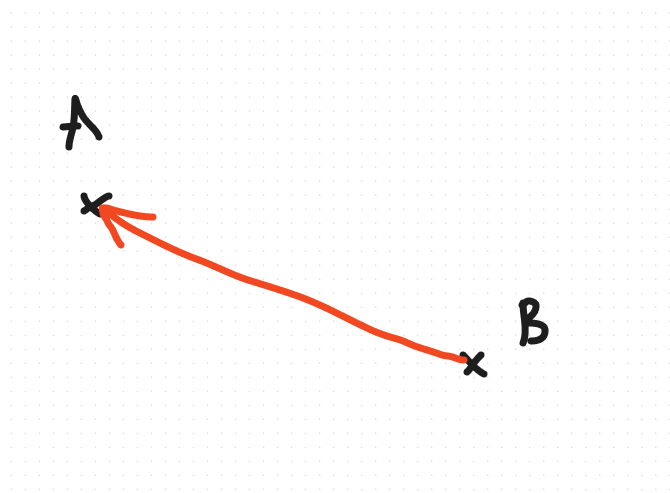
- You want to find the direction of the displacement.
"What gives us a direction?", you will ask. A vector. (I prefer to explain from scratch, so everyone can eat at the table).
 The formula is quite simple:
vector BA = point A - point B
So in our context, we will say displacement vector = center of mass of the piece - epicenter
We can normalize this vector so it is unit vector (it means that the length is 1). It will be easier for us that way to control the strength of displacement along side each vectors.
- We need a criteria to displace the part of our drill A simple criteria to take is the distance between the part's center and the epicenter of the explosion. The more you are far from the epicenter, the more we expect you to go away in our exploded view. Let's call this the magnitude of the vector we calculated in the previous step.
On the drill, like I said previously, we will take an higher (in Y axis) point for the epicenter, so the rotating element are kept along the same axis.
 View Website
 View Website
 View Website
Here you go, let's implement this.
The cool part: Implementation 💥
- Load the model using
useGLTFfrom the library drei (or use the GLTFLoader if you are using three.js native)
 export const Drill = () => {
  const gltf = useGLTF("drill-corrected.glb");
  return <primitive object={gltf.scene}></primitive>
}
- Traverse the scene to calculate each displacement. (You can discard the main object if you want to freeze it like me).
export const Drill = () => {
  const gltf = useGLTF("drill-corrected.glb");

  const mainObject = gltf.scene.getObjectByName("Main_") as Mesh;
  const targetMap: Map<string, Vector3> = new Map<string, Vector3>();
  const explosionCenter = new Vector3(0, 0.15, 0); // Higher epicenter for the drill
  const explosionFactor = 0.8; // Move uniformly along the direction for every part.

  useEffect(() => {
    gltf.scene.traverse((object) => {
      if (object.uuid !== mainObject.uuid) { // Discard the main object so it is frozen.
        const vector = object.position.clone().sub(explosionCenter).normalize();

        const displacement = object.position
          .clone()
          .add(
            vector.multiplyScalar(
              object.position.distanceTo(explosionCenter) * explosionFactor
            )
          );
        targetMap.set(object.name, displacement); // Store it in a dictionnary for later use.
      }
    });
  }, []);


  return (
    <>
      <primitive object={gltf.scene}></primitive>
    </>
  );
};
object.position.distanceTo(explosionCenter) is to calculate the distance from the epicenter as I explained it previously. The explosion factor is a way to control uniformly the expansion of each part. You can tweak it as you want.
const vector = object.position.clone().sub(explosionCenter).normalize(); is the direction we need to calculate to expand around the epicenter. We normalize it as you remember, to have a unit vector per part (length of 1), that way we can control uniformly through the explosion factor, the magnitude.
I store all of this in a Map, that will act as a dictionnary for each part. I want to use these displacement value later (with GSAP animation library for instance) to animate the explosion.
Here you go, you have your effect. Now, bonus, let's animate it with two different techniques
Bonus: Animation
We are going to use GSAP but you can use your favorite animation library.
Simple animation
Let's add the animation:
gltf.scene.traverse((object) => {
        if (object.uuid !== mainObject.uuid) {
          const displacement = targetMap.get(object.name) as Vector3;
          const tl = gsap.timeline().to(object.position, {
            x: displacement.x,
            y: displacement.y,
            z: displacement.z,
            duration: 5,
          });
        }
      });
For each parts, minus the one we discarded earlier, we will take back the displacement in the map and apply it through GSAP.
We are going to use the useEffect for react users, and we need to wait for the calculation to be done before searching through the map.
So, I will add a trigger state, that once it is set by the first code, it will trigger the second useEffect and our animation.
const [trigger, setTrigger] = useState(false);

  useEffect(() => {
    gltf.scene.traverse((object) => {
      if (object.uuid !== mainObject.uuid) {
        const vector = object.position.clone().sub(explosionCenter).normalize();

        const displacement = object.position
          .clone()
          .add(
            vector.multiplyScalar(
              object.position.distanceTo(explosionCenter) * explosionFactor
            )
          );
        targetMap.set(object.name, displacement);
      }
    });
    setTrigger(true);
  }, []);

  useEffect(() => {
    if (!trigger) {
      gltf.scene.traverse((object) => {
        if (object.uuid !== mainObject.uuid) {
          const displacement = targetMap.get(object.name) as Vector3;
          const tl = gsap.timeline().to(object.position, {
            x: displacement.x,
            y: displacement.y,
            z: displacement.z,
            duration: 5,
          });
        }
      });
    }
  }, [trigger]);
Through gsap.timeline().to(), we animate the position of the current object of the loop, using its displacement.
Here the sandbox if you are lazy like me :
Scroll based animation
Using the ScrollTrigger plugin and the scrub property, we can do a cool website that triggers the expansion using the scroll of the page.
Setting the scrub property to true, is binding the animation directly to the scroll. Using a value, it is adding some inertia to the animation, that I think is prettier.
Based on the same animation than the previous section you just need to add the ScrollTrigger plugin with gsap.registerPlugin(ScrollTrigger);
Then change the animation to
      let scrollTriggerParams = {
        toggleActions: "play none none reverse",
        scrub: 1.5,
      };
      gltf.scene.traverse((object) => {
        if (object.uuid !== mainObject.uuid) {
          const displacement = targetMap.get(object.name) as Vector3;
          gsap
            .timeline({
              scrollTrigger: {
                ...scrollTriggerParams,
              },
            })
            .to(object.position, {
              x: displacement.x,
              y: displacement.y,
              z: displacement.z,
            });
        }
      });
Give some room for your page to scroll, set the canvas to position: fixed in CSS, add some placeholder sections that are like 100vh height.
Then when scrolling, you will see the model expanding.
Here the full sandbox if you miss something out:
Conclusion
I hope that this short tutorial will be useful to you. Feel free to share your thoughts about it, and to tell me how to improve it, if it lacks in clarity.
Have a nice one !
Comments (0)