Introduction
There could be various reasons why you would need a free domain for your project.
For example, having multiple side projects could be quite costly in case that your projects are not generating any income. So saving costs could be crucial.
Another reason why you might need a free domina name is that you might want to do some just testing and not really need an actual domain which could cost you anywhere from $5 to +$50 dollars depending on the provider and the domain extension.
In this tutorial, I will show you how to get a free domain name from Freenom and use it with your Laravel Project.
Prerequisites
Before you get started you would need to have a Laravel project already installed.
To make things even better you can use the following referral link to get free $100 credit that you could use to deploy your servers and test the guide yourself:
Then once you have your account ready, you can follow the steps on How to Install Laravel on DigitalOcean with 1-Click here!
Choosing a free domain name
In this tutorial, we will use Freenom to register a free domain name! As far as I am aware, Freenom is the world's only free domain name provider.
 View Website
 View Website
 View Website
They provide free domain names with the following domain extensions:
- .TK
- .ML
- .GA
- .CF
- .GQ
Unfortunately, Freenom does not offer free .com domains but for testing purposes, only the above domain extensions are a great alternative!
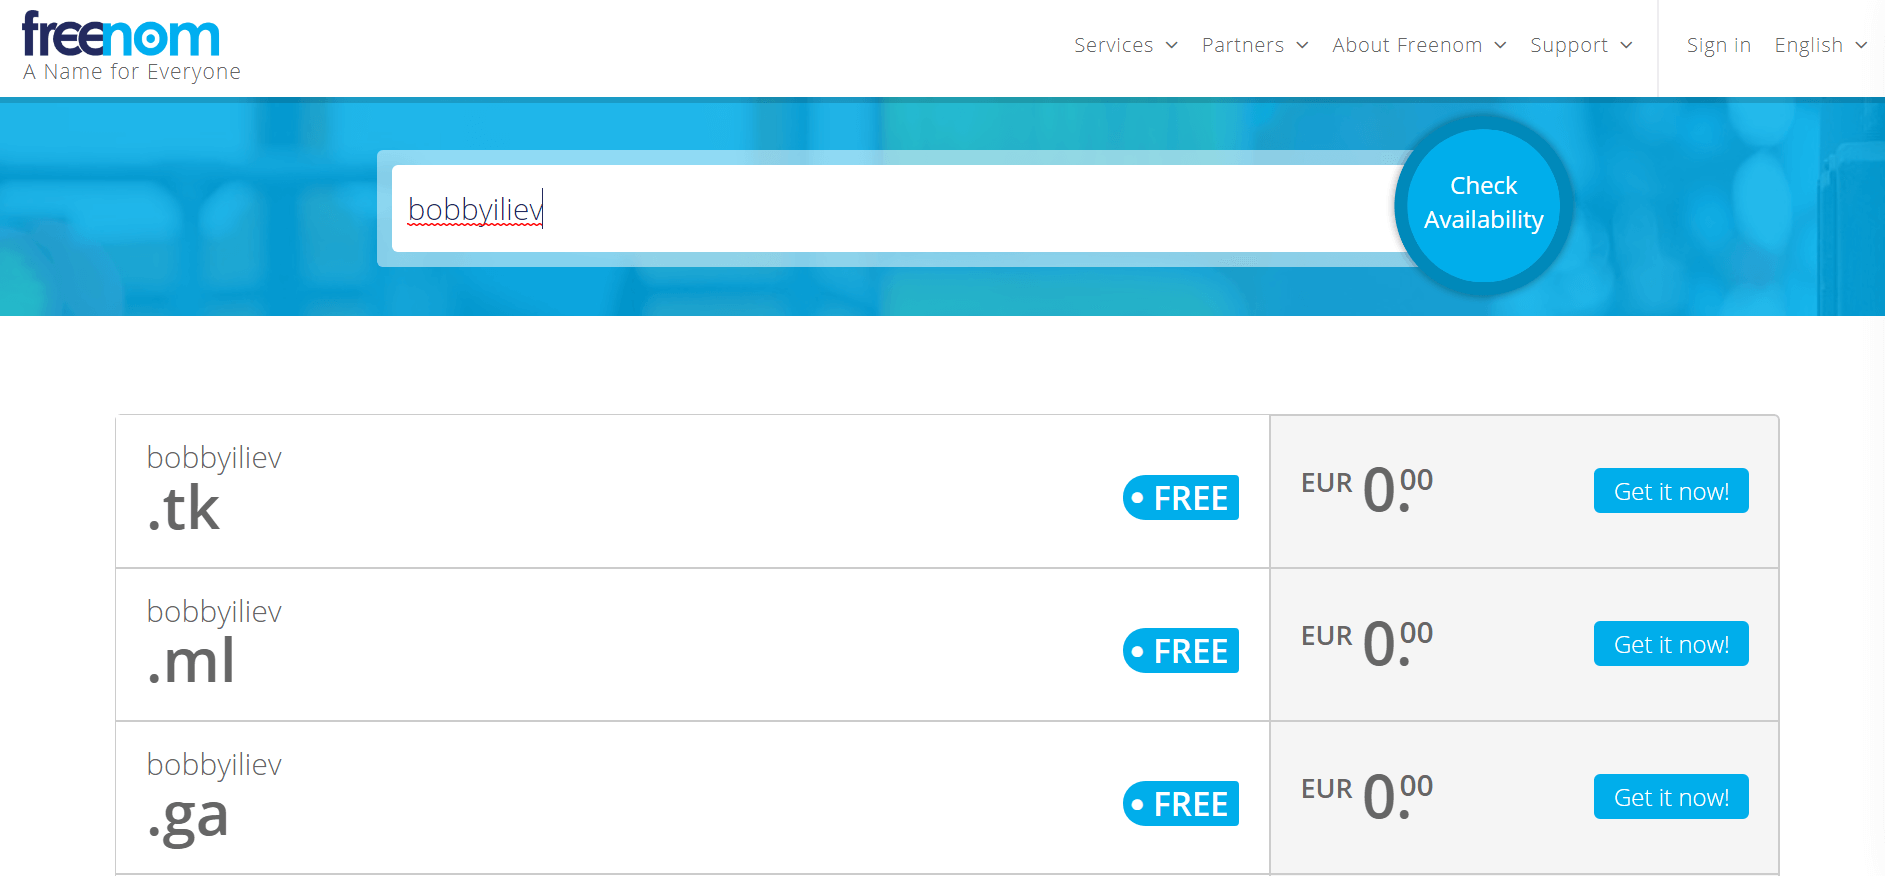
To check if a specific domain is available, just visit the Freenom website, you would get to a page where you can search and check if a specific domain is available:

In my case I will look for bobbyiliev and then choose the available extension:

In my case, bobbyiliev.ml is available so I will go for that one by clicking on the Get it now! button, and then click on Checkout.
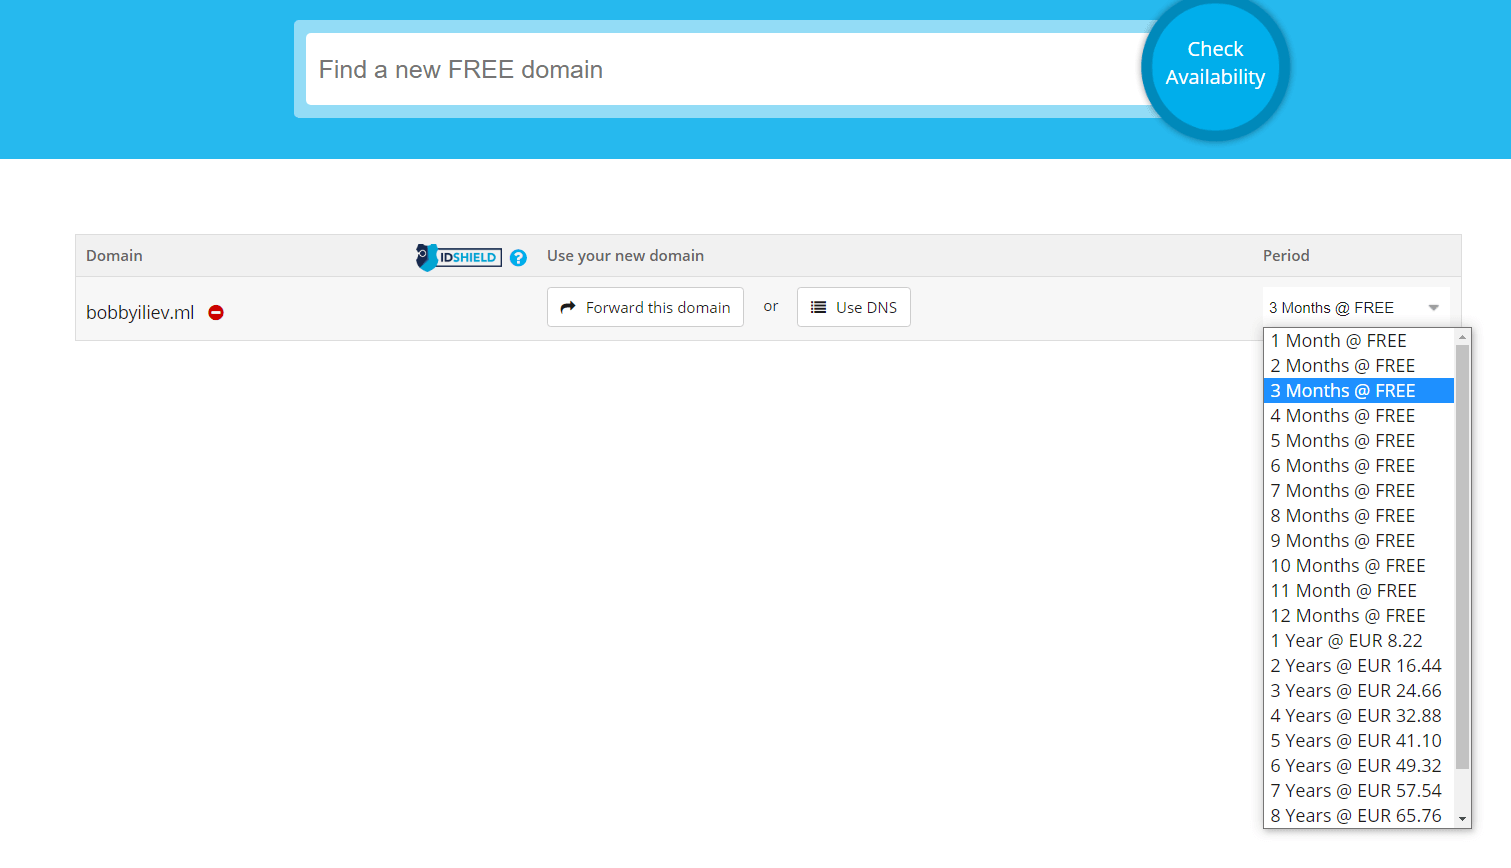
You would get to a page where you could choose for how long would you like to keep the domain name for:

Choose the period from the dropdown menu and then hit next. After that follow the steps and sign up for a free account.
Once you are ready with the registration process, then go ahead and proceed to the next step where you will need to add your new free domain name to your DigitalOcean account.
Adding your Domain to DigitalOcean
If you don't have a DigitalOcean account already make sure to create one via this link here:
Once you've created a DigitalOcean account follow these steps here:
- First go to your DigitalOcean Control Panel
- Then click on Networking on the left
- After that click on Domains
- And there add your new domain name button and then add the domain name that you just registered:

Then you would see your new DNS zone where you would need to add an A record for your domain name and point it your Laravel server! For more information on how to manage your DNS make sure to read this guide!
Updating your Nameservers
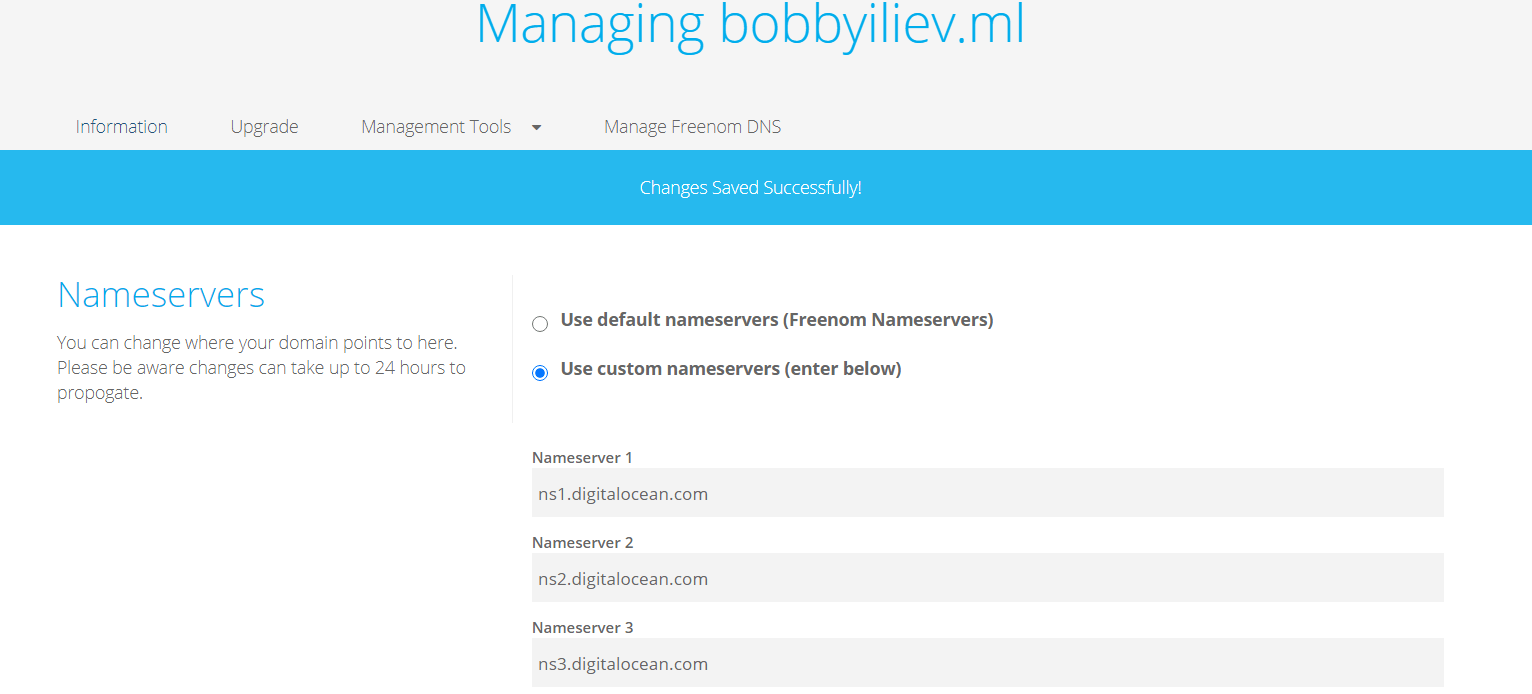
Once you have your Domain name all configured and ready to go in DigitalOcean, then you need to update your Nameservers, so that your domain would start using your new DigitalOcean DNS zone.
To do so just copy the following 3 nameservers:
- ns1.digitalocean.com
- ns2.digitalocean.com
- ns3.digitalocean.com
And then go back to your Freenom account, there follow these steps:
- From the menu click on Services
- Then click on My Domains
- After that click on Manage Domain for your new domain
- Then from the "Management Tools" dropdown click on "Nameservers"
- There choose "Use custom nameservers (enter below)" and enter the 3 DigitalOcean nameservers from above and click "Save"

Finally, it could take up to 24 hours for the DNS to propagate over the Globe and after that, you will be able to see your Laravel application when visiting your free domain name in your browser!
Conclusion
Now you know how to get a free domain name for your Laravel Project and add it to DigitalOcean where you could manage your DNS zone and point it to your Laravel server.
If you are working as a DevOps engineer, check out this DevOps Scorecard and evaluate your DevOps skills across 8 key areas and discover your strengths and growth opportunities
Hope that this helps!


Comments (2)