
Introduction
As much as I love to use the terminal in order to do my daily tasks in the end I would rather do multiple tasks within one window (GUI) or perform everything from the terminal itself.
In the past, I was using the text editors (vim, nano and etc) in my terminal to edit the code in my repositories and then go along with the git client to commit my changes, but then I switched to Visual Studio Code to manage and develop my code.
I will recommend you to check this article on why you should use Visual Studio. It is an article from Visual Studio's website itself.
Why you should use Visual Studio
Visual Studio Code has integrated source control management (SCM) and includes Git support in-the-box. Many other source control providers are available through extensions on the VS Code Marketplace. It also has support for handling multiple Source Control providers simultaneously so you can open all of your projects at the same time and make changes whenever this is needed. I personally find this really handy.
Prerequisites
You need to install Visual Studio Code. It runs on the macOS, Linux, and Windows operating systems.
Follow the platform-specific guides below:
You need to install Git first before you get these features. Make sure you install at least version 2.0.0. If you do not have git installed on your machine feel free to check this really useful article on How to get started with Git
You need to set your username and email in the Git configuration or git will fail back to using information from your local machine when you commit. We need to provide this information because Git embeds this information into each commit we do.
 View Website
 View Website
 View Website
In order to set this you can execute the following commands:
git config --global user.name "John Doe"
git config --global user.email "[email protected]"
The information will be saved in your ~/.gitconfig file
[user]
    name = John Doe
    email = [email protected]
With Git installed and set up on your local machine, you are now ready to use Git for version control with Visual Studio or using the terminal.
Cloning a repository
The good thing is that Visual Studio will auto-detect if you've opened a folder that is actually a repository. If you've already opened a repository it will be visible in the Source Control View.
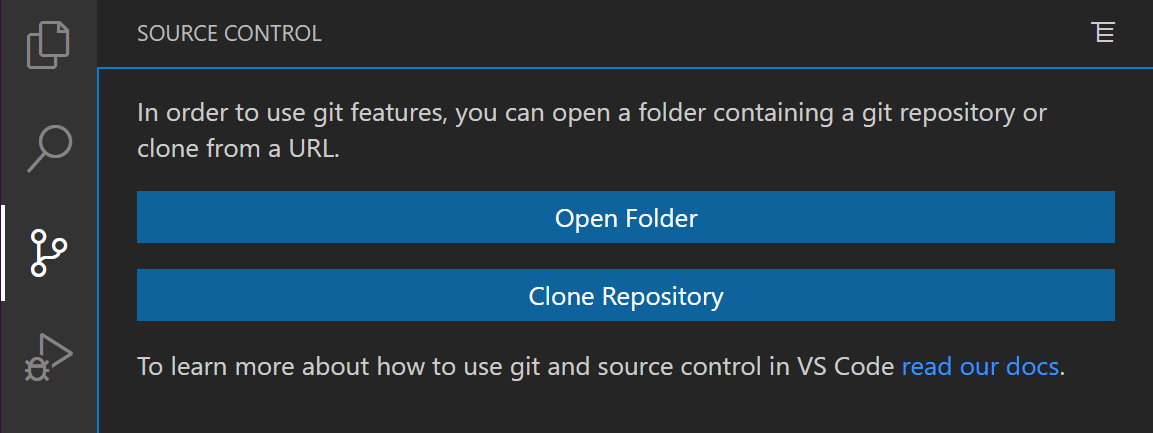
If you haven't opened a folder yet, the Source Control view will give you the options to Open Folder from your local machine or Clone Repository.
If you select Clone Repository, you will be asked for the URL of the remote repository (for example on GitHub) and the parent directory under which to put the local repository.
For a GitHub repository, you would find the URL from the GitHub Code dialog.
Create a branch
In order to create a branch open the command pallet:
- Windows: Ctrl + Shift + P
- Linux: Ctrl + Shift _ P
- MacOS: Shift + CMD + P
And select Git Create Branch...
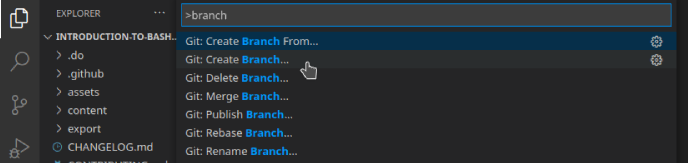
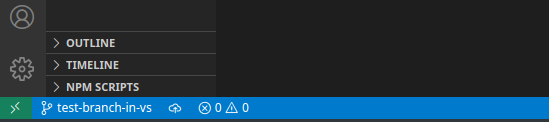
then you just need to enter a name for the branch. Keep in mind that in the bottom left corner you can see in which branch you are. The default one will be the main and if you successfully create the branch you should see the name of the newly created branch
If you want to switch branches you can open the command pallet and search for Git checkout to and then select the main branch or switch to a different branch.

Setup a commit message template
If you want to speed up the process and have a predefined template for your commit messages you can create a simple file that will contain this information.
In order to do that open your terminal if you're on Linux or macOS and create the following file: .gitmessage in your home directory. In order to create the file, you can open it in your favourite text editor and then simply put the default content you would like and then just save and exit the file. Example content is:
cat ~/.gitmessage
#Title

#Summary of the commit

#Include Co-authored-by for all contributors.
To tell Git to use it as the default message that appears in your editor when you run git commit and set the commit.template configuration value:
$ git config --global commit.template ~/.gitmessage
$ git commit
Conclusion
If you prefer to code in Visual Studio Code and you also use version control I will definitely recommend you to give it a go and interact with the repositories in VS code. I believe that everyone has their own style and they might do things differently depending from their mood as well. As long as you can add/modify your code and then commit your changes to the repository there is no exactly correct/wrong way to achieve this. For example you can edit your code in vim and push the changes using the git client in your terminal or do the coding in Visual Studio and then commit the changes using the terminal as well. You're free to do it the way you want it and the way you find it more convenient as well. I believe that using git witin VS code can make your workflow more efficient and robust.
Additional sources:
- Version Control - Read more about integrated Git support.
- Setup Overview - Set up and start using VS Code.
- GitHub with Visual Studio - Read more about the GitHub support in VS code
- You can also check this mini video tutorial on how to use the basics of Git version control in Visual Studio Code
Comments (0)