

Here I will guide you on how to setup Google Analytics for Laravel Voyager's Dashboard.
Get Client ID
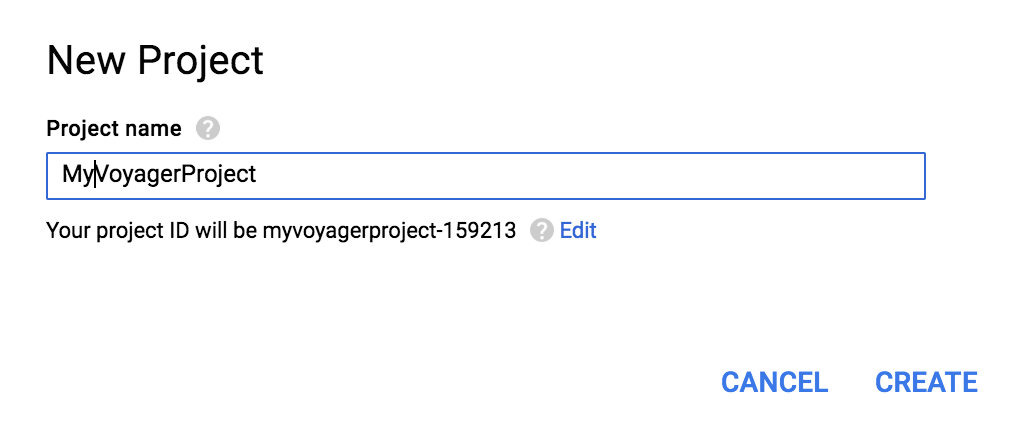
Open up Google's API Manager and create a new project for your Voyager dashboard as seen below.
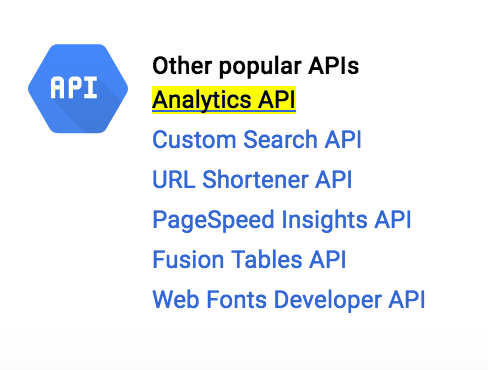
Once your project have been created the page will refresh and you will be able to select the API integrations for your project. Here you need to find the Analytics API and click on that.
On the next page you will have to enable the API. This will take a little while.

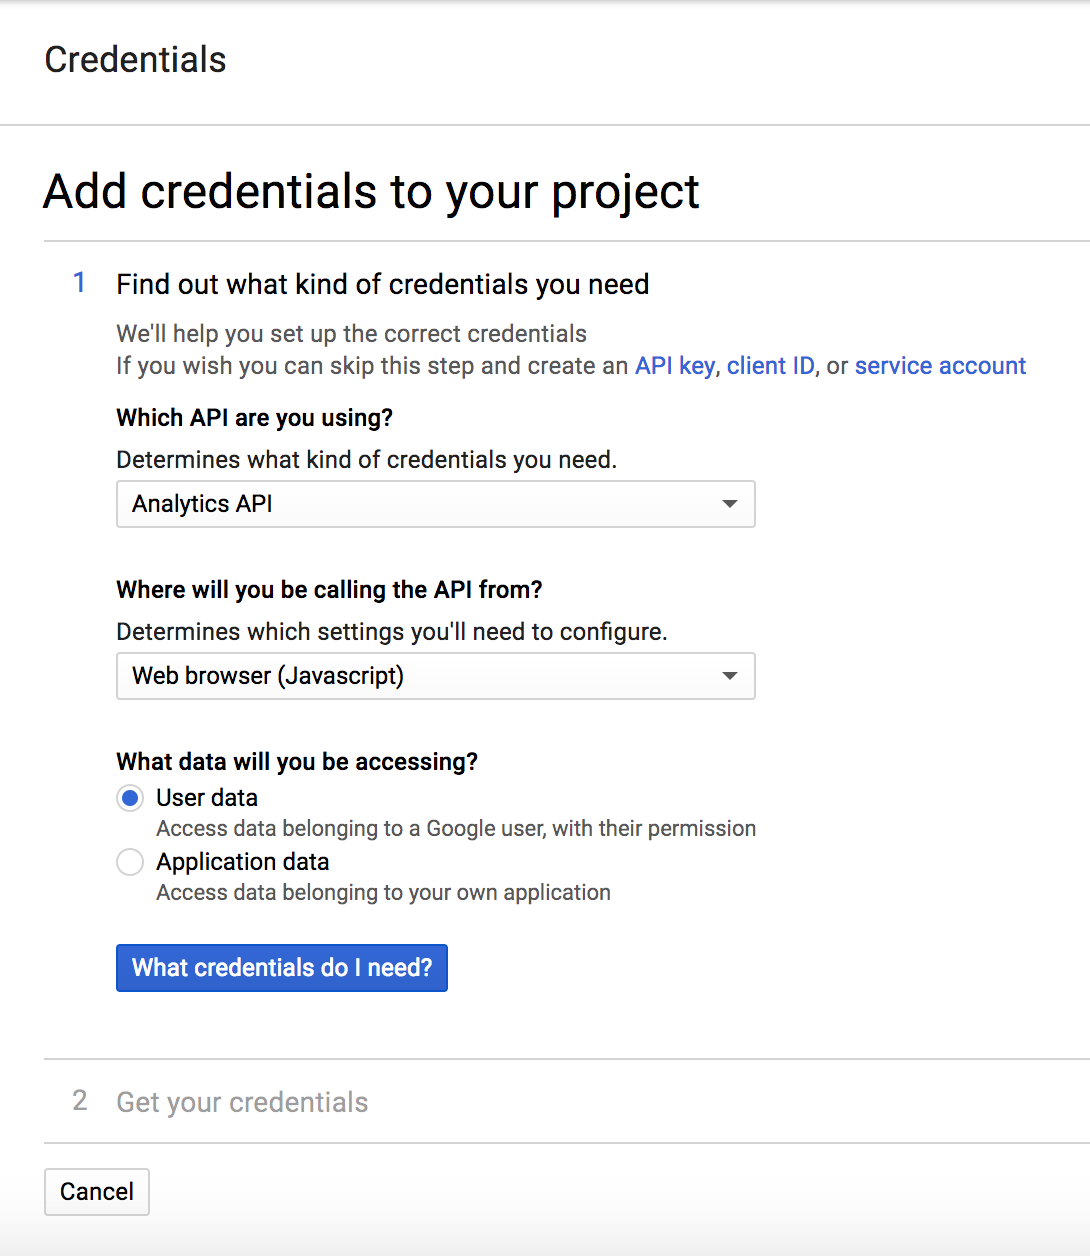
Once enabled it will show a warning that you may need credentials to use the API. There you must click the create credentials.

 View Website
 View Website
 View Website
When creating the credential you must define the API you are using as Analytics API and the method as Web browser (Javascript). The way data will be accessed must be set to User data in order to support using it from a web browser.
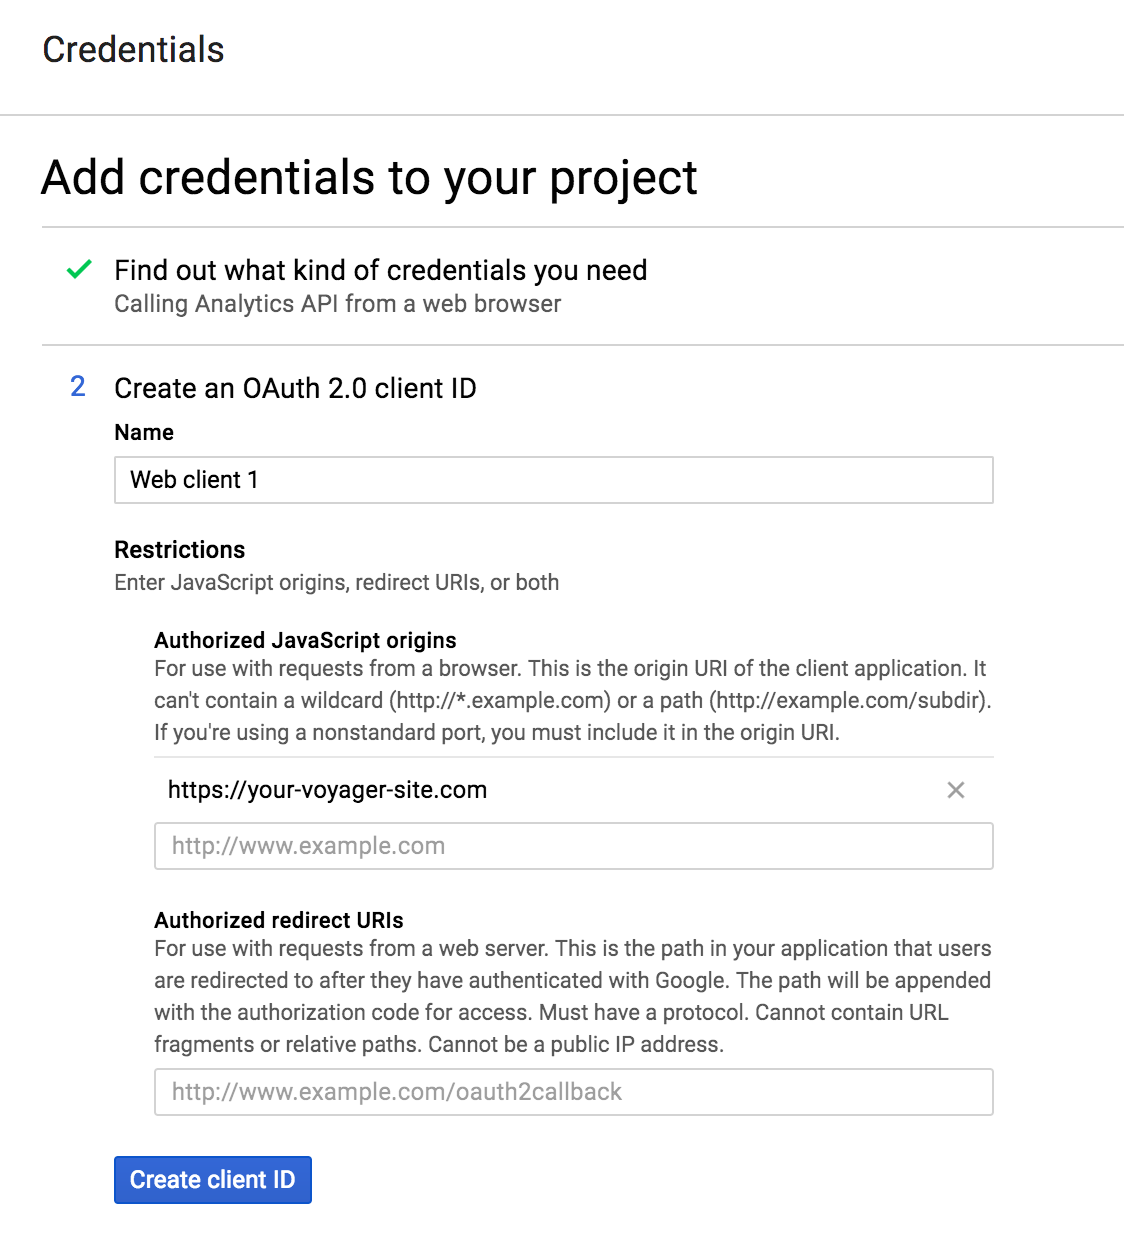
In order for your Voyager dashboard to access this Google API application you must set the restrictions. Here you must add the domain for your Voyager dashboard with the http or https prefix under Authorized JavaScript origins as seen below.
Please note that if you fail to provide the correct domain for this, the box that was purpose to show the Google Analytics data in your Voyager dashboard will end up being blank, in that case go back here and try again.
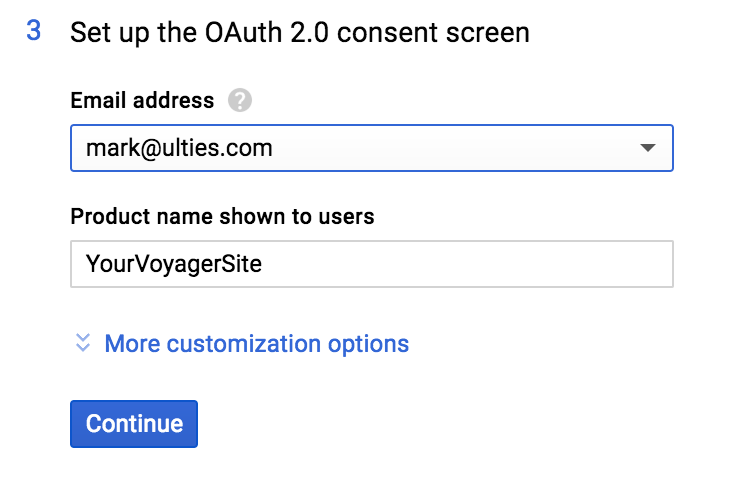
Next step is to setup the consent screen with your email and the product name that users will see when authenticating your application for their Google Analytics data. However this is only administrators of your Voyager panel that will be able to see this. Don't worry, they will only see the analytics that their user have access to.
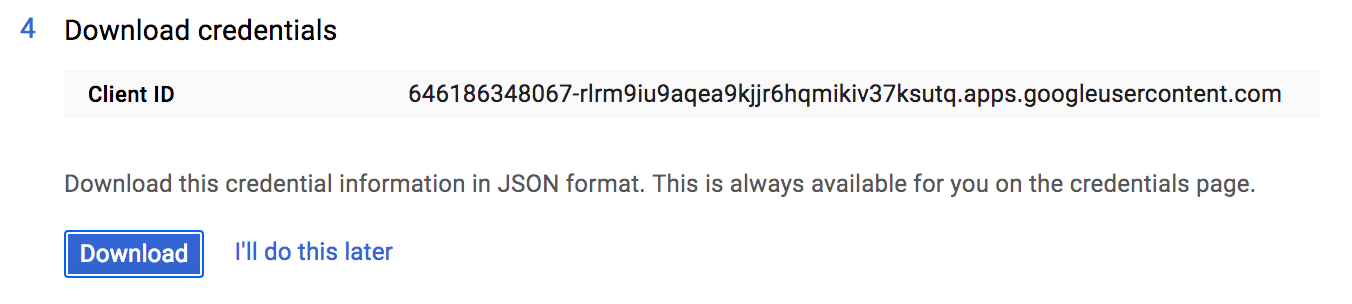
Finally you have build up your application have have got your own Google API Client ID as seen below. Now copy this client id, you will need this in the next step.
Add Client to Voyager
Go to your Voyager admin panel and open the Settings page, and set the newly generated client id to the Google Analytics Client ID setting.

Save the settings and go to Dashboard, if everything was configured correctly you would see a orange button saying Access Google Analytics. If that is the case click on that button to login, if that is not the case, I recommend trying again.

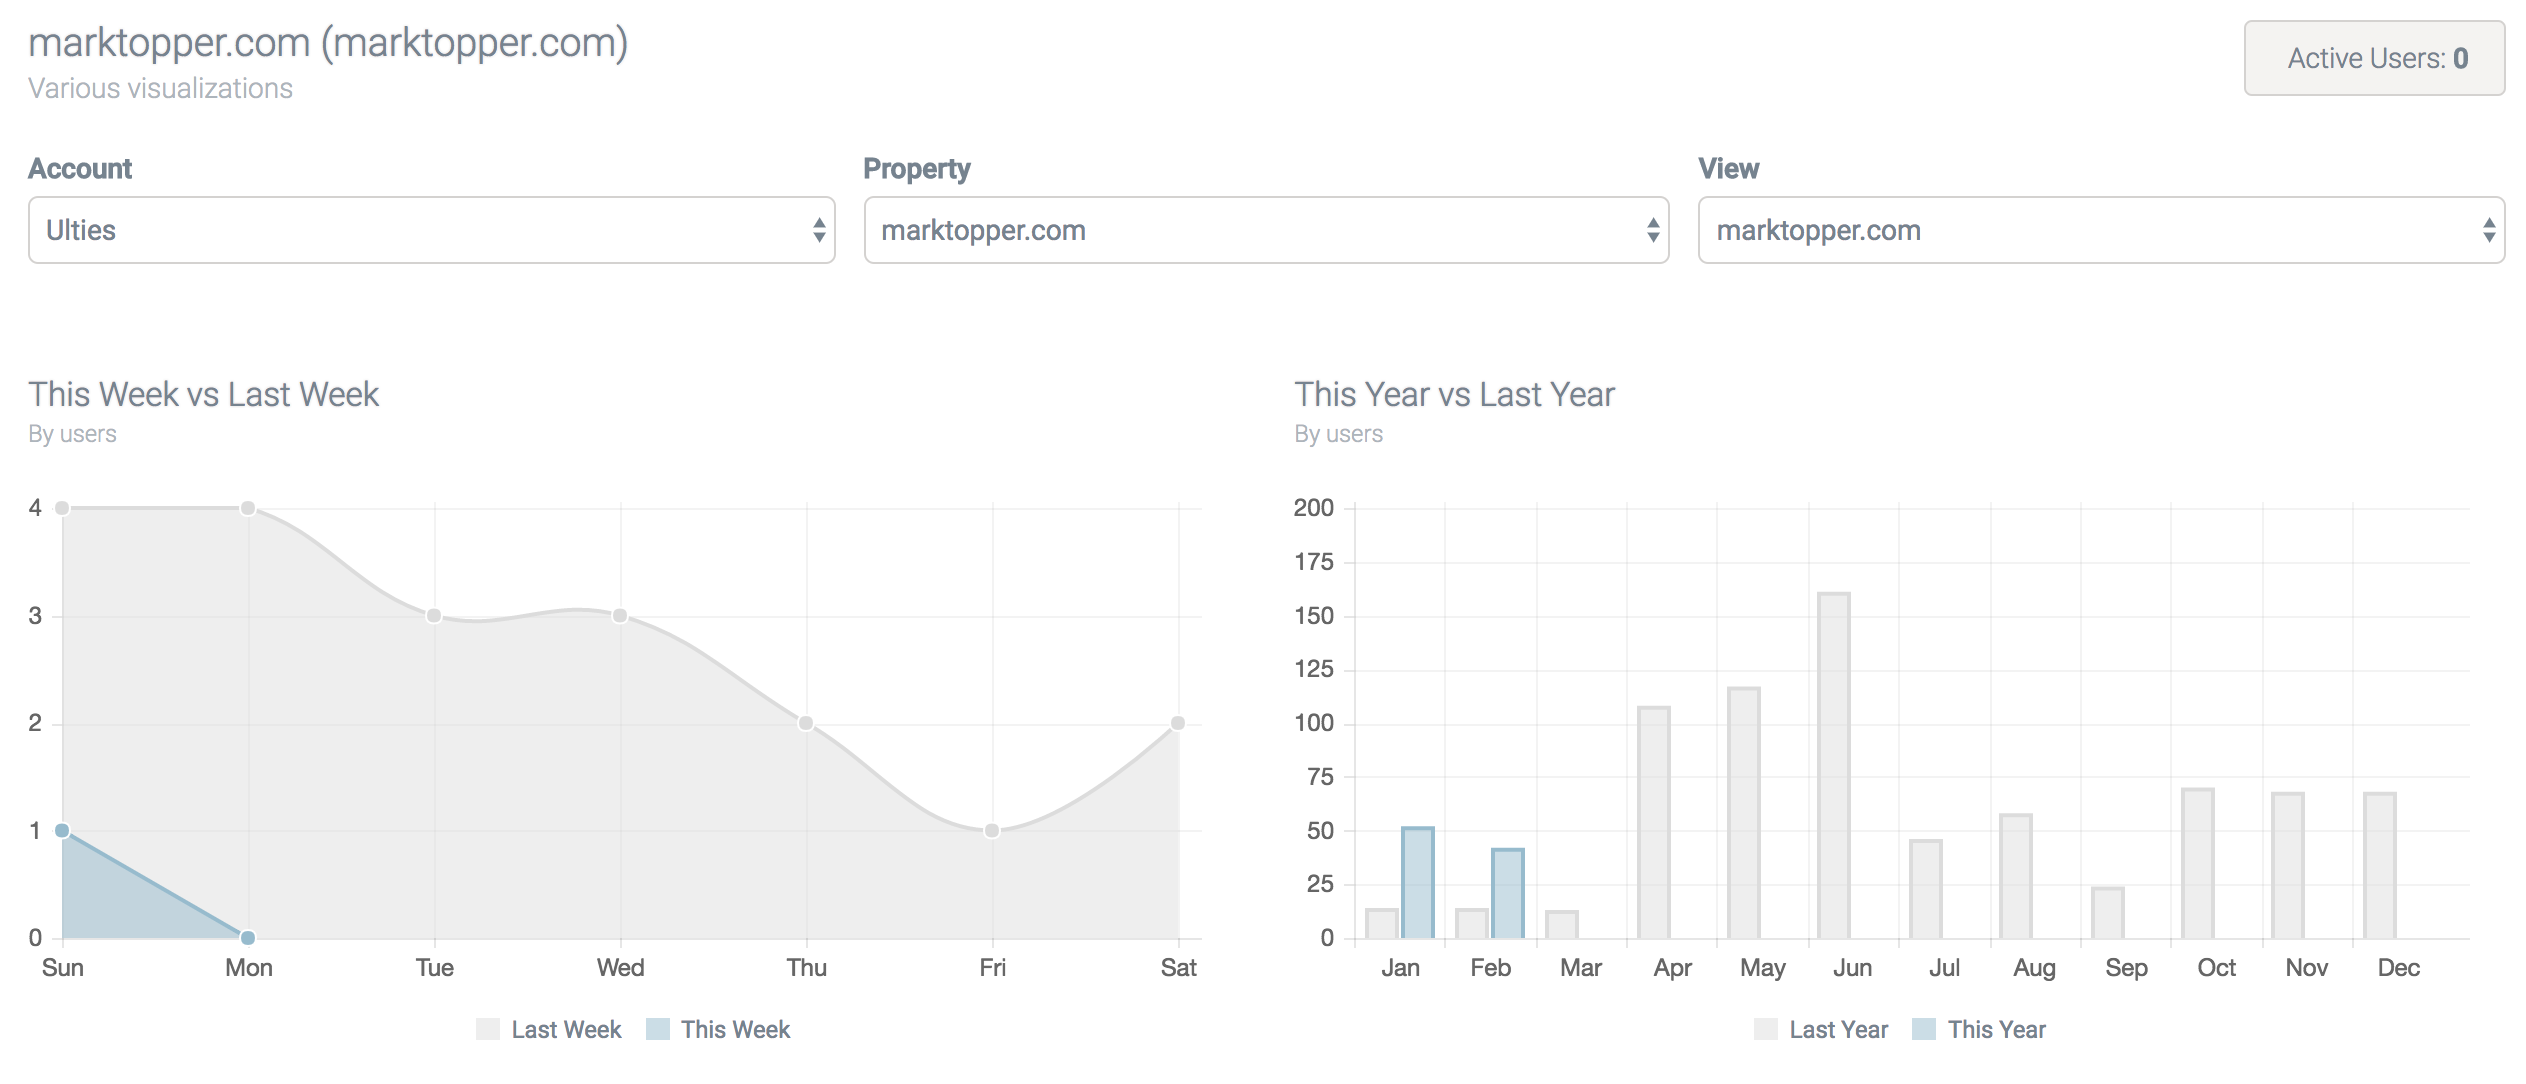
And whoila! ???? You have yourself some analytics!
Comments (1)