
Introduction
Welcome to part 4 of my Introduction to Docker blog post series!
In part 1 I quickly went through installing Docker and what containers are and in part 2 we actually played with Docker containers a little bit by running a couple of Docker containers, in part 3 we went got introduced to the Docker images and some basic operations.
In this post, I'll give a quick introduction to the Dockerfile and how to use it!
I'll be using DigitalOcean for all of the demos, so I would strongly encourage you to create a DigitalOcean account follow along. You would learn more by doing!
To make things even better you can use my referral link to get a free $100 credit that you could use to deploy your virtual machines and test the guide yourself on a few DigitalOcean servers:
Digital Ocean $100 Free Credit
Once you have your account here's how to deploy your first droplet/server:
https://www.digitalocean.com/docs/droplets/how-to/create/
I'll be using Ubuntu 18.04 so I would recommend that you stick to the same so you could follow along.
 View Website
 View Website
 View Website
What is a Dockerfile?
A Dockerfile is basically a text file that contains all of the required commands to build a certain Docker image.
The Dockerfile reference page:
https://docs.docker.com/engine/reference/builder/
It lists the various commands and format details for Dockerfiles.
Dockerfile example
Here's a really basic example of how to create a Dockerfile and add our source code to an image.
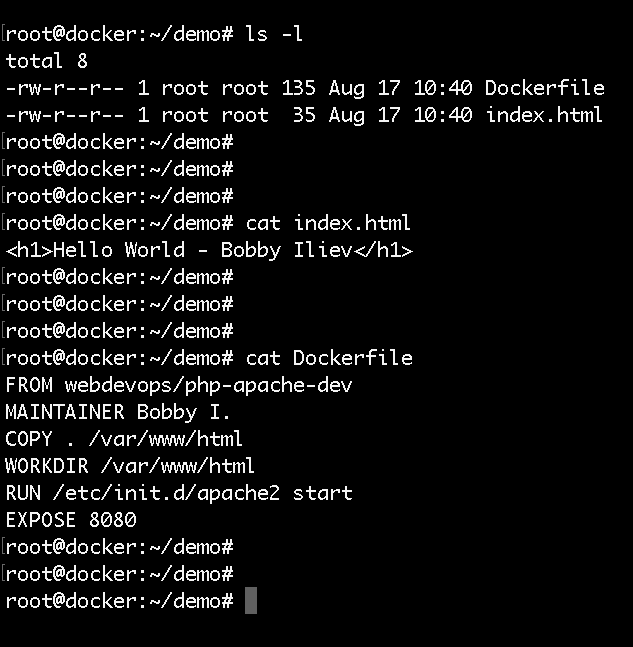
First, I have a simple Hello world index.html file in my current directory that I would add to the container with the following content:
<h1>Hello World - Bobby Iliev</h1>And I also have a Dockerfile with the following content:
FROM webdevops/php-apache-dev
MAINTAINER Bobby I.
COPY . /var/www/html
WORKDIR /var/www/html
EXPOSE 8080
Here is a screenshot of my current directory and the content of the files:
Here is a quick rundown of the Dockerfile:
- FROM - The image that we would use as a ground
- MAINTAINER - The person who would be maintaining the image
- COPY - Copy some files in the image
- WORKDIR - The directory where you want to run your commands on start
- EXPOSE - Specify a port that you would like to access the container on
Docker build
Now in order to build a new image from our Dockerfile, we need to use the docker build command. The syntax of the docker build command is the following:
docker build [OPTIONS] PATH | URL | -The exact command that we need to run is this one:
docker build -f Dockerfile -t your_user_name/php-apache-dev .After the built is complete you can list your images with the docker images command and also run it:
docker run -d -p 8080:80 your_user_name/php-apache-devAnd again just like we did in the last tutorial we can go ahead and publish our image:
docker login

docker push your-docker-user/name-of-image-here
Then you will be able to see your new image in your Docker Hub account (https://hub.docker.com) you can pull from the hub directly:
docker pull your-docker-user/name-of-image-hereFor more information on the docker build make sure to check out the official documentation here:
https://docs.docker.com/engine/reference/commandline/build/
Knowledge Check
Once you've read this post, make sure to test your knowledge with this Dockerfile quiz:
https://quizapi.io/predefined-quizzes/basic-dockerfile-quiz
Conclusion
This is a really basic example, you could go above and beyond with your Dockerfiles!
That is pretty much it for this post! Now you know how to write a Dockerfile, how to build a new image from a Dockerfile using the docker build command!
We are ready to move to Part 5 of the Introduction to Docker blog post series:
https://devdojo.com/tutorials/introduction-to-docker-part-5
Let me know if you have any questions!
Comments (0)