

Postfix is an open source Mail Transfer Agent which will allow your server to receive emails from a specific address and parse that email as you see fit.
Imagine you had a domain at hello.com and you wanted to setup an email such as [email protected] and whenever you receive this email you can parse it accordingly. Of course the ideal way to do this would be to setup GSuite with your custom domain and assign a support person to respond to those emails. But, if you are a developer and you wanted to create your own custom functionality for incoming emails you can easily use Postfix for this.
Let's start things off with how you can install Postfix.
Installing Postfix
Installation of Postfix on an ubuntu server is very simple. You can run the following command to install postfix:
sudo apt-get install postfixAfter running that command you'll now see a configuration screen in front of you.
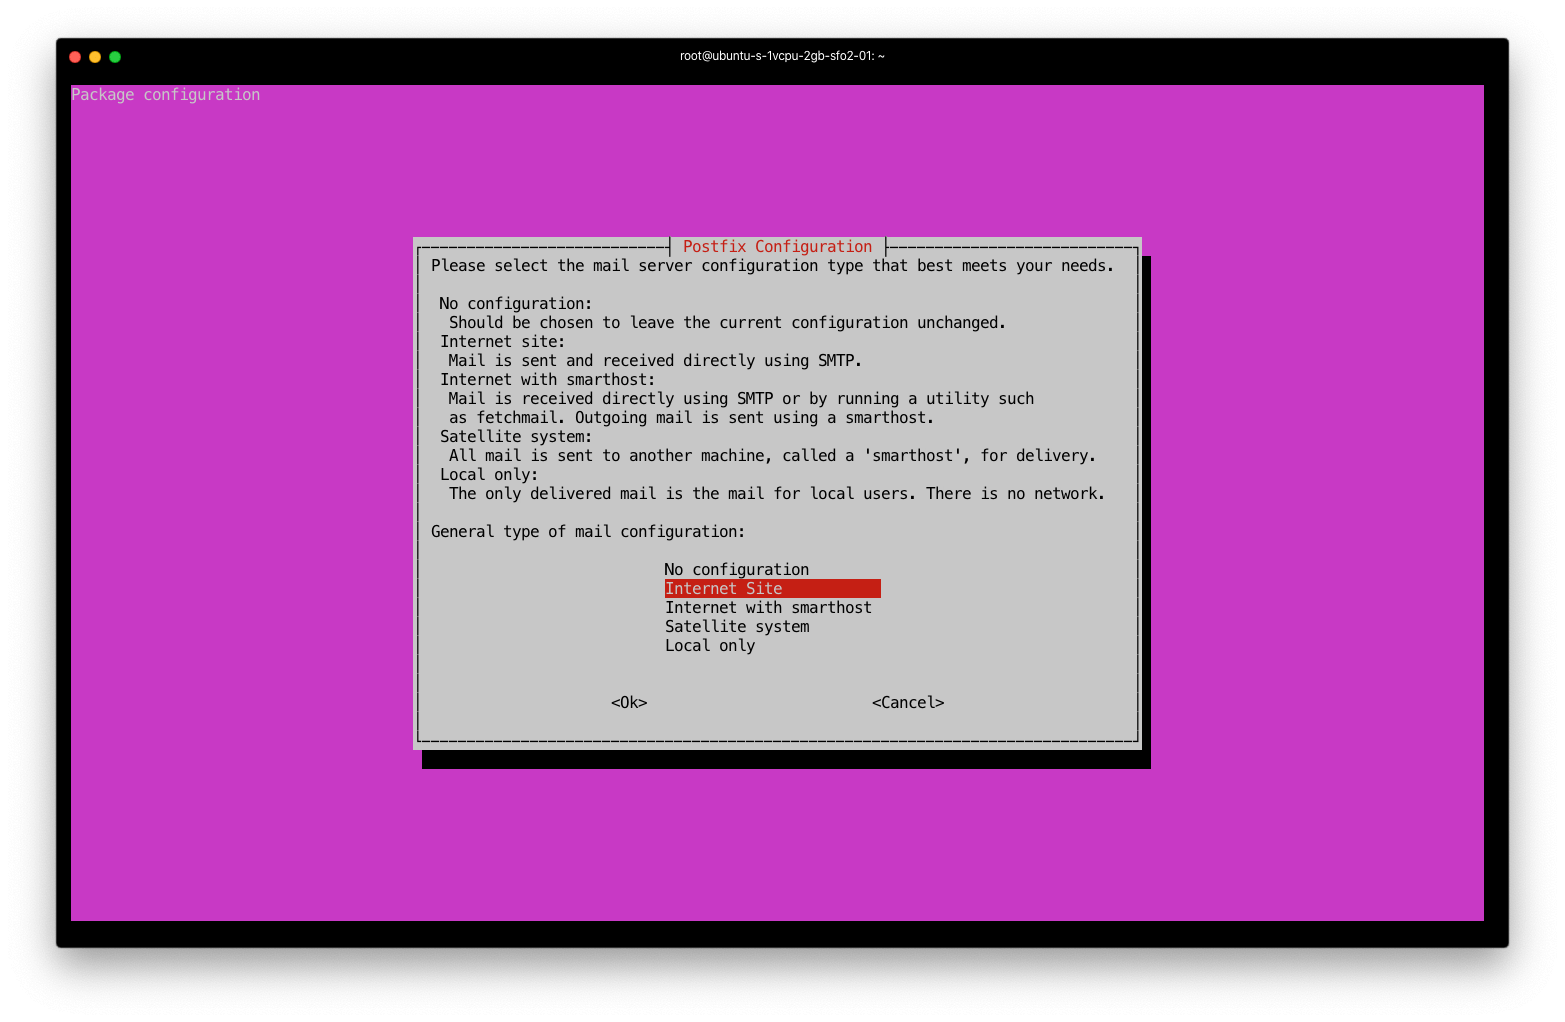
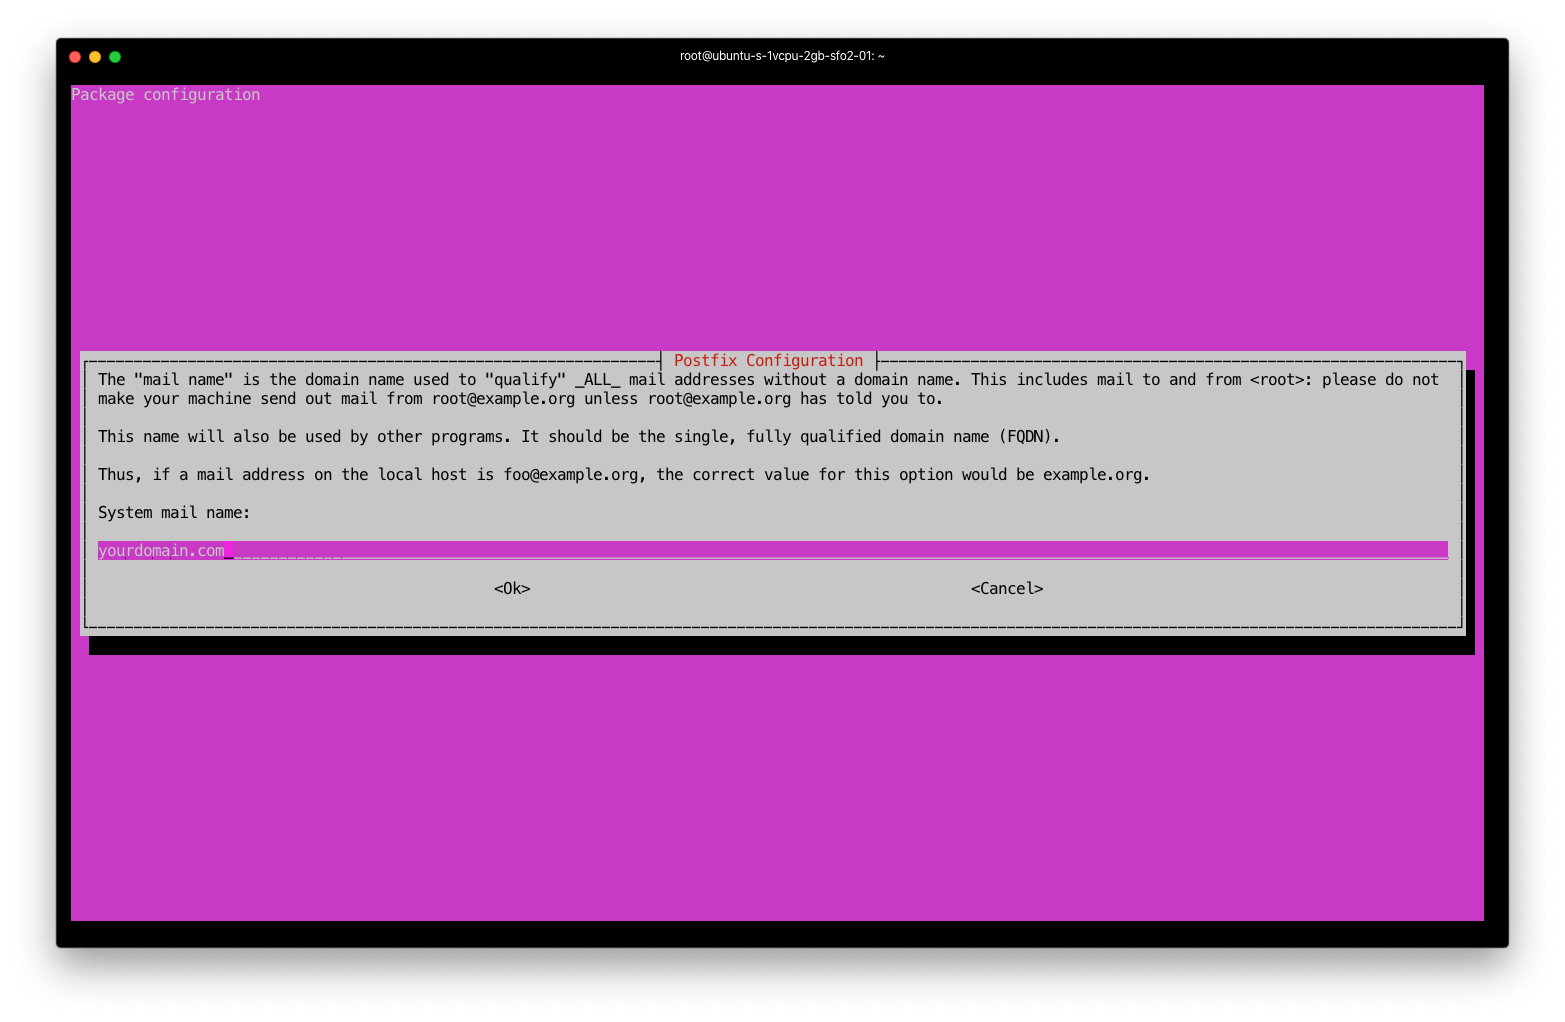
I want to be able to receive emails via SMTP from this server so I will choose Internet Site. On the next screen you'll specify the domain you want to use to receive email address.
sudo dpkg-reconfigure postfixTypically you can just leave the rest of the options the way they are and click press Enter through the rest of the steps:
- Root and postmaster mail recipient: postmaster (Press Enter)
- Other destinations to accept mail for: (Press Enter)
 View Website
 View Website
 View Website
- Force synchronous updates on mail queue?: (Press Enter) accept No here.
- Local networks: (Press Enter) with the default
- Mailbox size limit: (Press Enter) "0"
- Local address extension character: (Press Enter)
- Internet protocols to use: (Press Enter) "all"
After all that you'll have Postfix installed on your server. In order to verify that Postfix is installed on your server you can run:
sudo service postfix statusAnd you should see something similar to the following:

Configuring Postfix
When we install Postfix, we are also installing a few daemon processes for postfix. These processes are running in order to route incoming and outgoing email requests. These daemon processes run in the background of our server and they are controlled by a master file called master.cf, which is typically located at /etc/postfix/master.cnf. This master.cf file contains the list of processes to run when email is received or delivered.
Let's pop the hood and see what's under this Master Config file. Opening this file up in VIM we'll see something that looks similar to the following (the screen shown below has been scrolled to the bottom of the file):
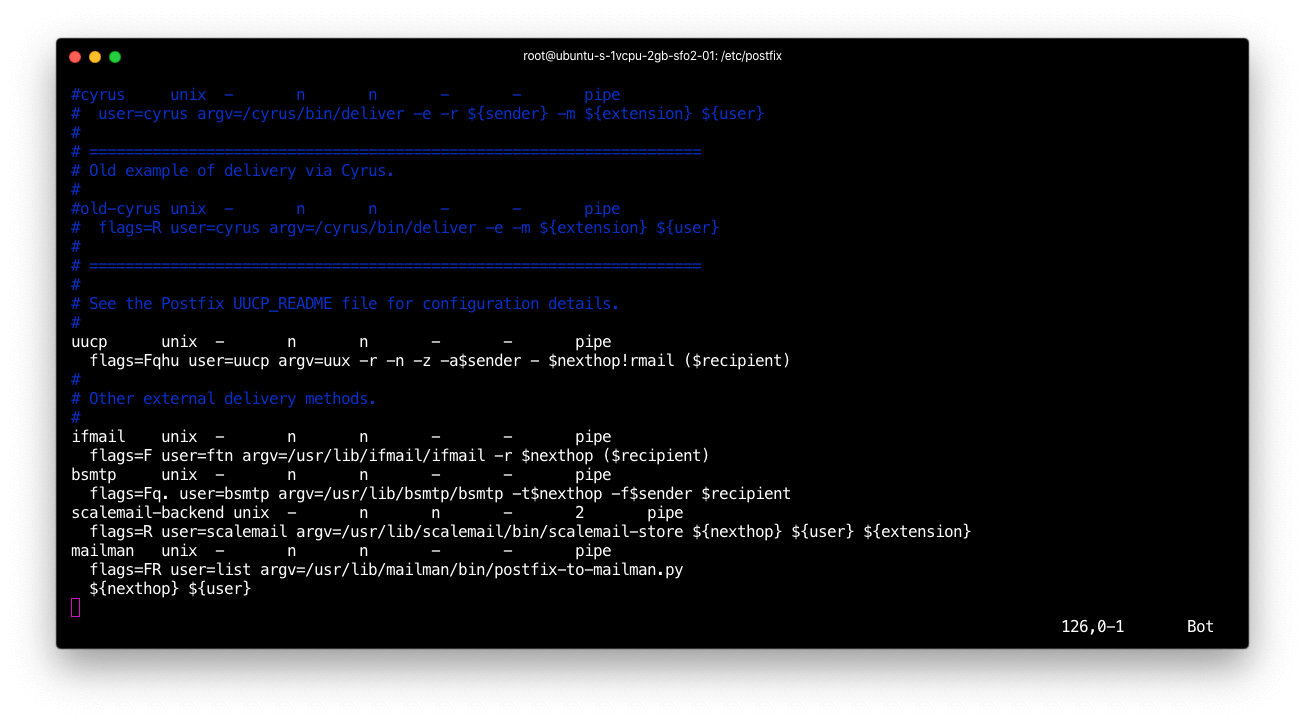
Woh Nelly! That looks like a cluster f***, right? It's ok, don't be too scared of the file, after you break it down and try to understand it, it won't be that complicated.
In this example we are going to create a new process to run a PHP script when we receive a new email. So, at the bottom of our master.cf file we will add the following:
myscript unix - n n - - pipe
  flags=F user=www-data argv=/home/myphpfile.php ${sender} ${size} ${recipient}
In the example above we are creating a new process to run the myscript (which we will create shortly) whenever we receive or deliver email from our server. You'll see that the entry to this file is going to be /home/myphpfile.php that we will also create in the following steps.
Next, if we take a look at the top of our master.cnf file you'll see something similar to this.
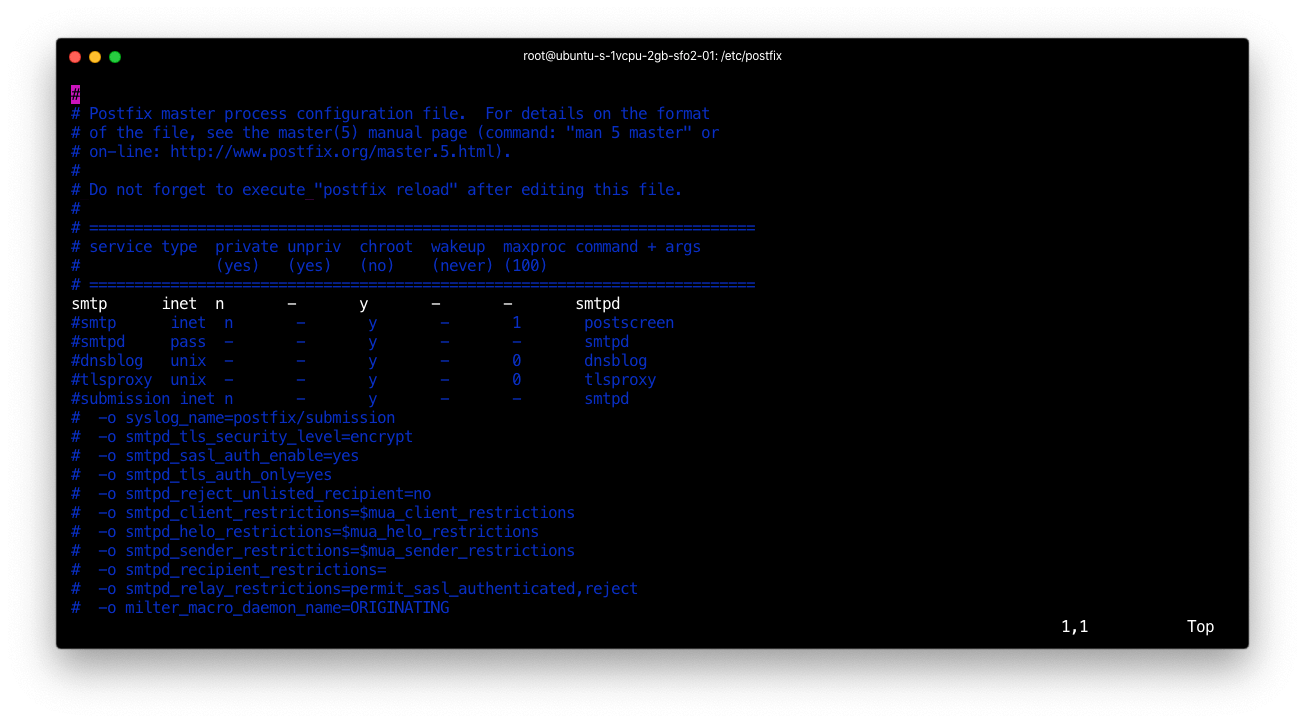
We're going to want to modify the line that starts with smtp to be the following:
smtp      inet  n       -       -       -       -       smtpd
        -o content_filter=myscript:dummy
After saving this file we will then need to reload postfix with our new changes:
sudo service postfix reloadOk, now before creating our script we'll need to make sure that we have PHP installed on our server so that we can run the /home/myphpfile.php script when we receive a new email.
Installing PHP
First we'll need to make sure that we update apt-get and install the necessary repositories:
sudo apt-get update
sudo apt -y install software-properties-common
sudo add-apt-repository ppa:ondrej/php
sudo apt-get update
Then we can run the following command to install php7.4
sudo apt -y install php7.4Next, we also want to add the PHP CLI tool:
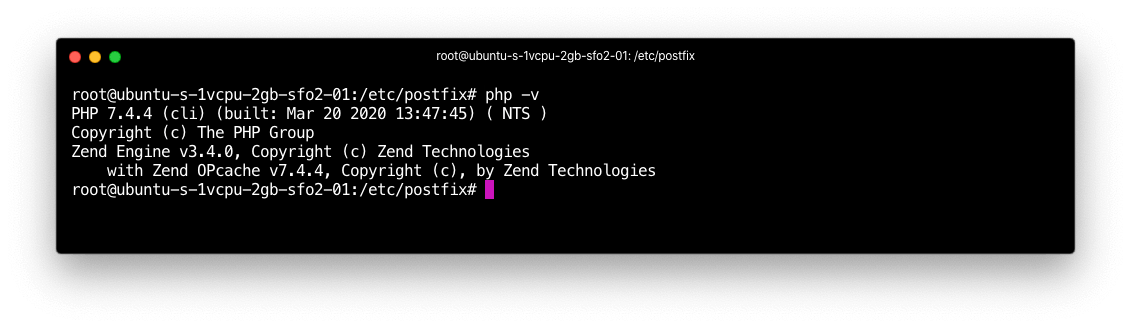
sudo apt -y install php7.4-cliThis will create a new PHP executable file located inside of /user/bin/php. Next, we can test out that we are running PHP on our server by running php -v:
Creating our Script
Let's create a new file located at /home/myphpfile.php with the following contents:
#!/usr/bin/php
<?php
$file = fopen("/tmp/test", "a");
fwrite($file, "Script successfully ran at ".date("Y-m-d H:i:s"));
fclose($file);
?>
After saving that file, we may need to add some new permissions to that file with the following command inside the /home directory:
chmod +rx myphpfile.phpFinally, inside of the /home directory we will run our script:
./myphpfile.phpNow, if we were to look inside the file located at /tmp/test we will see an output that looks like the following:
Script successfully ran at 2020-04-06 18:11:44Ok, now that we have confirmed our script is ready to go, we'll need to make the script a little more useful. Let's add the following content in place of the /home/myphpfile.php
#!/usr/bin/php
<?php
$file = fopen("/tmp/test", "a");
fwrite($file, "Script successfully ran at ".date("Y-m-d H:i:s"));

// read from stdin
$fd = fopen("php://stdin", "r");
$email = "";
while (!feof($fd)) {
    $line = fread($fd, 1024);
    $email .= $line;
}
fclose($fd);

fwrite($file, $email);
fclose($file);

?>Configuring MX Records
Next we need to configure our DNS records so that way when we send an email to [email protected], the Name Servers know what server to send that request to. In my example for this post I'm using a domain at typer.dev, instead of mydomain.com, so you can see what the DNS entries look like:
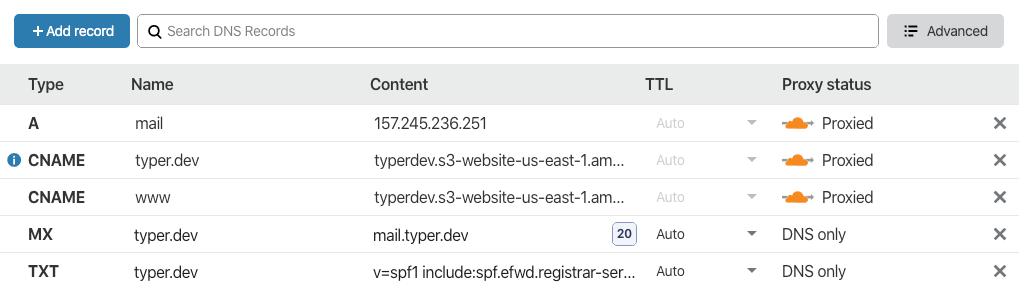
Here are the important records you will need to add:
MX @ mail.typer.devThen we need to add an A record that maps the mail.typer.dev to our Postfix server IP Address:
A mail 157.245.236.251Testing it out
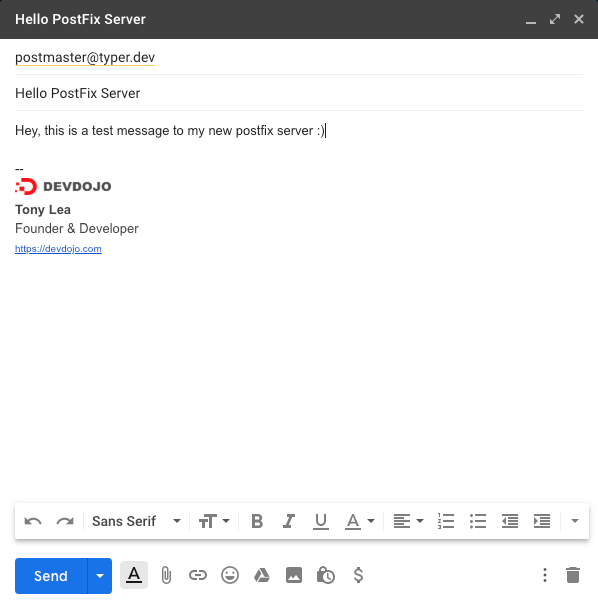
Now, we can send an email to our new email address. In my case this is [email protected]:
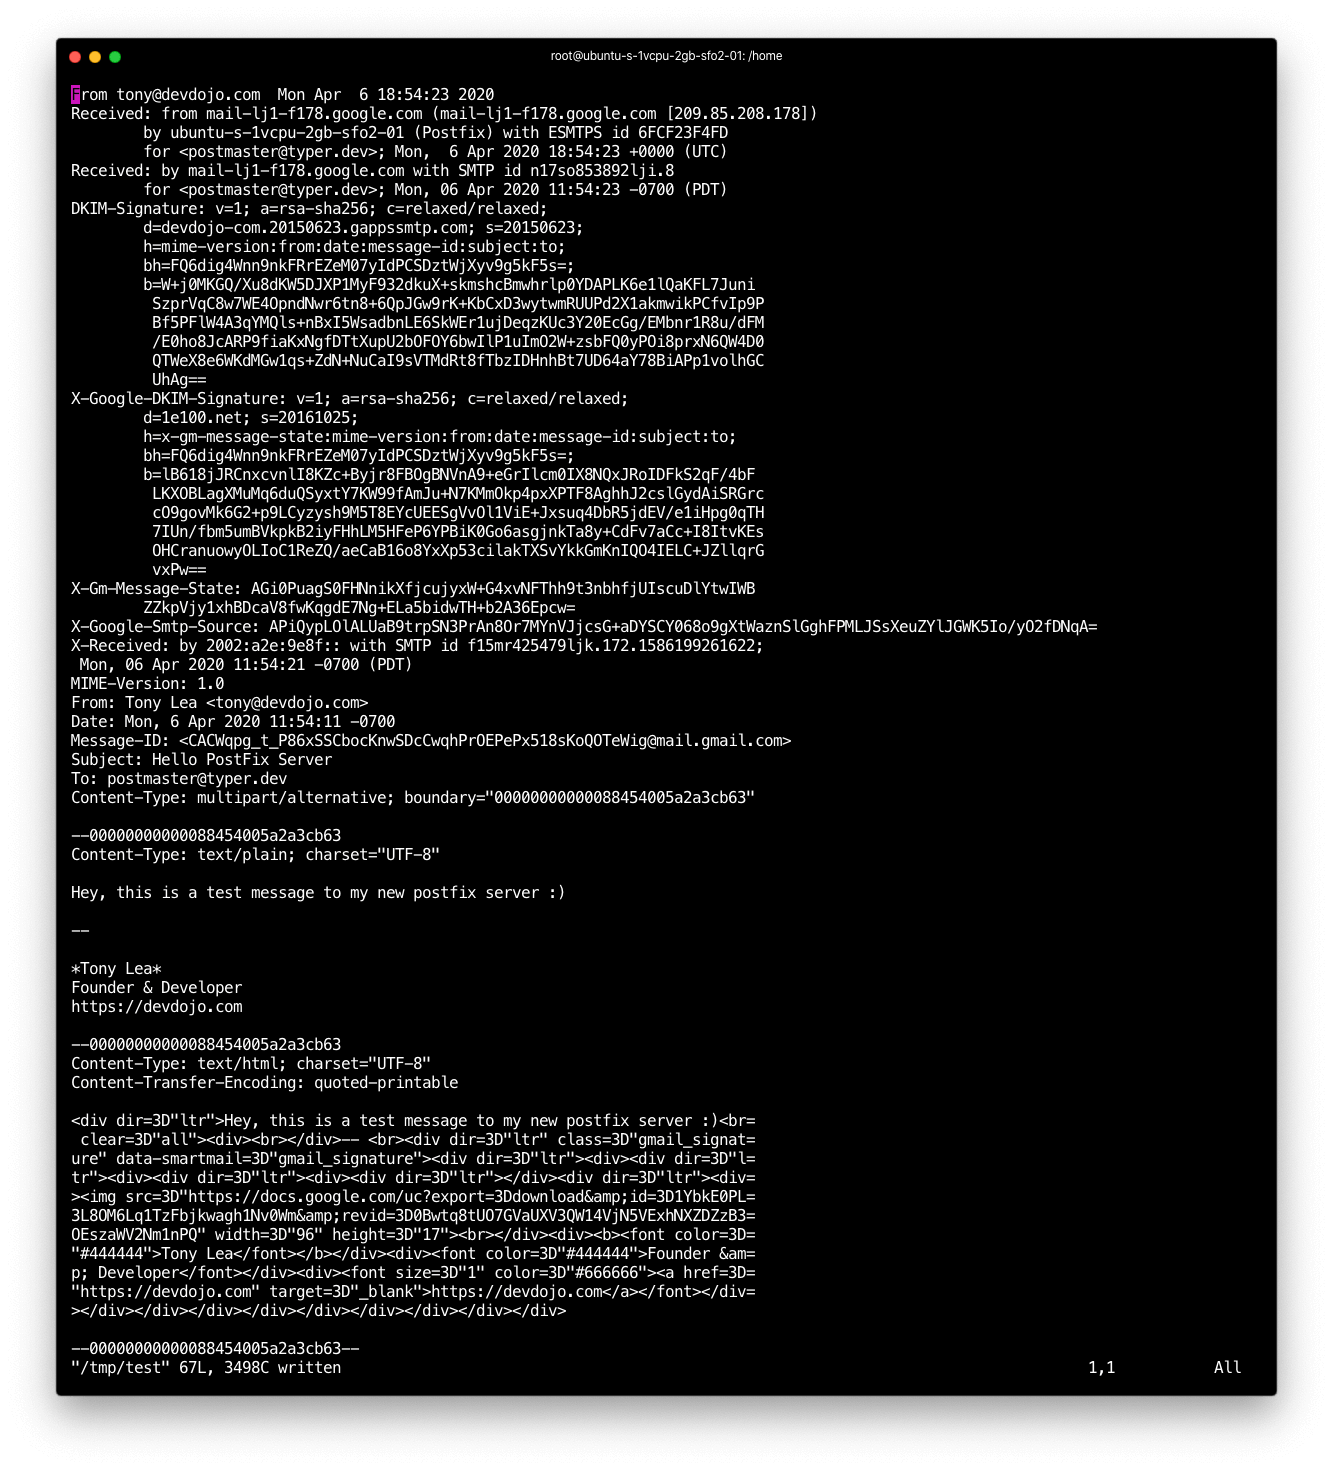
After sending off this email, I should now be able to go back to my server and open up the /tmp/test file and see something similar to the following:
Conclusion
Using Postfix to receive emails is pretty simple to setup. If you ever have a need to capture emails with the flexibility to do whatever you want with the content, then this would be the ideal way perform that functionality.Troubleshooting
There were a few issues that I ran into later on down the road that I thought I would share. If your server keeps kicking back that the mail is not sending you may want to change the following line starting with smtpd_relay_restrictions to be the following:
smtpd_relay_restrictions = permit_sasl_authenticated, permit_mynetworks, reject_unauth_destinationRemember to make sure you run sudo service postfix reload after any changes.
Next... If you want to create a new email address besides postmaster you can add it to your /etc/aliases file like so:
tony@typer.dev FILTER myscript:dummyAfter you add that to your alias file you need to run the following command:
postmap /etc/accessThis will register those emails with postfix. Finally be sure to run sudo service postfix reload and you should be good to go!
Resources:
https://www.binarytides.com/postfix-mail-forwarding-debian/
https://thecodingmachine.io/triggering-a-php-script-when-your-postfix-server-receives-a-mail
Comments (0)