Creating a new Next.js app
npx create-next-app next-auth0-demo
Installing nextjs-auth0
npm i @auth0/nextjs-auth0 # npm
yarn add @auth0/nextjs-auth0 # yarn
Cleanup
I will delete everything after the Head starting from the main till the footer.
import Head from "next/head";

export default function Home() {
  return (
    <div className="flex justify-center mt-80">
      <Head>
        <title>Create Next App</title>
        <meta name="description" content="Generated by create next app" />
        <link rel="icon" href="/favicon.ico" />
      </Head>

    </div>
  );
}
Setting up an application in Auth0
Creating an app
-
Sign up to Auth0
-
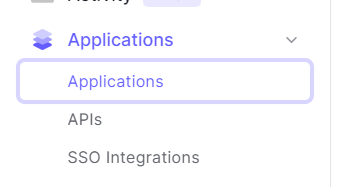
Go to applications under the applications tab

-
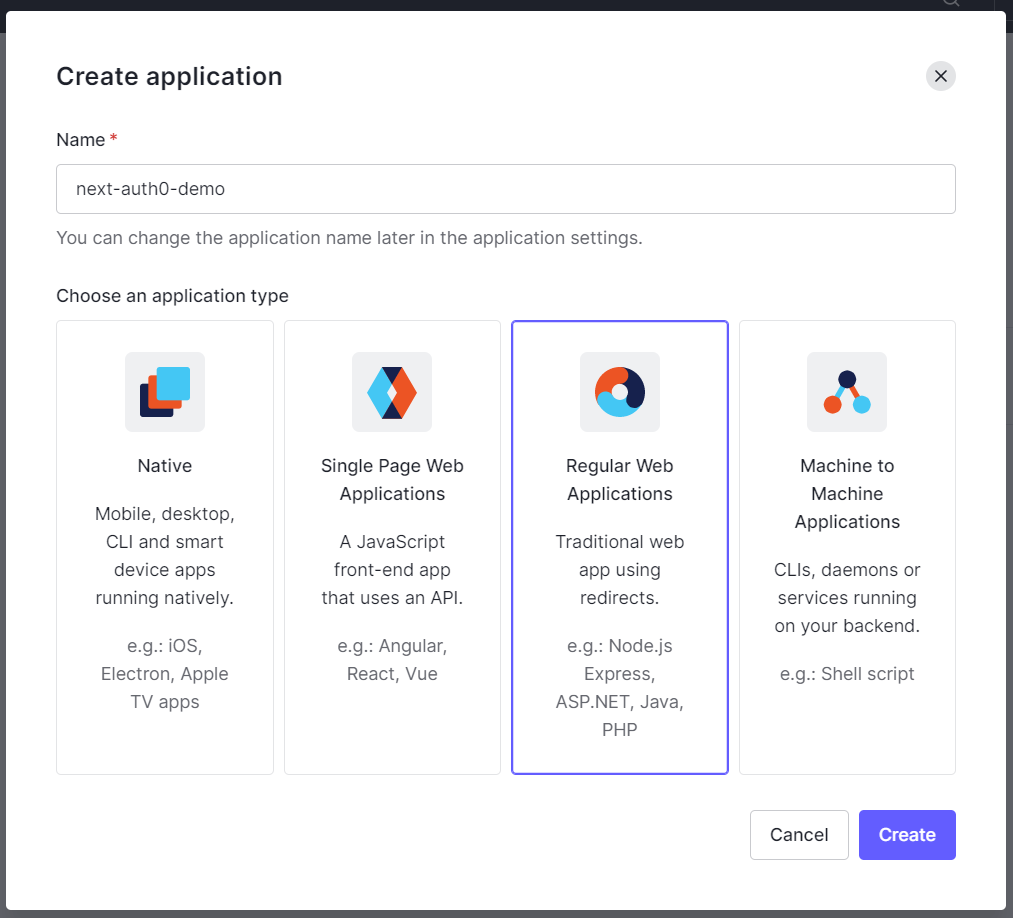
Create a new application
-
Select Regular Web Applications and give a name to your app, then click on create.

Getting the credentials
 View Website
 View Website
 View Website
In the settings tab copy the domain, client id, and the client secretand add it to your .env.local file.
AUTH0_SECRET='LONG_RANDOM_VALUE'
AUTH0_BASE_URL='http://localhost:3000'
AUTH0_ISSUER_BASE_URL='https://YOUR_AUTH0_DOMAIN'
AUTH0_CLIENT_ID='YOUR_AUTH0_CLIENT_ID'
AUTH0_CLIENT_SECRET='YOUR_AUTH0_CLIENT_SECRET'
Edit the AUTH0_ISSUER_BASE_URL, AUTH0_CLIENT_ID, and AUTH0_CLIENT_SECRET. and add your credentials.
Getting the AUTH0_SECRET
Run this command in your terminal
node -e "console.log(crypto.randomBytes(32).toString('hex'))"
and paste the 32 character string you get like this -
AUTH0_SECRET='f63640d7850cb61ad2acd9c0fcd94e0211c6ebbea2b8086b735d4f3c1192ddc0'
Configure the UserProvider in _app.js
You will need to wrap your app in UserProvider
import React from "react";
import { UserProvider } from "@auth0/nextjs-auth0";

export default function App({ Component, pageProps }) {
  return (
    <UserProvider>
      <Component {...pageProps} />
    </UserProvider>
  );
}
Creating the auth0 page
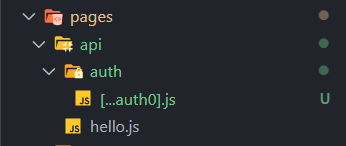
Create an auth folder inside of pages/api and create a file named [...auth0].js like this:

Inside [...auth0].js add these two lines
import { handleAuth } from "@auth0/nextjs-auth0";

export default handleAuth();
Showing the Sign-in button
Add a link tag pointing to /api/auth/login
<Link href="/api/auth/login">Login</Link>
I am using the Next link, So I need to import it like this
import Link from "next/link";
Now if you try to click on login you will see an error similar to this

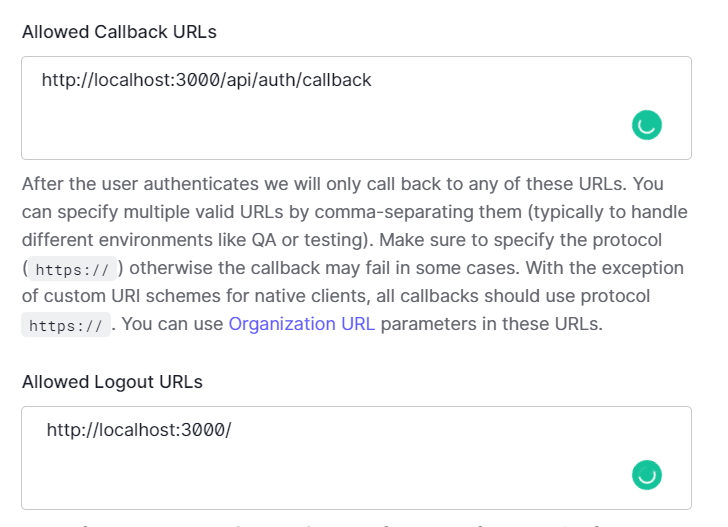
We need to add the allowed callback URLs and logout URLs in the dashboard
Allowed Callback URLs: http://localhost:3000/api/auth/callback
Allowed Logout URLs: http://localhost:3000/

You need to save the changes by clicking on the button given below. Many people forget it and even me 😂.
Now our login flow is working perfectly.
While deploying you will need to change localhost to your app URL.
Getting the user's data
There are two ways to get the user's data-
- With the useUser hook
import { useUser } from "@auth0/nextjs-auth0";
import Head from "next/head";
import Link from "next/link";

export default function Home() {
  const { user } = useUser();

  return (
    <div className="flex justify-center mt-80">
      <Head>
        <title>Create Next App</title>
        <meta name="description" content="Generated by create next app" />
        <link rel="icon" href="/favicon.ico" />
      </Head>
      {user ? (
        <div>
          <h3>Hello, {user.name}</h3>
          <Link href="/api/auth/logout">Logout</Link>
        </div>
      ) : (
        <Link href="/api/auth/login">Login</Link>
      )}
    </div>
  );
}
- With
withPageAuthRequired
If you are using this then the user will not be able to access this page without being signed in.
import { withPageAuthRequired } from "@auth0/nextjs-auth0";
import Head from "next/head";
import Link from "next/link";

function Home({ user }) {
  return (
    <div className="flex justify-center mt-80">
      <Head>
        <title>Create Next App</title>
        <meta name="description" content="Generated by create next app" />
        <link rel="icon" href="/favicon.ico" />
      </Head>
      <div>
        <h3>Hello, {user.name}</h3>
        <Link href="/api/auth/logout">Logout</Link>
      </div>
    </div>
  );
}

export default Home;

export const getServerSideProps = withPageAuthRequired();
%[https://www.loom.com/share/925dbf80c5564ec3855bf3e7eec5d935]


Comments (0)