In this tutorial, we'll see how we can use Redis as a database for caching purposes to load the data faster in any type of application.
So let's get started.
What is Redis
Redis is an in-memory data store used as a database for storing data
Redis is used for caching purpose. So If your API data is not frequently changing then we can cache the previous API result data and on the next requests re-send the cached data from Redis
-
As you know some websites which show live score of matches like cricket match updates the data on the website after every fixed second. So If the user clicks on the refresh button or refreshes the page, the cached data is returned to avoid the unnecessary heavy load on the server.
-
And after specific seconds of time, the fresh score of data gets updated which is done using Redis database
-
So If you're making an API call to some external API or your MongoDB/PostgreSQL or any other database, you can return the cached result from Redis, If your data is not changing frequently
-
Redis is not specific to one langauge, you can use redis in PHP, C, C++, Ruby, Scala, Swift and so on
-
Top companies like Twitter, GitHub, StackOverflow, Pinterest and many others are using Redis in their applications
Our Amazing SponsorsDigitalOcean offers a simple and reliable cloud hosting solution that enables developers to get their website or application up and running quickly.View Website
Laravel News keeps you up to date with everything Laravel. Everything from framework news to new community packages, Laravel tutorials, and more.View Website
A Laravel Starter Kit that includes Authentication, User Dashboard, Edit Profile, and a set of UI Components. Learn more about the DevDojo sponsorship program and see your logo here to get your brand in front of thousands of developers.View Website
-
Redis also accepts expiry time so If your API data is changing after 10 seconds, you can specify the expiry time in Redis to re-fetch the new data after 10 seconds instead of sending cached data
-
The data stored in the Redis is always in the string format
-
So to store an array or object we can use the JSON.stringify method
-
And to get the data back from Redis we can use the JSON.parse method
-
One thing you need to remember is that data stored in Redis is stored in memory so If the machine is crashed or is shutdown, the data stored in the Redis is lost
To avoid losing the data, in this tutorial, you will see how to use upstash which is a very popular serverless database for Redis.
The great thing about upstash is that it provides durable storage which means data is reloaded to memory from block storage in case of a server crash. So you never lose your stored data.
Redis Installation
To install Redis on your local machine you can follow the instructions from this page.
If you're on Mac, you can install the Redis by using a single command:
brew install redis
To start the Redis service:
brew services start redis
To stop the Redis service:
brew services stop redis
Let's create a React application to see how to use Redis.
Initial Project Setup
Create a new React app:
npx create-react-app serverless-redis-demo
Once the project is created, delete all files from the src folder and create the index.js, App.js and styles.css files inside the src folder. Also, create components folders inside the src folder.
Install the required dependencies:
yarn add axios@0.21.1 bootstrap@4.6.0 dotenv@10.0.0 ioredis@4.27.6 react-bootstrap@1.6.1
Open the styles.css file and add the following contents inside it:
* {
  padding: 0;
  margin: 0;
  box-sizing: border-box;
}

body {
  font-family: 'Segoe UI', Tahoma, Geneva, Verdana, sans-serif;
  letter-spacing: 1px;
  background-color: #ade7de;
}

.container {
  text-align: center;
  margin-top: 1rem;
}

.loading {
  text-align: center;
}

.errorMsg {
  color: #ff0000;
}

.action-btn {
  margin: 1rem;
  letter-spacing: 1px;
}

.list {
  list-style: none;
  text-align: left;
}

.list-item {
  border-bottom: 1px solid #797878;
  background-color: #a5e0d7;
  padding: 1rem;
}
How to Create the Initial Pages
In this application, we'll be using Star Wars API for getting a list of planets and list of people.
Create a new file People.js inside the components folder with the following content:
import React from 'react';

const People = ({ people }) => {
  return (
    <ul className="list">
      {people?.map(({ name, height, gender }, index) => (
        <li className="list-item" key={index}>
          <div>Name: {name}</div>
          <div>Height: {height}</div>
          <div>Gender: {gender}</div>
        </li>
      ))}
    </ul>
  );
};

export default People;
Here, we're looping over the list of people received as a prop and displaying them on the screen.
Note: we're using the optional chaining operator(?.) so people?.map is the same as people && people.map(...
ES11 has added a very useful optional chaining operator in which the next code after ?. will be executed only if the previous reference is not undefined or null.
Now, create a new file Planets.js inside the components folder with the following content:
import React from 'react';

const Planets = ({ planets }) => {
  return (
    <ul className="list">
      {planets?.map(({ name, climate, terrain }, index) => (
        <li className="list-item" key={index}>
          <div>Name: {name}</div>
          <div>Climate: {climate}</div>
          <div>Terrain: {terrain}</div>
        </li>
      ))}
    </ul>
  );
};

export default Planets;
Here, we're looping over the list of planets received as a prop and displaying them on the screen.
Now, open the App.js file and add the following contents inside it:
import React, { useState } from 'react';
import { Button } from 'react-bootstrap';
import axios from 'axios';
import Planets from './components/Planets';
import People from './components/People';

const App = () => {
  const [result, setResult] = useState([]);
  const [category, setCategory] = useState('');
  const [isLoading, setIsLoading] = useState(false);
  const [errorMsg, setErrorMsg] = useState('');

  const getData = async (event) => {
    try {
      const { name } = event.target;
      setCategory(name);
      setIsLoading(true);
      const { data } = await axios({
        url: '/api/starwars',
        method: 'POST',
        data: { name }
      });
      setResult(data);
      setErrorMsg('');
    } catch (error) {
      setErrorMsg('Something went wrong. Try again later.');
    } finally {
      setIsLoading(false);
    }
  };

  return (
    <div className="container">
      <div onClick={getData}>
        <h1>Serverless Redis Demo</h1>
        <Button variant="info" name="planets" className="action-btn">
          Planets
        </Button>
        <Button variant="info" name="people" className="action-btn">
          People
        </Button>
        {isLoading && <p className="loading">Loading...</p>}
        {errorMsg && <p className="errorMsg">{errorMsg}</p>}
        {category === 'planets' ? (
          <Planets planets={result} />
        ) : (
          <People people={result} />
        )}
      </div>
    </div>
  );
};

export default App;
In this file, we're displaying two buttons, one for planets and another for people and depending on which button is clicked we're making an API call to get either a list of planets or a list of people.
**Note: ** Instead of adding an onClick handler to both the buttons we've added onClick handler for the div which contains those buttons so the code will look clean and will be beneficial If we plan to add some more buttons in the future like this:
  <div onClick={getData}>
   ...
  </div>
Inside the getData function, we're using the event.target.name property to identify which button is clicked and then we're setting the category and loading state:
setCategory(name);
setIsLoading(true);
Then we're making an API call to the /api/starwars endpoint(which we will create soon) by passing the name as data for the API.
And once we've got the result, we're setting the result and errorMsg state:
setResult(data);
setErrorMsg('');
If there is any error, we're setting that in catch block:
setErrorMsg('Something went wrong. Try again later.');
And in the finally block we're setting the loading state to false.
setIsLoading(false);
The finally block will always get executed even If there is success or error so we've added the call to setIsLoading(false) inside it so we don't need to repeat it inside try and in the catch block.
we've added a getData function which is declared as async so we can use await keyword inside it while making an API call.
And in the JSX, depending on which category is selected by clicking on the button, we're displaying the corresponding component:
{category === 'planets' ? (
  <Planets planets={result} />
) : (
  <People people={result} />
)}
Now, open the index.js file and add the following contents inside it:
import React from 'react';
import ReactDOM from 'react-dom';
import App from './App';
import 'bootstrap/dist/css/bootstrap.min.css';
import './styles.css';

ReactDOM.render(<App />, document.getElementById('root'));
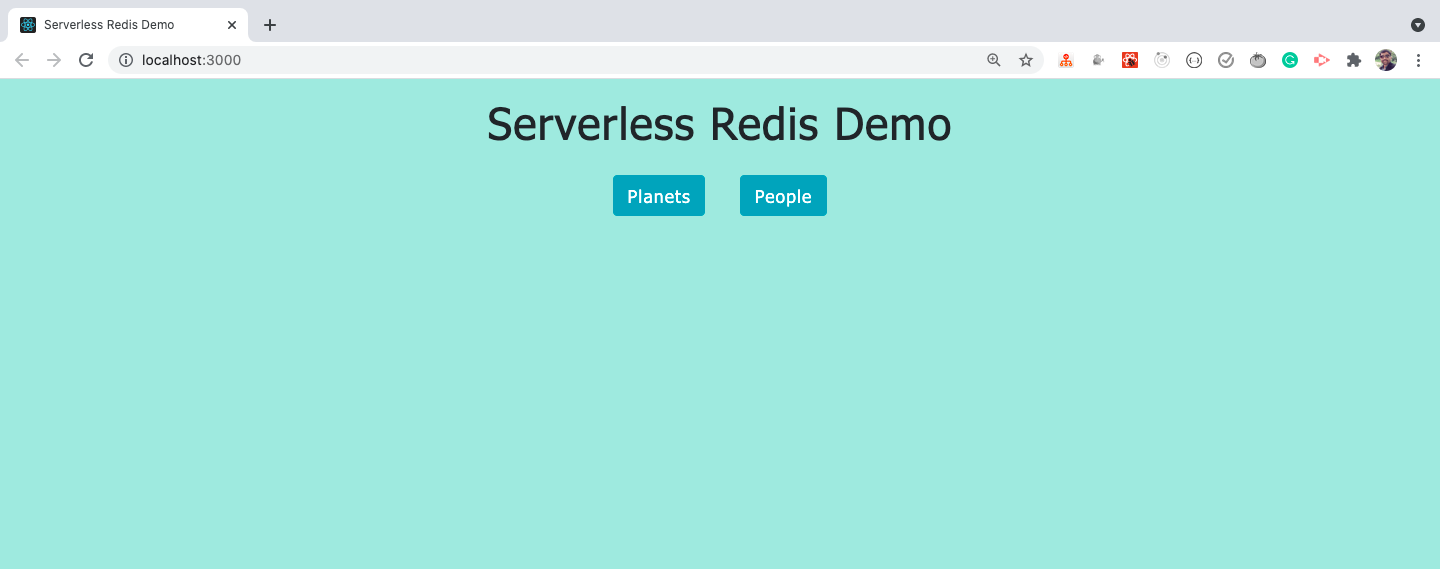
Now, If you run the application by executing the yarn start command, you'll see the following screen:
How to create an API
Now, let's create the backend API.
We'll use Netlify functions to create API so we don't need to create a Node.js server and we can access our APIs and React application running on different ports without getting a CORS(Cross-Origin Resource Sharing) error.
Netlify functions are the most popular way to create serverless applications.
Netlify function uses the Serverless AWS Lambda functions behind the scenes so we don't need to manage those ourselves.
If you're not aware of AWS Lambda functions and Netlify functions, check out my this article for the introduction.
You can also check out my this article to understand netlify functions better.
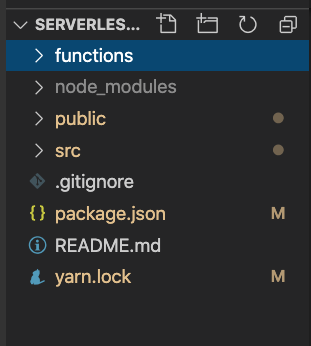
Now, create a new folder with the name functions inside the project folder alongside the src folder.
So your folder structure will look like this:
Inside the functions folder, create a utils folder and create a new file constants.js inside it and add the following contents inside it:
const BASE_API_URL = 'https://swapi.dev/api';

module.exports = { BASE_API_URL };
As the netlify functions and AWS Lambda functions use Node.js syntax, we're using the module.exports for exporting the value of the constant.
In this file, we've defined a BASE URL for the Star Wars API.
Netlify/Lambda functions are written like this:
exports.handler = function (event, context, callback) {
  callback(null, {
    statusCode: 200,
    body: 'This is from lambda function'
  });
};
Here, we're calling the callback function by passing an object containing statusCode and body.
The body is always a string. So If you're returning an array or object make sure to use JSON.stringify method for converting the data to a string.
Forgetting to use JSON.stringify is the most common mistake in Netlify functions.
Now, create a starwars.js file inside the functions folder with the following contents:
const axios = require('axios');
const { BASE_API_URL } = require('./utils/constants');

exports.handler = async (event, context, callback) => {
  try {
    const { name } = JSON.parse(event.body);

    const { data } = await axios.get(`${BASE_API_URL}/${name}`);

    return {
      statusCode: 200,
      body: JSON.stringify(data.results)
    };
  } catch (error) {
    return {
      statusCode: 500,
      body: JSON.stringify('Something went wrong. Try again later.')
    };
  }
};
In this file, initially, we're parsing the request data using the JSON.parse method.
const { name } = JSON.parse(event.body);
We're accessing name from body because If you remember, from the App.js file of our React app, we're making API call like this:
const { data } = await axios({
  url: '/api/starwars',
  method: 'POST',
  data: { name }
});
So we're passing name as data for the API.
As we've created the netlify function in starwars.js file inside the functions folder, Netlify will create the function with the same name of the file so we're able to access the API using /api/starwars URL.
Here, we're passing the value contained in the name property as data for the request so
data: { name }
is the same as
data: { name: name }
If the key and the variable containing value are the same, then using ES6 shorthand syntax, we can skip the colon and the variable name.
Therefore, we're using the JSON.parse method to destructure the name property from the event.body object.
Then inside the starwars.js file, we're making an API call to the actual star wars API.
const { data } = await axios.get(`${BASE_API_URL}/${name}`);
The axios response comes in the data property so we're destructuring it so the above code is the same as the below code:
const response = await axios.get(`${BASE_API_URL}/${name}`);
const data = response.data;
If you check Star Wars Planets/People API, you'll see that the actual data of the API is stored in the results property of the response.
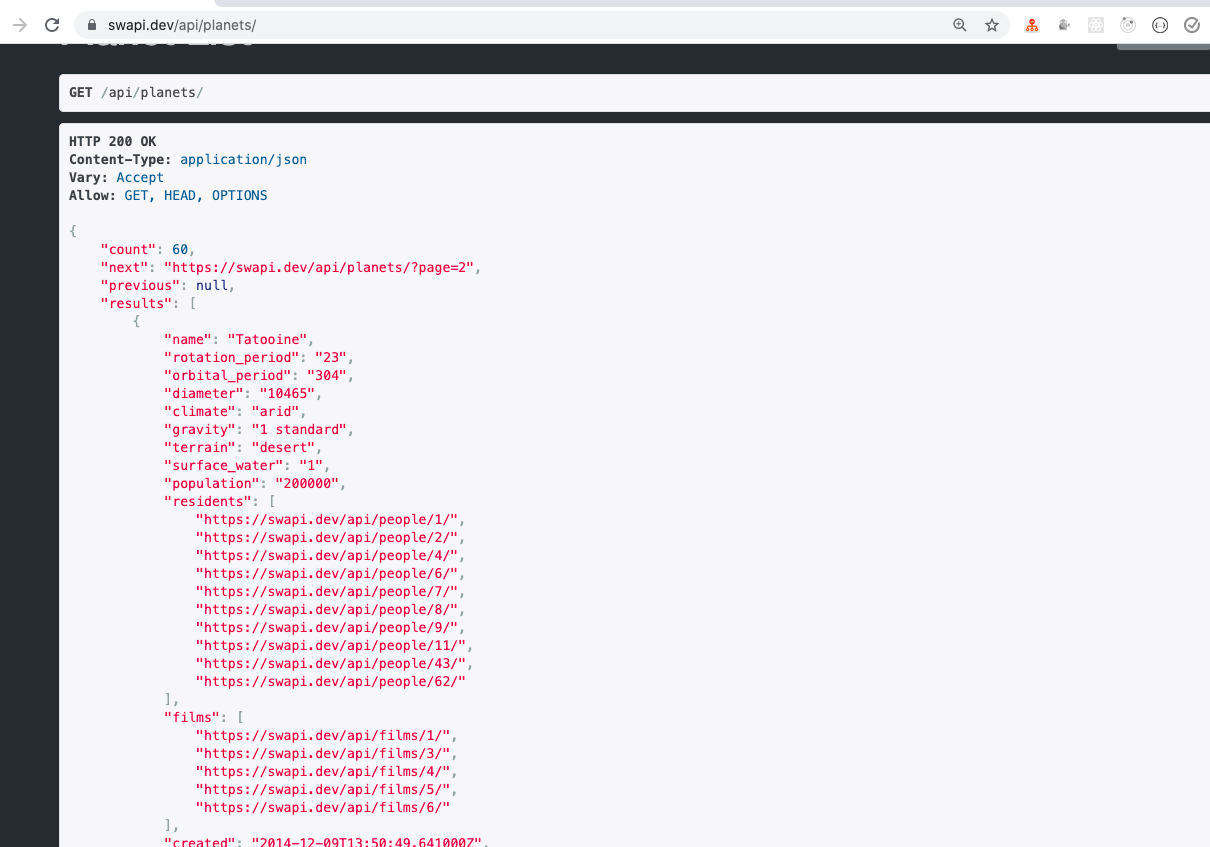
Therefore, once we have the response, we're returning the data.results back to the client(Our React App):
return {
  statusCode: 200,
  body: JSON.stringify(data.results)
};
If there's an error, we're returning back the error message:
return {
  statusCode: 500,
  body: JSON.stringify('Something went wrong. Try again later.')
};
How to execute the Netlify functions
To Inform the netlify that we want to execute the netlify functions, create a new file netlify.toml inside the serverless-redis-demo project folder with the following content:
[build]
  command="CI= yarn run build"
  publish="build"
  functions="functions"

[[redirects]]
  from="/api/*"
  to="/.netlify/functions/:splat"
  status=200
  force=true
This is the configuration file for Netlify where we specify the build configuration.
Let's break it down:
- The
commandspecifies the command that needs to be executed to create a production build folder - The
CI=is specific to Netify so netlify does not throw errors while deploying the application - The
publishspecifies the name of the folder to be used for deploying the application - The
functionsspecifies the name of the folder where all our Serverless functions are stored - All the serverless functions, when deployed to the Netlify, are accessible at the URL
/.netlify/functions/so instead of specifying the complete path every time while making an API call, we instruct Netlify that, whenever any request comes for/api/function_name, redirect it to/.netlify/functions/function_name - :splat specifies that, whatever comes after
/api/should be used after/.netlify/functions/
So when we call /api/starwars API, behind the scenes the /.netlify/functions/starwars/ path will be used.
To execute the netlify functions, we need to install the netlify-cli npm library which will run our serverless functions and also our React app.
Install the library by executing the following command from the terminal:
npm install netlify-cli -g
If you're on Linux/Mac then you might need to add a sudo before it to install it globally:
sudo npm install netlify-cli -g
Now, start the application by running the following command from the terminal from inside the serverless-redis-demo project folder:
netlify dev
The netlify dev command will first run our serverless functions from the functions folder and then our React application and it will automatically manage the proxy so you will not get a CORS error while accessing the serverless functions from the React application.
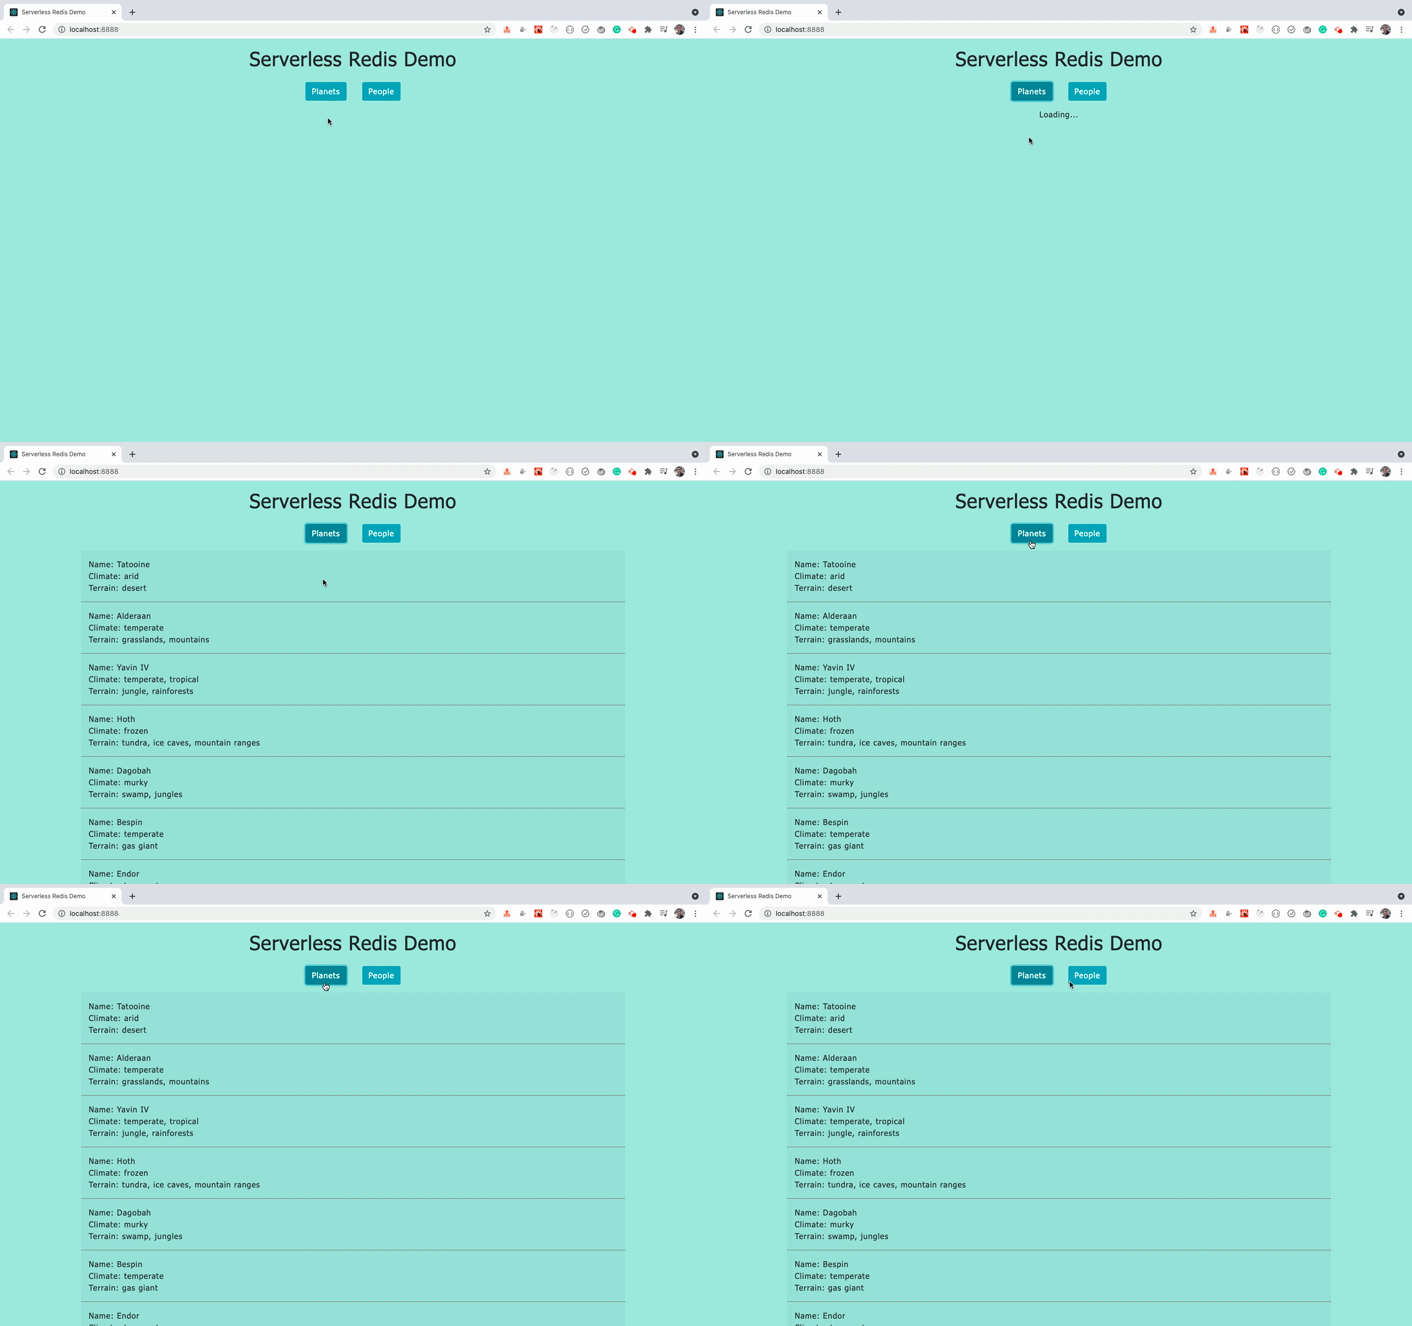
Now, navigate to http://localhost:8888/ and check the application
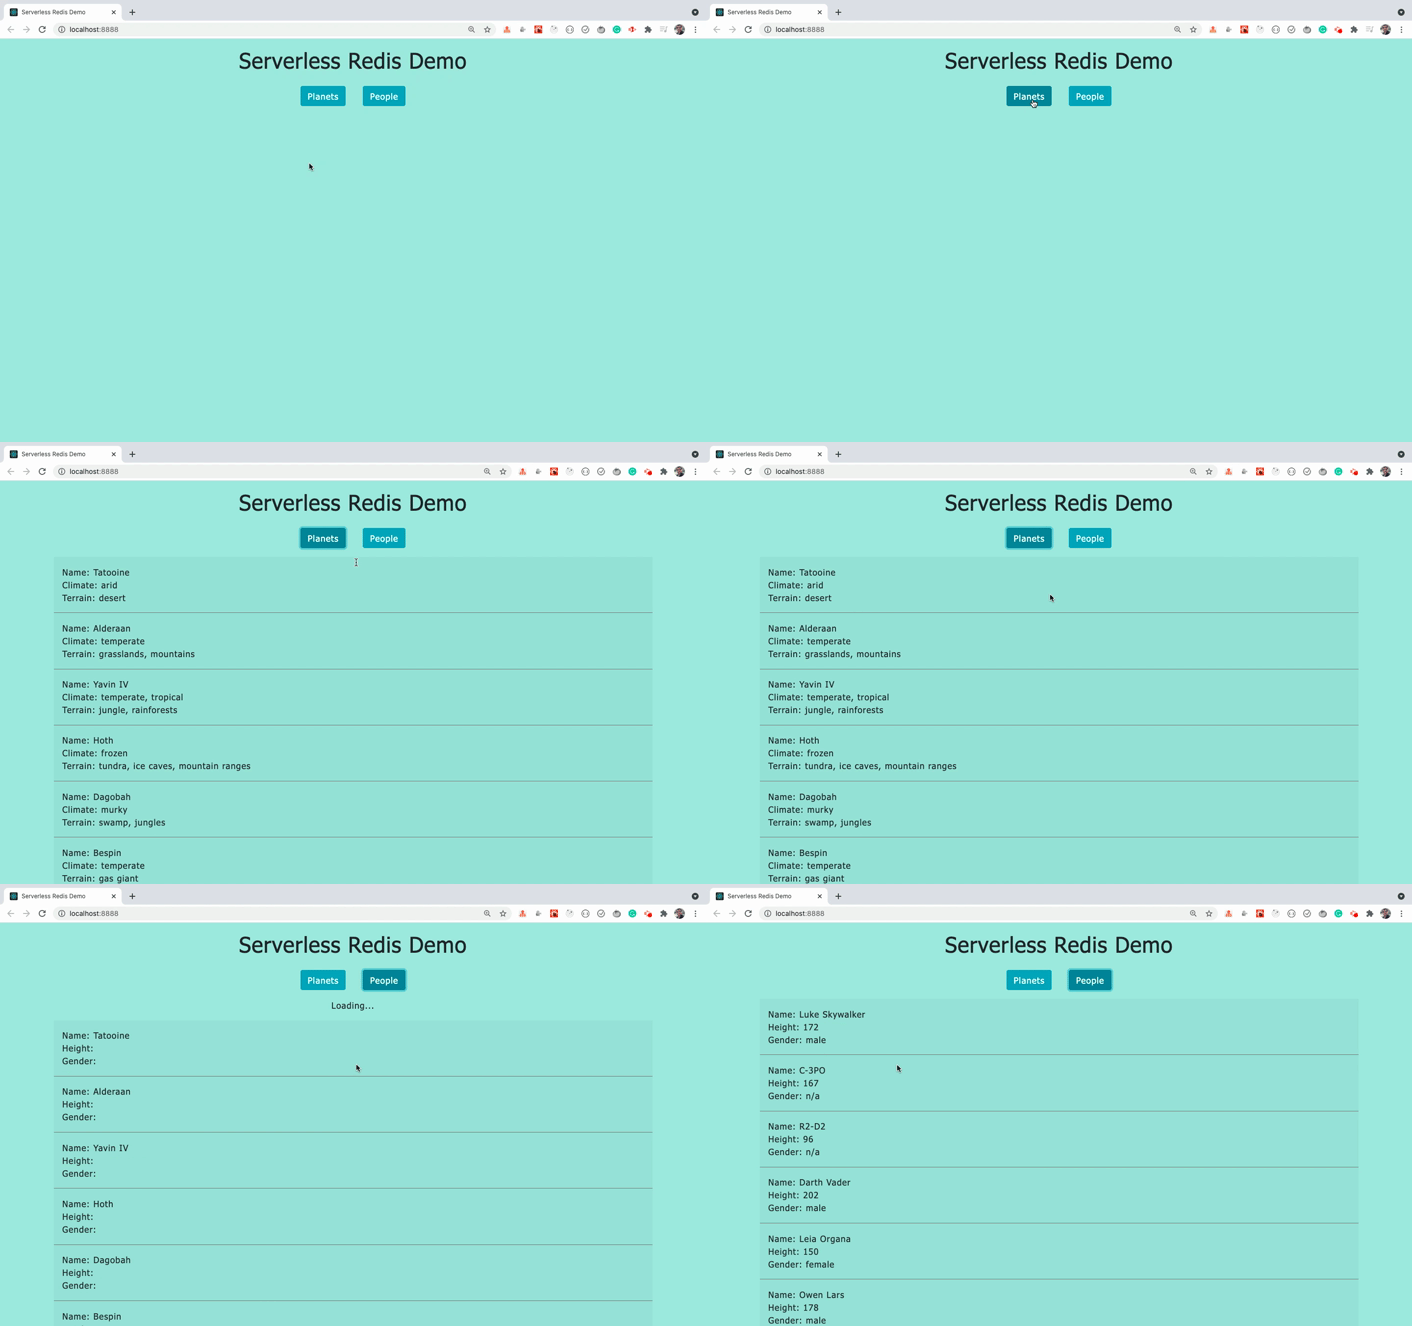
As you can see clicking on the buttons correctly fetches data from the API.
As we're not using Redis yet, you'll see that every time we click on any of the buttons, we're making a fresh API call to the Star Wars API.
So to get the result back, it takes some time and till that time we're seeing the loading message.
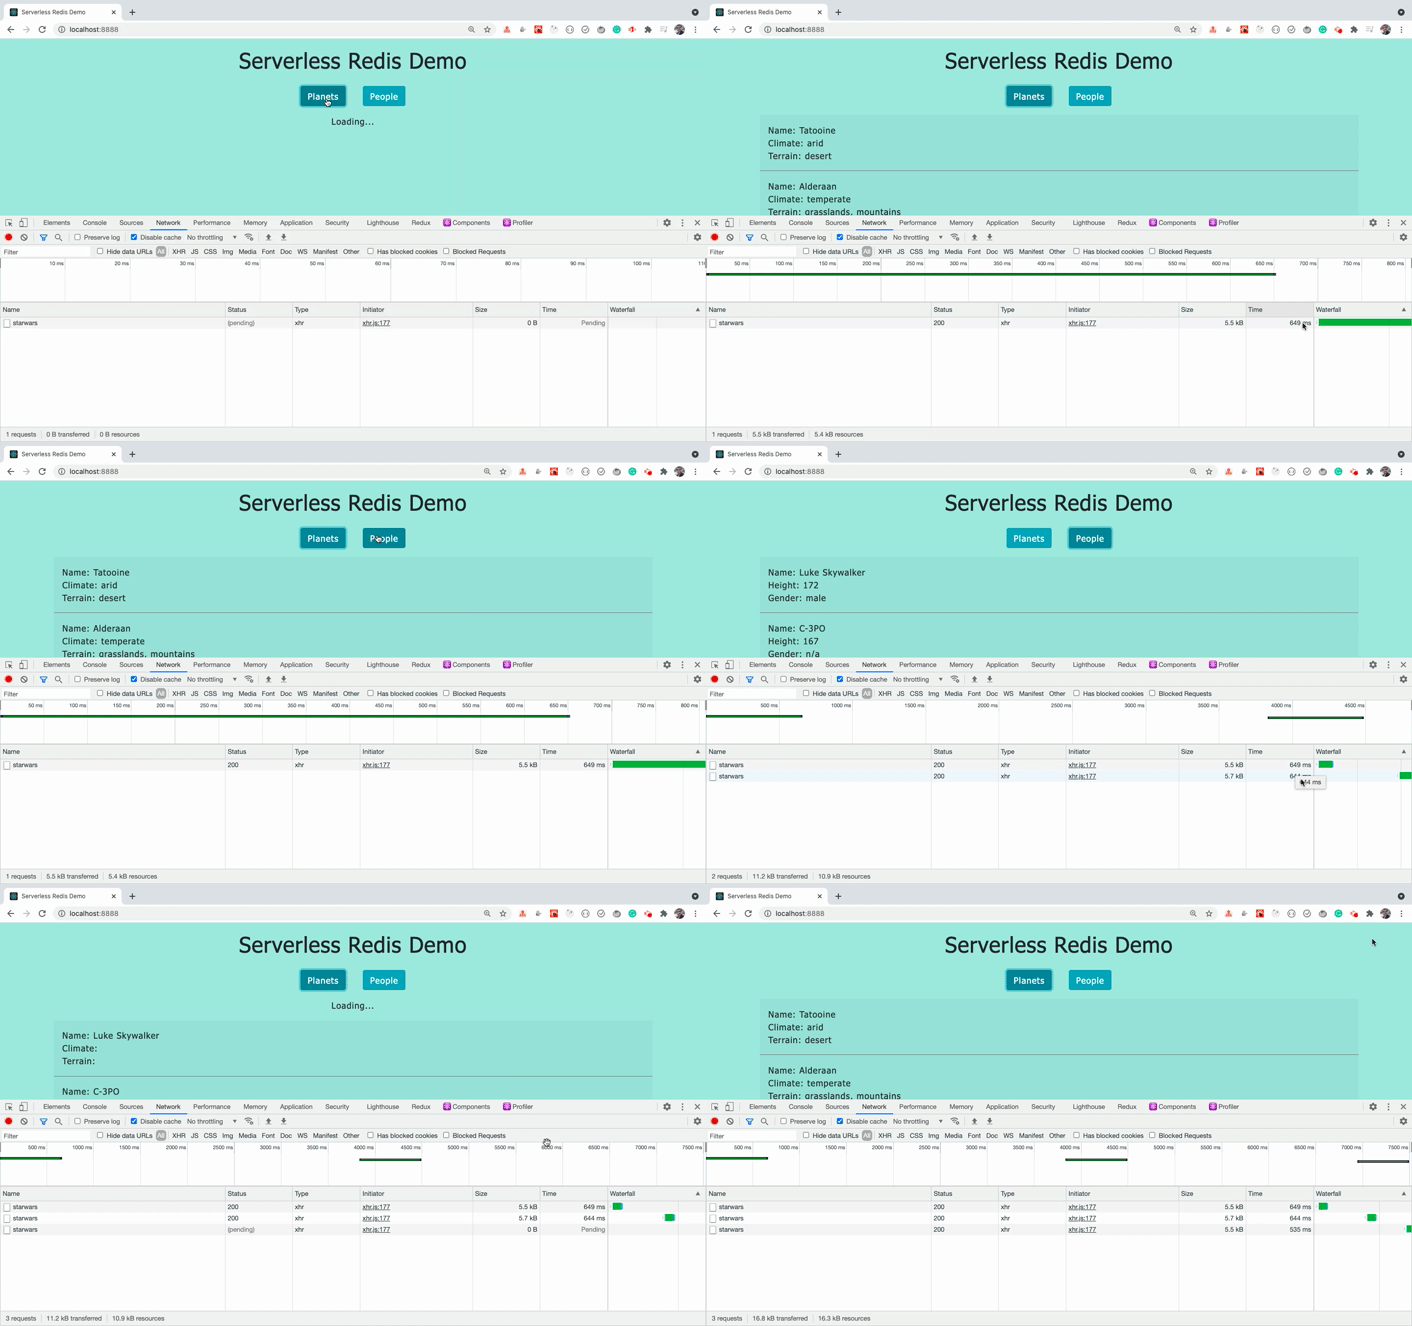
As you can see, the API call is taking more than 500 milliseconds to get the result from the API.
So suppose, If you're accessing data from the database and the response contains a lot of data then it might take more time to get the response back.
So let's use Redis now to reduce the API response time.
Using Redis In The Application
We'll use the ioredis which is a very popular Redis client for Node.js.
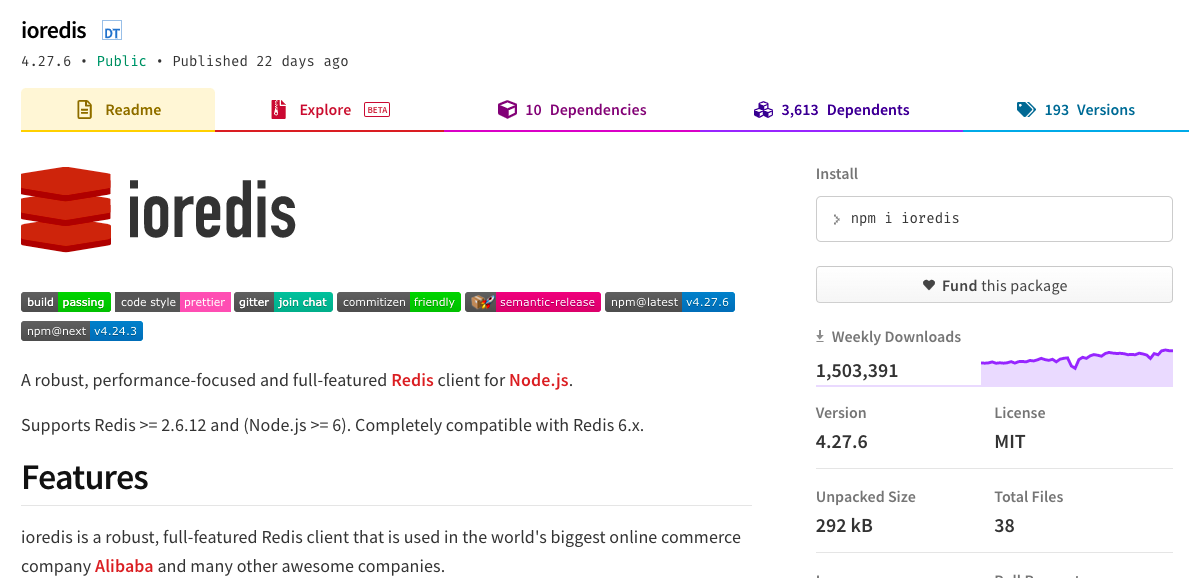
As you can see above, this library has around 1.5 Million weekly downloads.
Now, open the functions/starwars.js file and replace it with the following contents:
const axios = require('axios');
require('dotenv').config();
const { BASE_API_URL } = require('./utils/constants');
const Redis = require('ioredis');

const redis = new Redis(process.env.DB_CONNECTION_URL);

exports.handler = async (event, context, callback) => {
  try {
    const { name } = JSON.parse(event.body);

    const cachedResult = await redis.get(name);
    if (cachedResult) {
      console.log('returning cached data');

      return {
        statusCode: 200,
        body: JSON.stringify(JSON.parse(cachedResult))
      };
    }

    const { data } = await axios.get(`${BASE_API_URL}/${name}`);

    redis.set(name, JSON.stringify(data.results), 'EX', 10);

    console.log('returning fresh data');

    return {
      statusCode: 200,
      body: JSON.stringify(data.results)
    };
  } catch (error) {
    return {
      statusCode: 500,
      body: JSON.stringify('Something went wrong. Try again later.')
    };
  }
};
Here, we've some initial imports at the top of the file:
const axios = require('axios');
require('dotenv').config();
const { BASE_API_URL } = require('./utils/constants');
const Redis = require('ioredis');
As we're using ioredis npm library, we've imported it and then we're creating an object of Redis by passing it a connection string.
const redis = new Redis(process.env.DB_CONNECTION_URL);
Here, for the Redis constructor function, we're passing the connection URL to access data store somewhere else.
If we don't pass any argument to the constructor then the locally installed Redis database will be used.
Also, instead of directly providing the connection URL we're using environment variable for security reasons.
You should always use environment variables for API Keys or database connection URLs or password to make it secure.
Configuring upstash Redis Database
To get the actual connection URL value, navigate to upstash and log in with either google, GitHub or Amazon account.
Once logged in, you'll see the following screen:
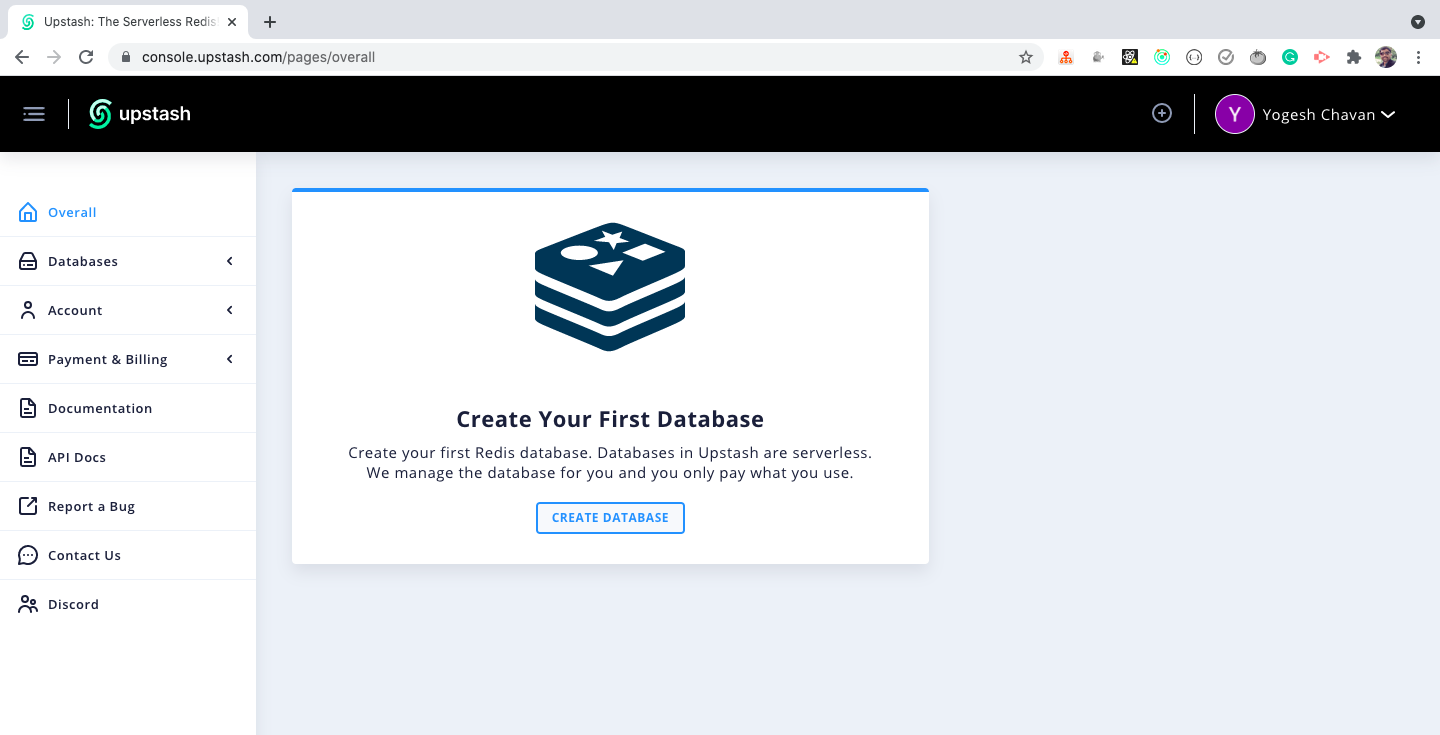
Click on the CREATE DATABASE button and enter the database details and click on the CREATE button.
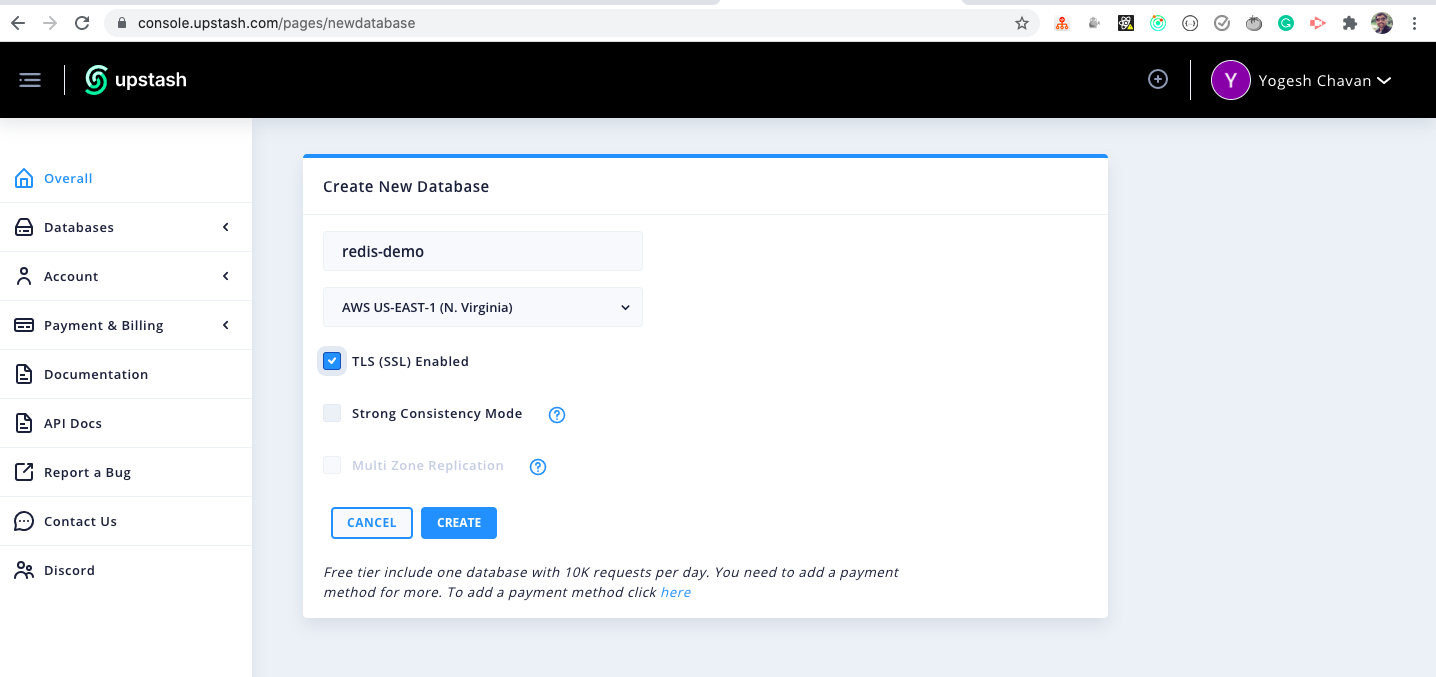
Once the database is created, you'll see the following screen:
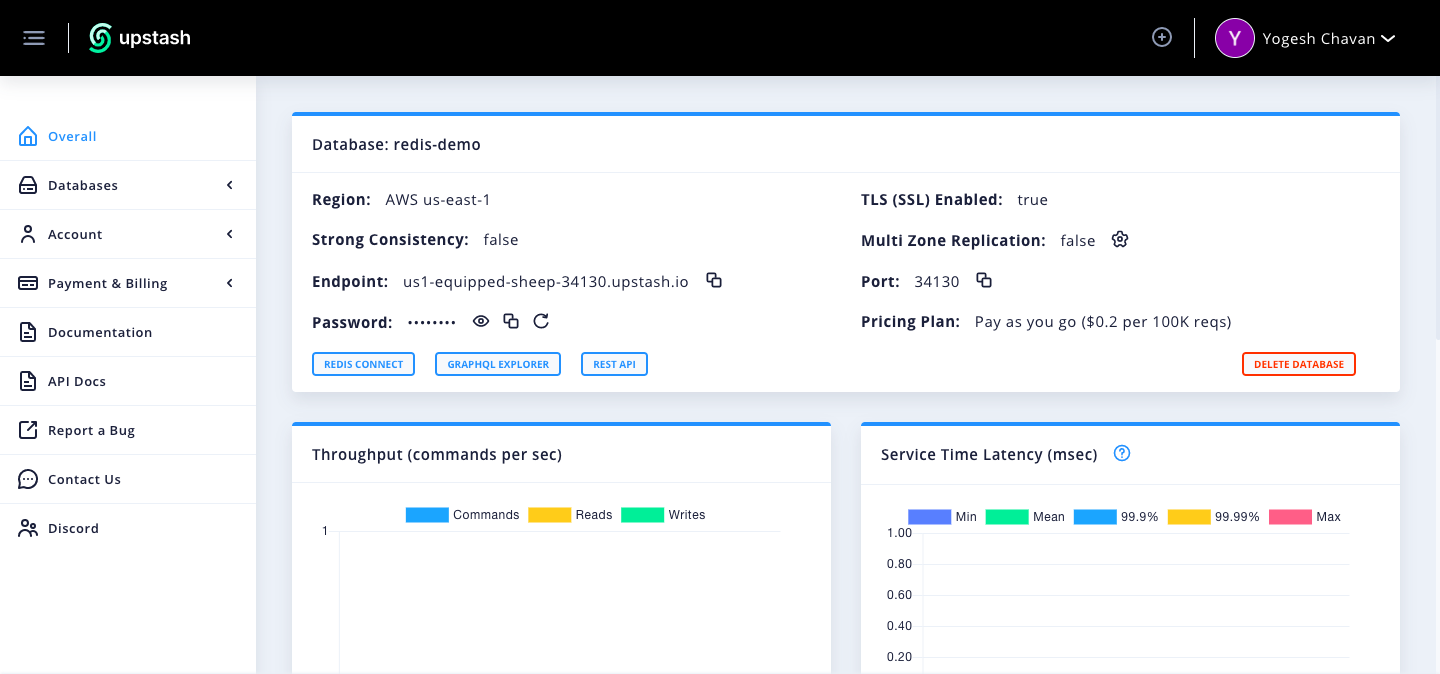
Click on the REDIS CONNECT button and then select the Node.js(ioredis) from the dropdown and copy the connection URL value.
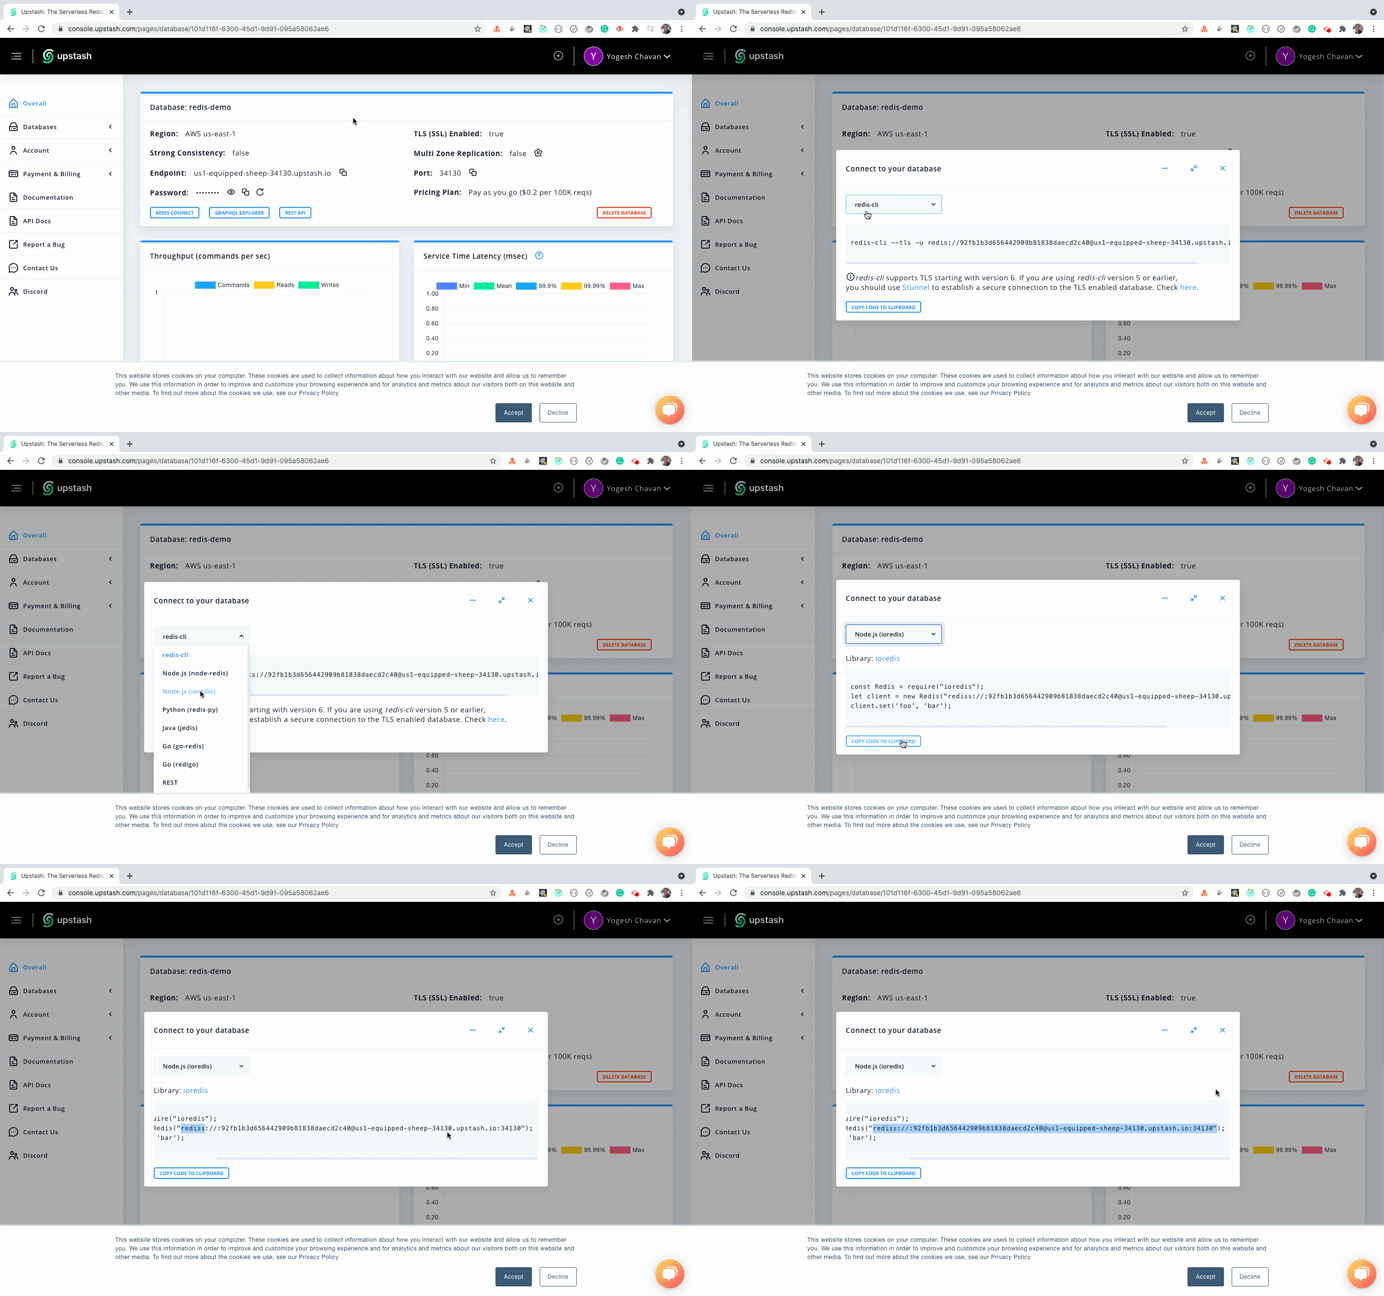
Now, create a new .env file inside the serverless-redis-demo folder and add the following contents inside it:
DB_CONNECTION_URL=your_copied_connection_url
You should never push .env file to GitHub repository so make sure to include the
.envfile in the.gitignorefile so it will not be pushed to GitHub repository.
Now, let's proceed with understanding the code from the functions/starwars.js file.
Once we have the connection URL, we're creating a Redis object using:
const redis = new Redis(process.env.DB_CONNECTION_URL);
Then we've defined the netlify function as shown below:
exports.handler = async (event, context, callback) => {
  try {
    const { name } = JSON.parse(event.body);

    const cachedResult = await redis.get(name);
    if (cachedResult) {
      console.log('returning cached data');

      return {
        statusCode: 200,
        body: JSON.stringify(JSON.parse(cachedResult))
      };
    }

    const { data } = await axios.get(`${BASE_API_URL}/${name}`);

    redis.set(name, JSON.stringify(data.results), 'EX', 10);

    console.log('returning fresh data');

    return {
      statusCode: 200,
      body: JSON.stringify(data.results)
    };
  } catch (error) {
    return {
      statusCode: 500,
      body: JSON.stringify('Something went wrong. Try again later.')
    };
  }
};
Inside the function, we're accessing the name value from the request data and then we're calling the get method of the Redis object.
const cachedResult = await redis.get(name);
As Redis database stores data as a key-value pair. To get the data for the provided key we use the redis.get method as shown above.
So If the name is planets then the key will be planets. If there is no such key in the Redis then Redis will return null.
So next, we're checking If the key exists. If yes then we're returning the data back from the function.
if (cachedResult) {
  console.log('returning cached data');

  return {
    statusCode: 200,
    body: JSON.stringify(JSON.parse(cachedResult))
  };
}
We've also added a console.log so we can see If we're getting cached result or fresh result.
If no such key exists, then we're making the API call to the Star Wars API using axios.
Then we're storing the response data in the Redis database using the set method.
For the set method, we're passing:
- the key
- the response data in a stringified format,
EXconstant to specify expiry time and- the value 10 to expire the redis key-value pair after 10 seconds
const { data } = await axios.get(`${BASE_API_URL}/${name}`);

redis.set(name, JSON.stringify(data.results), 'EX', 10);
The Redis maintains its own timer so If the 10 seconds are over after setting the value, Redis will remove the key-value pair.
So the next time, we call this function and 10 seconds are not over after setting the key-value pair then we'll get the cached data so there is no need of making an API call again.
Then we're returning that data from the function.
console.log('returning fresh data');

return {
    statusCode: 200,
    body: JSON.stringify(data.results)
};
Verifying the Caching Functionality
Now, we've added the caching functionality, let's verify the functionality of the application.
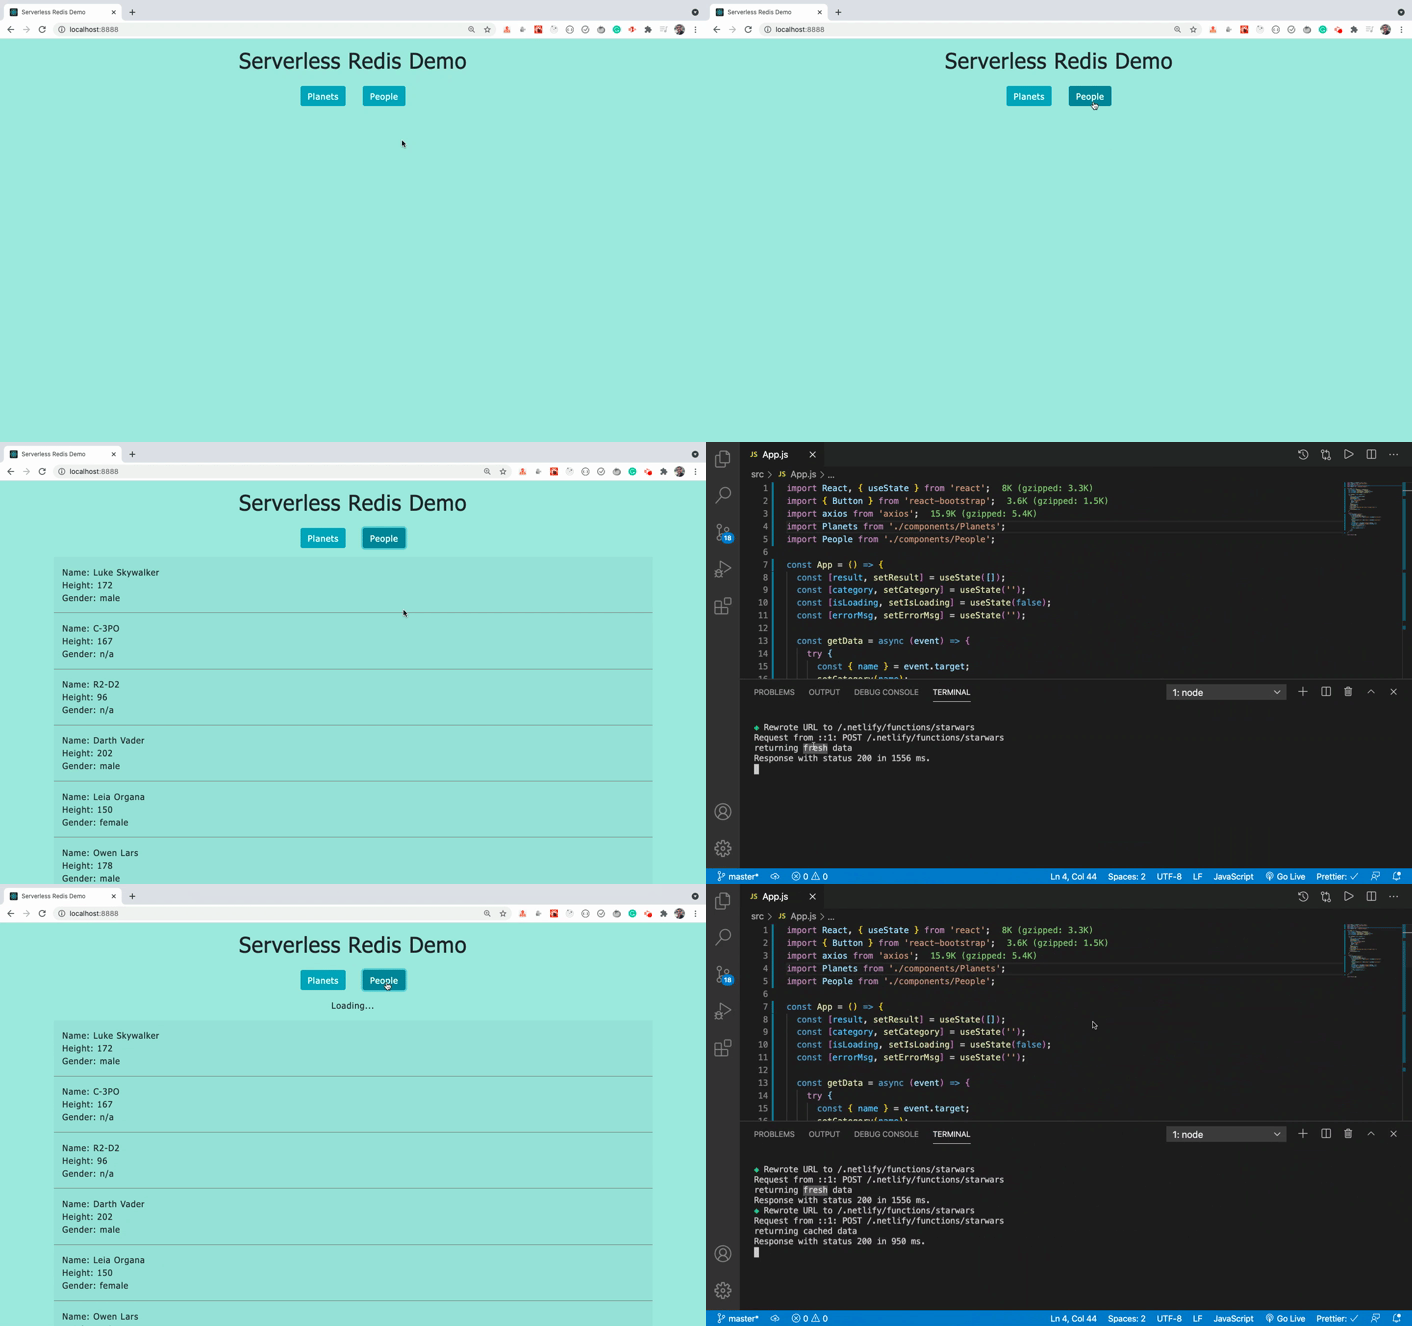
As you can see when we click on the planets button the first time, it takes some time to get the API response.
But after every next click, it takes less time to get the response.
This is because for every button click after the first click we're always returning the cached response which we got when we clicked the button the first time which we can confirm from the log printed in the console:
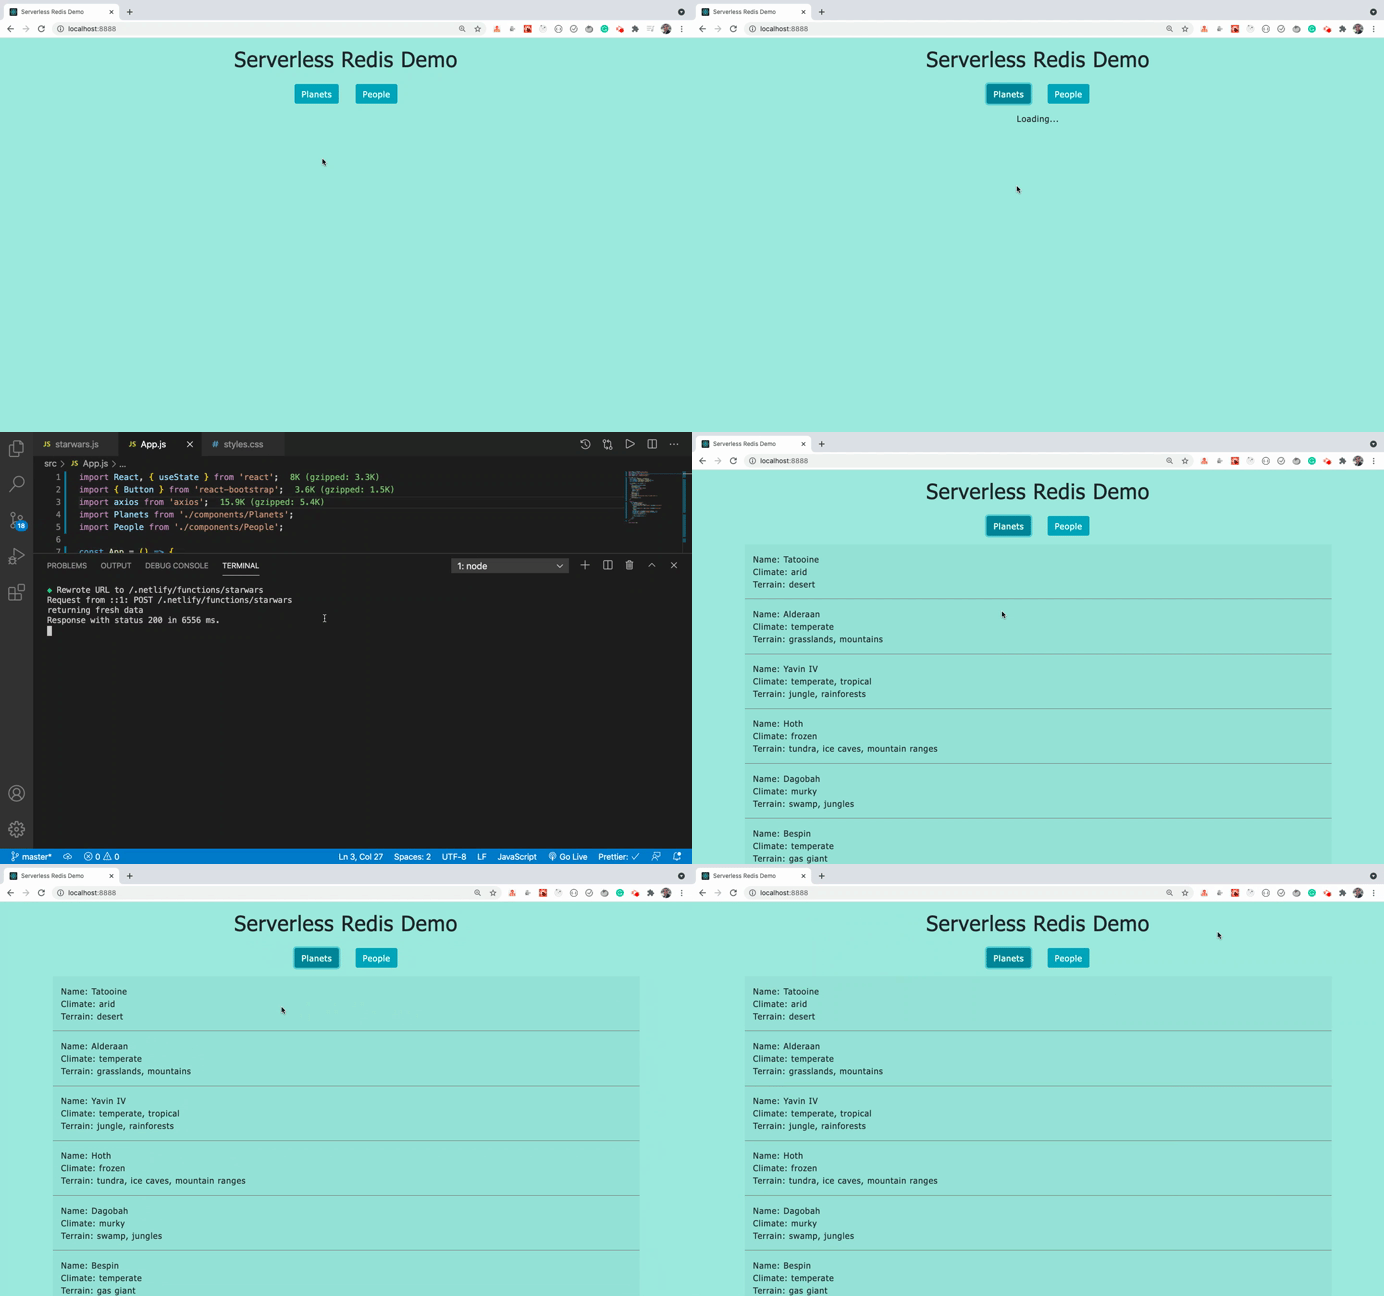
Also, If you remember once we got the response, we're setting an expiry time of 10 seconds for the Redis data in the functions/starwars.js file:
redis.set(name, JSON.stringify(data.results), 'EX', 10);
So after every 10 seconds from getting the response, the Redis data is removed so we always get fresh data after 10 seconds.
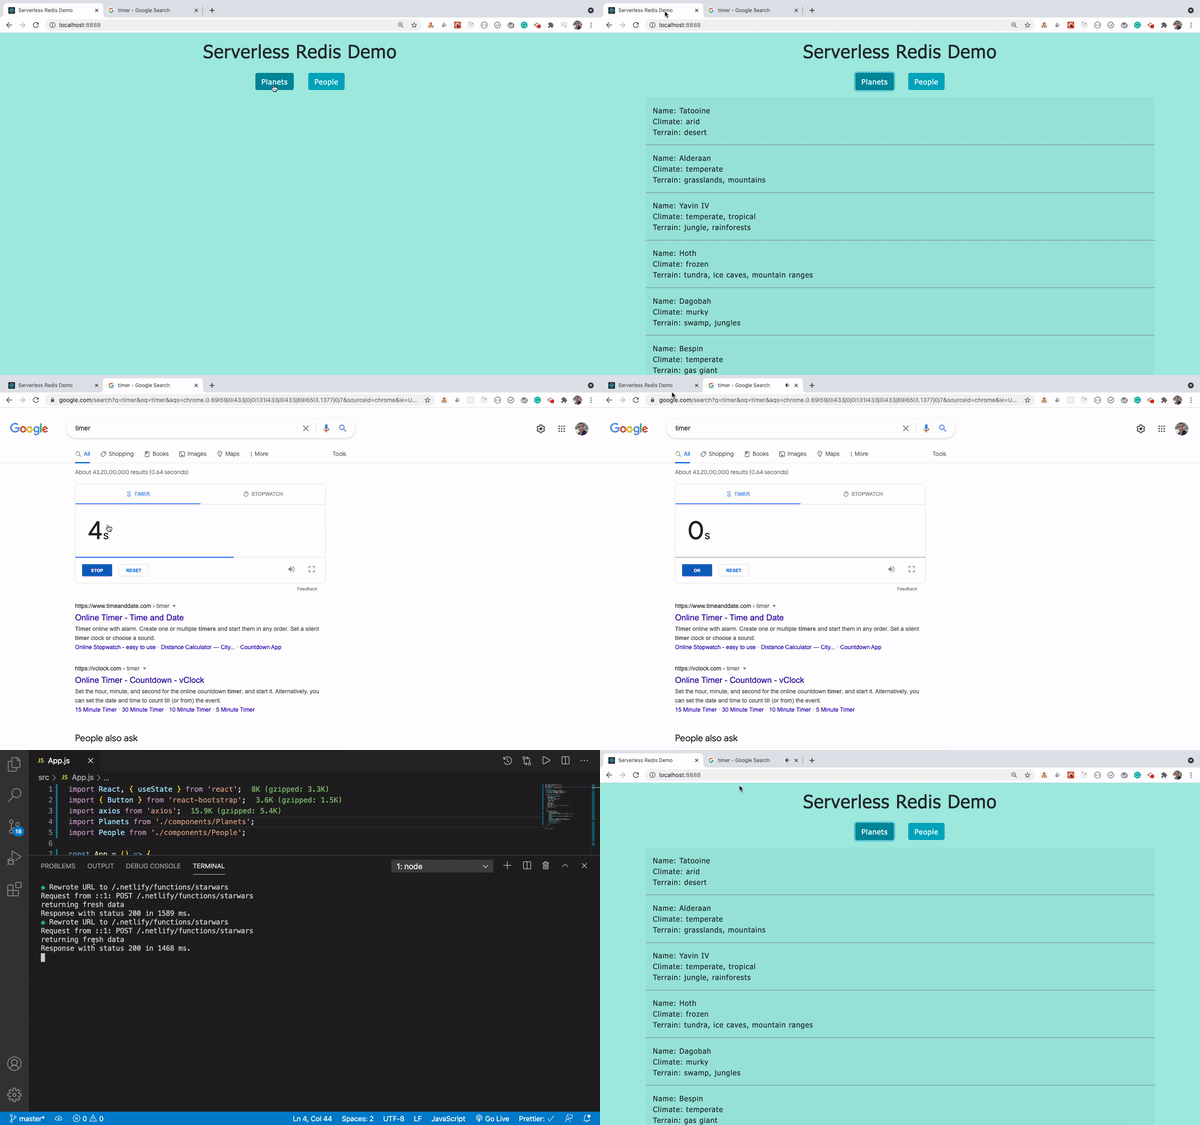
As you can see, once we got the response, we're starting the timer and once 10 seconds are over we're again clicking on the button to make another API call.
As 10 seconds are over, the Redis data is removed so we again get fresh data as can be confirmed from the returning fresh data log in the console and next time we again click on the button before the 10 seconds are over, we're getting cached data instead of fresh data.
The caching functionality will work the same when we click on the People button to get a list of people.
Using Local Installation of Redis
As we have seen, to connect to the Upstash redis database, we're passing connection URL to the Redis constructor:
// functions/starwars.js

const redis = new Redis(process.env.DB_CONNECTION_URL);
If we don't pass any argument to the constructor like this:
const redis = new Redis();
then the locally installed Redis database will be used.
So let's see how that works.
If Redis is already installed on your machine, then to access the Redis through the command line, we can execute the redis-cli command.
Check out the below video to see it in action.
- As you can see in the above video, to get the data stored at key
people, we're using the following Redis command:
get people
-
Here, we're using people because we've used
peopleas the name of the key while saving to Redis usingredis.setmethod -
Initially, it does not exist so nil is returned which is equivalent to null in JavaScript.
-
Then once we click on the People button to get the list of people, the
peoplekey gets set so we get the data back If we again execute theget peoplecommand -
As we've set the expiry time as 10 seconds, the key-value pair is deleted once 10 seconds timeout is over
-
so we're using ttl(time to live) command to get the remaining time of the key expiry in seconds like this:
ttl people
-
If the value returned by ttl is -2 then it means that the key does not exist as it's expired
-
If the value returned by ttl is -1 then it means that the key will never expire which will be the case If we don't specify the expiry while using the
redis.setmethod. -
So if the ttl is -2, the application will make the API call again and will not return the cached data as the key is expired so again you will see a loading message for some more time.
That's it about this tutorial.
You can find the complete source code for this tutorial in this repository.
Conclusion
-
As we have seen, using Redis to return cached data can make the application load faster which is very important when we either have a lot of data in the response or the backend takes time to send the response or we're making an API call to get data from the database.
-
Also, with Redis after the specified amount of expiry time, we can make a new API call to get updated data instead of returning cached data.
-
As Redis data is stored in memory, data might get lost If the machine is crashed or shut down, so we can use the upstash as a serverless database so the data will never get lost even If the machine is crashed.

Comments (0)