The format for the series is going to be beginner-friendly. Each post covers a single feature or some subset of a feature. It is assumed the reader has familiarity with HTML and CSS. Prior JavaScript experience is beneficial, but it is not a hard requirement.
Static vs. Dynamic Websites
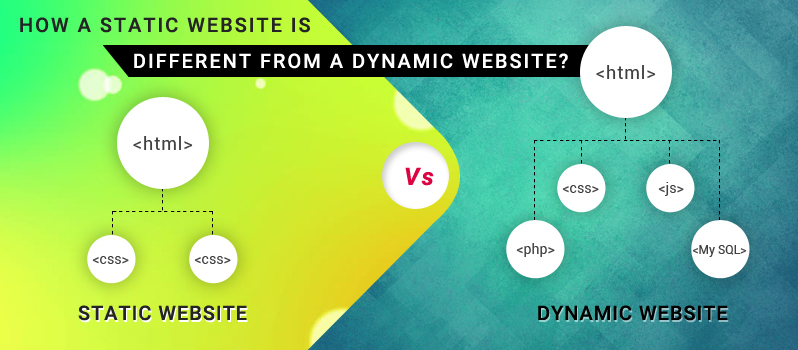
Why use Hugo? or, you might ask Why use a static site generator? To answer this, we need to understand the difference between static and dynamic websites.
Any website that requires processing before sending user HTML, JavaScript, or CSS is dynamic. For example, this could be a server that constructs the HTML, or it makes a request to a database. In the world of a static website, the processing is done beforehand. The browser receives the site in the same form that it is hosted on the server. Some benefits of using static websites are reduced complexity, increased security, easier to version control, and faster to deploy.

Not every website needs to be dynamic. Blogs, documentation, newspaper websites, photo and video galleries, portfolios, company sites are all static in nature. Instead of storing posts, pictures, or videos in a database, the content can be injected in the HTML before we deploy the website. This procedure is called prerendering. The processed HTML can be stored on any file server or content delivery network (CDN).
Hugo and Competitors
Hugo is not the only static site generator. There are many well-known alternatives such as Gatsby, Next, or Jekyll. The first two are built on top of React and give developers the benefits of having a JavaScript ecosystem. The downside is complexity. Jekyll is written in Ruby and is not nearly as complex as its JavaScript competitors. Jekyll has been around for some time and has many great "getting started" resources online.
Prerendering HTML is one of the primary purposes of a static website generator, and this is where Hugo shines. It is extremely fast! The build times for both development and production rarely exceed a few seconds. The speed and simplicity are what make Hugo an excellent choice for building a static website.
Installation
Hugo is written in Go, and ships as a single binary. Below are the commands to install it using the most popular package managers:
Homebrew
 View Website
 View Website
 View Website
brew install hugo
Chocolatey
choco install hugo -confirm
Apt
sudo apt-get install hugo
Some other methods to obtain the binary, including building it from the source. This is described in the Hugo official docs.
Hello World in Hugo
It is finally time to create our first website!
Open your terminal and run the following:
hugo new site hello-world
You should see something similar to Congratulations! Your new Hugo site is created.
You will also see a message telling you how to create a theme and generate content. We will skip all of these suggestions and focus on the generated project's structure.
The hello-world folder looks like the following:
├── archetypes
│   └── default.md
├── config.toml
├── content
├── data
├── layouts
├── static
└── themes
This is a skeleton of a typical Hugo project. In future articles, we will cover each section in more detail. For now, let's move on and start developing.
Go back to the terminal and run:
hugo server -p 3000
It will start a development server on port 3000. If you don't provide a p flag, the server will start on the port 1313. You might see a few warnings in your terminal. It is safe to ignore them for the time being.
Now, the server is running; however, if you open your browser to http://localhost:3000 you won't see anything but a blank page.
Don't panic! Hugo is one of the frameworks that doesn't make any assumptions about your project. Therefore, you get nothing out of the box.
Let's create a new file at layouts/index.html, with the following content:
<!DOCTYPE html>
<html lang="en">
  <head>
    <meta charset="utf-8">
    <title>{{ .Title }}</title>
    <link rel="stylesheet" href="style.css">
    <script src="script.js"></script>
  </head>
  <body>
    <h3>Hello World</h3>
  </body>
</html>
The server should automatically pick up the newly created file. Navigate back to your browser, and you should see the following page:

And that's how simple it is to create a static website using Hugo.
That's all for now! Next time we'll get back to the Hugo project's structure and talk more about each of the generated directories. In this series, we'll also cover templates, content management, and many other topics. Stay tuned!!


Comments (0)