Social Authentication Integration
Introduction
Auth supports out-of-the-box social authentication. This will allows your users to login/register using their social media accounts.
Included Providers
The following providers are included by default and ready-to-use (after adding credentials):
- GitHub
- GitLab
- Bitbucket
- Slack
These are all part of Laravel Socialite. If you want to use additional providers that are not listed above, you'll need to install another package called Socialite Providers.
Socialite Providers Package
Socialite Providers is a third-party package available at https://socialiteproviders.com/. This package includes a ton of providers. You will need to install a package for each provider you want to include. For instance, if you want to use the Apple Service provider, you will need to install the package here.
After installing the socialite providers you want to use, you can then move on to the rest of the setup.
Setting Up Social Providers
To setup a specific social auth provider, you will need to retrieve two keys for each. The CLIENT_ID and the CLIENT_SECRET. These credentials can be retrieved from each social network and each network has a different process for retrieving these keys. We will not go into detail on how to retrieve these keys; however, you can do a search for Setting up oAuth with network and you should find steps that will help you retrieve each of these.
Add keys to your .env
When you have your CLIENT_ID and CLIENT_SECRET for each social provider, you will need to open your .env file and add those credentials, like so:
GOOGLE_CLIENT_ID=your-google-client-id
GOOGLE_CLIENT_SECRET=your-google-client-secret

FACEBOOK_CLIENT_ID=your-facebook-client-id
FACEBOOK_CLIENT_SECRET=your-facebook-client-secret
The example above is what it would look like to add your social authentication with GOOGLE and FACEBOOK.
Visual Indicators
In the setup screen, you will see a list of social providers with key icons next to them:
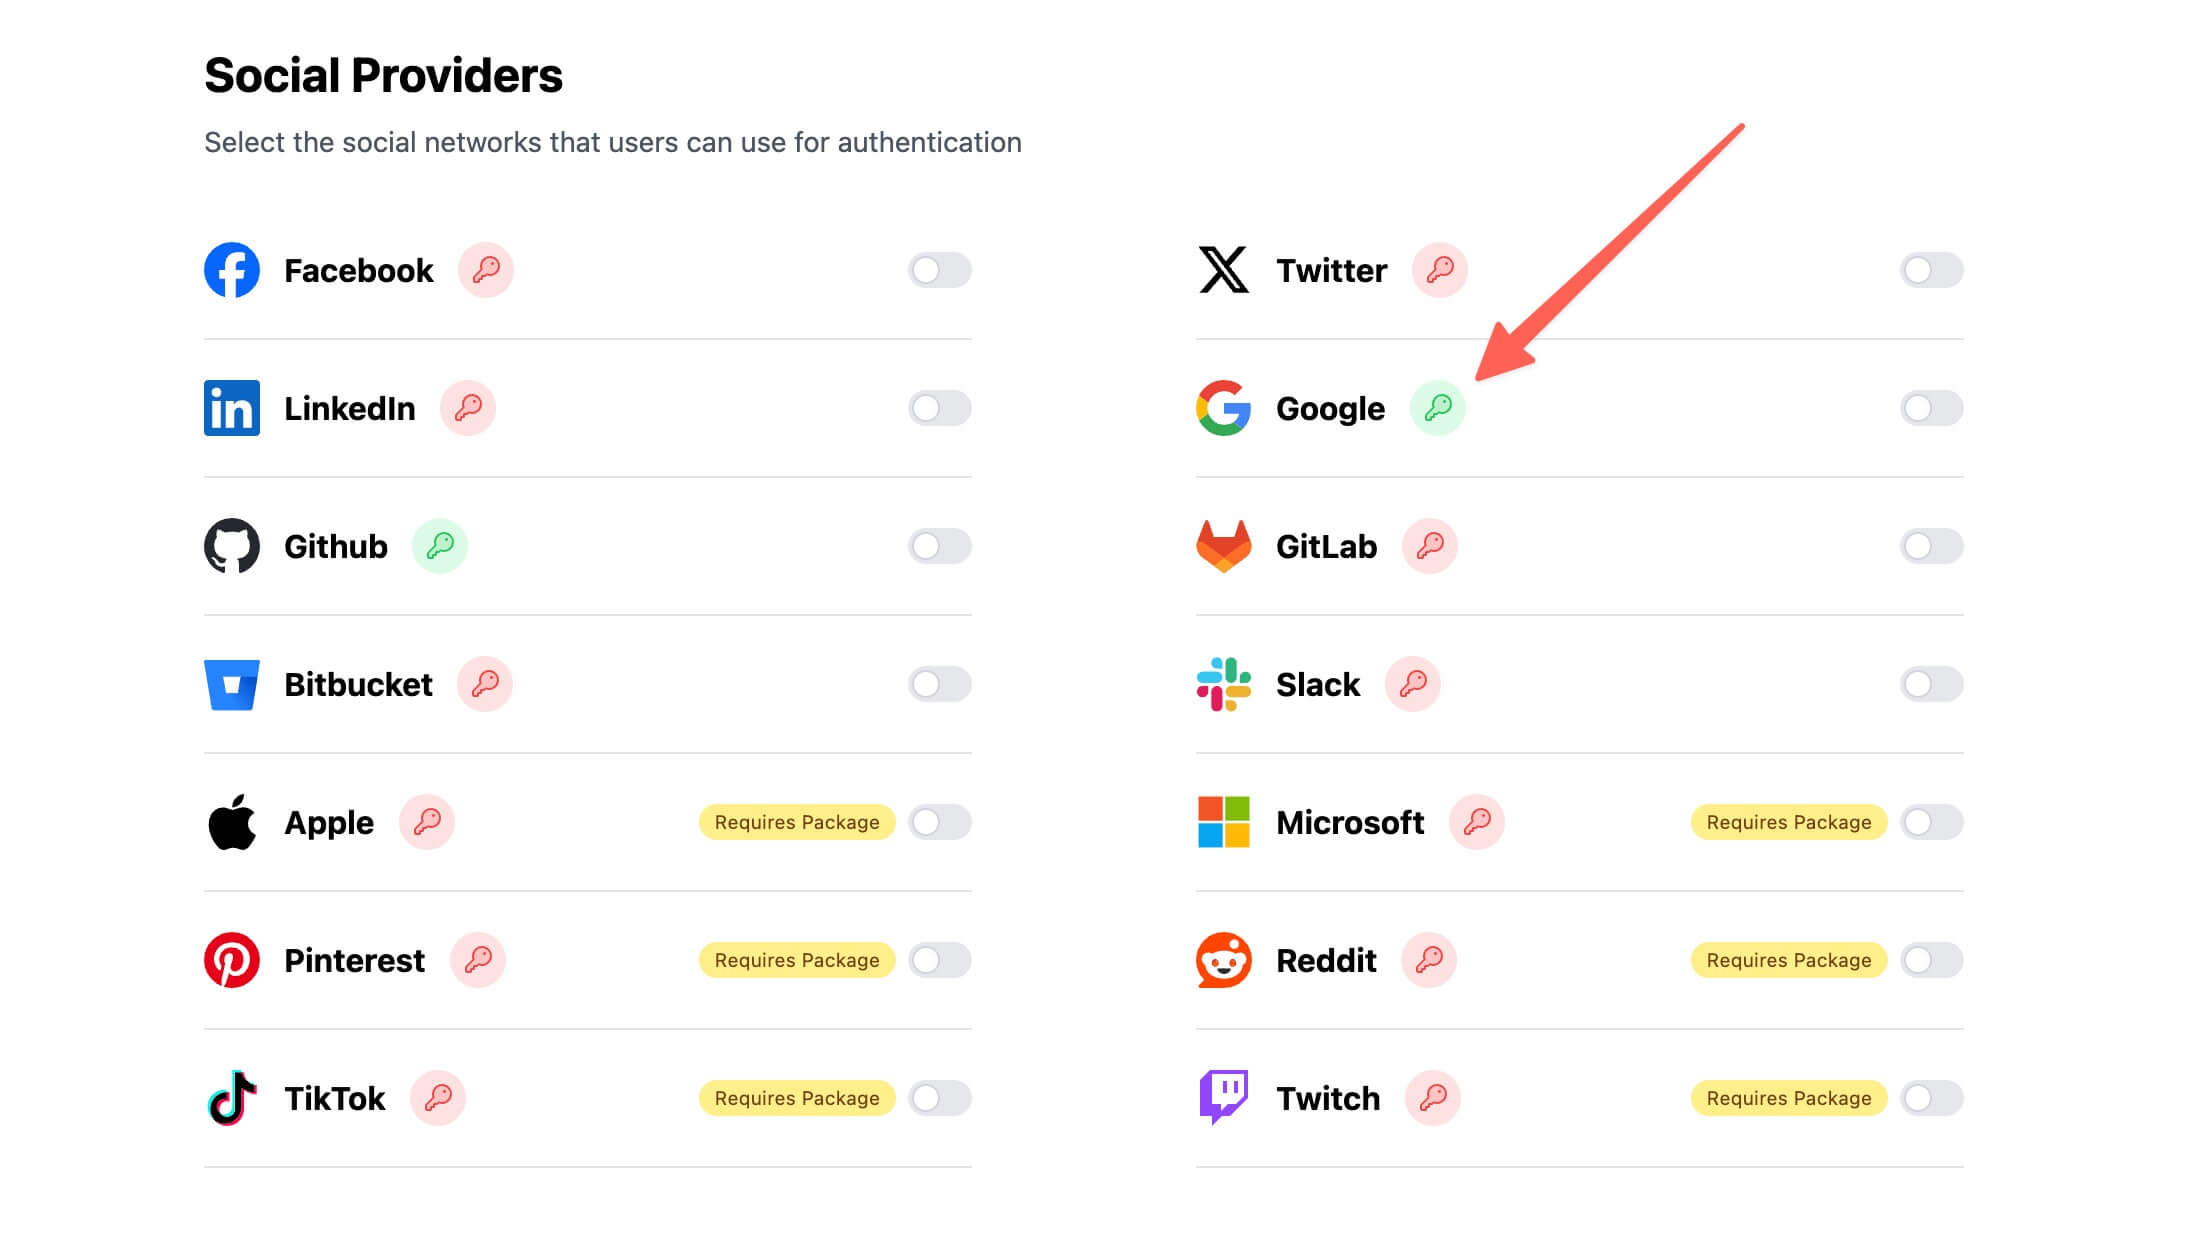
- Green Key Icon: Indicates that the
CLIENT_IDandCLIENT_SECREThave been added. - Red Key Icon: Indicates that the
CLIENT_IDandCLIENT_SECRETare missing.
Testing Out Social Authentication
After you add the CLIENT_ID and CLIENT_SECRET for the social providers you'll then be able to toggle that social provider and see it on the Login/Register pages.
If everything is setup correctly, you'll be able to click the Social Provider button and be authenticated with that user/network.
Remember that everything needs to be setup correctly. In the social network setup page you'll need to make sure your local URL's are included correctly, even and HTTPS/HTTP mis-match can break the social authentication functionality.
Show Social Providers on Login:
Inside of your authentication setup page, you will see an option titled: Login Show Social Providers. If this is toggled off, the social provider buttons will not be visible by default. If a user then enters their email and it's associated with a social network, that network button will show up in place of the Email/Identifer input.