Subscription Plans
Subscription plans are an important part of many SaaS applications. With subscription plans, you can offer your customers different levels of service, each with its own set of features, access, and pricing. Offering subscription plans in your SaaS allows you to build a revenue model that appeals to a broad audience.
Let's cover how to utilize subscription plans in Wave.
When a user purchases a subscription, they are subscribing to a specific plan. Each plan is linked to a role, so when a user subscribes, they automatically receive the permissions associated with that role.
You may add, edit, or delete any of the current plans that are available by default.
Current Plans
When you install Wave you will see there are three default plans:
- Basic
- Premium
- Pro
You can feel free to edit or delete any of these plans.
Deleting Plans
To delete plans you can visit /admin/plans and click Delete:
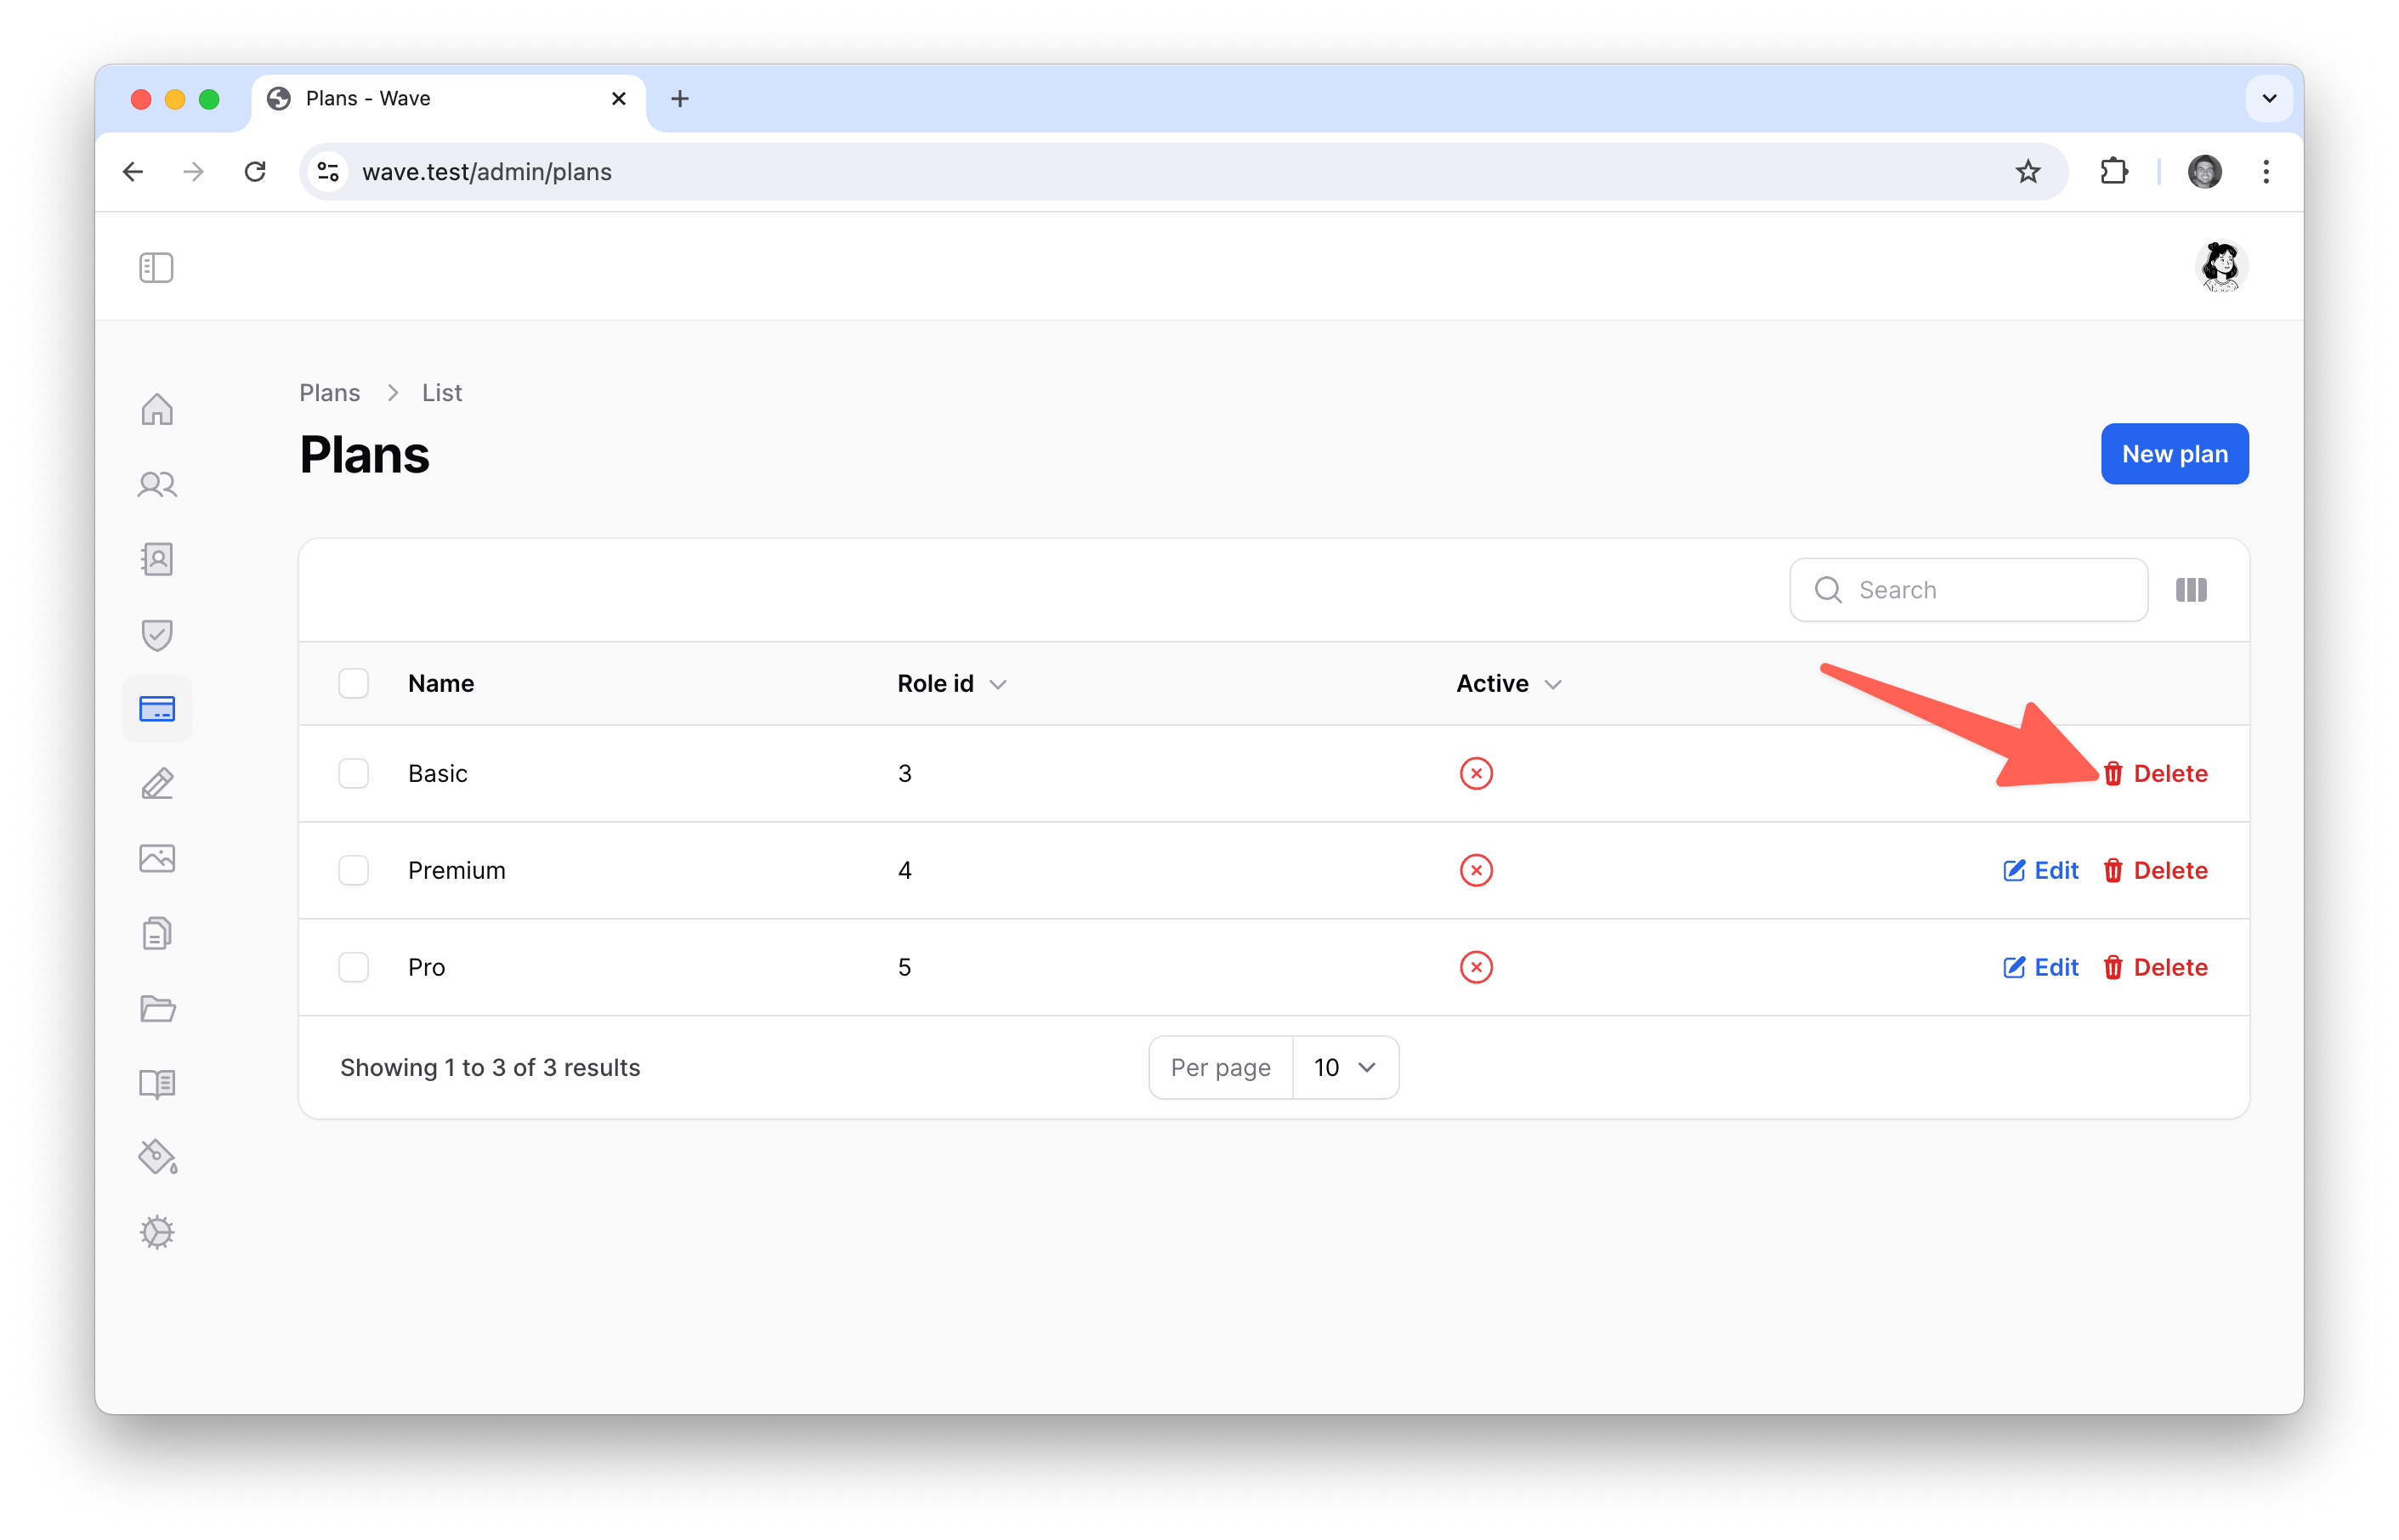
Since our plan is associated with a role, we will also delete the associated role at /admin/roles

We will cover more about User Roles in the next section.
Creating Plans
Let’s create a new plan called starter. Before doing so, I’ll first create a new role, which will be assigned to users when they subscribe to this plan. The role will also be named starter, but you can choose any name you would like. To create a new role, click on the New role button.
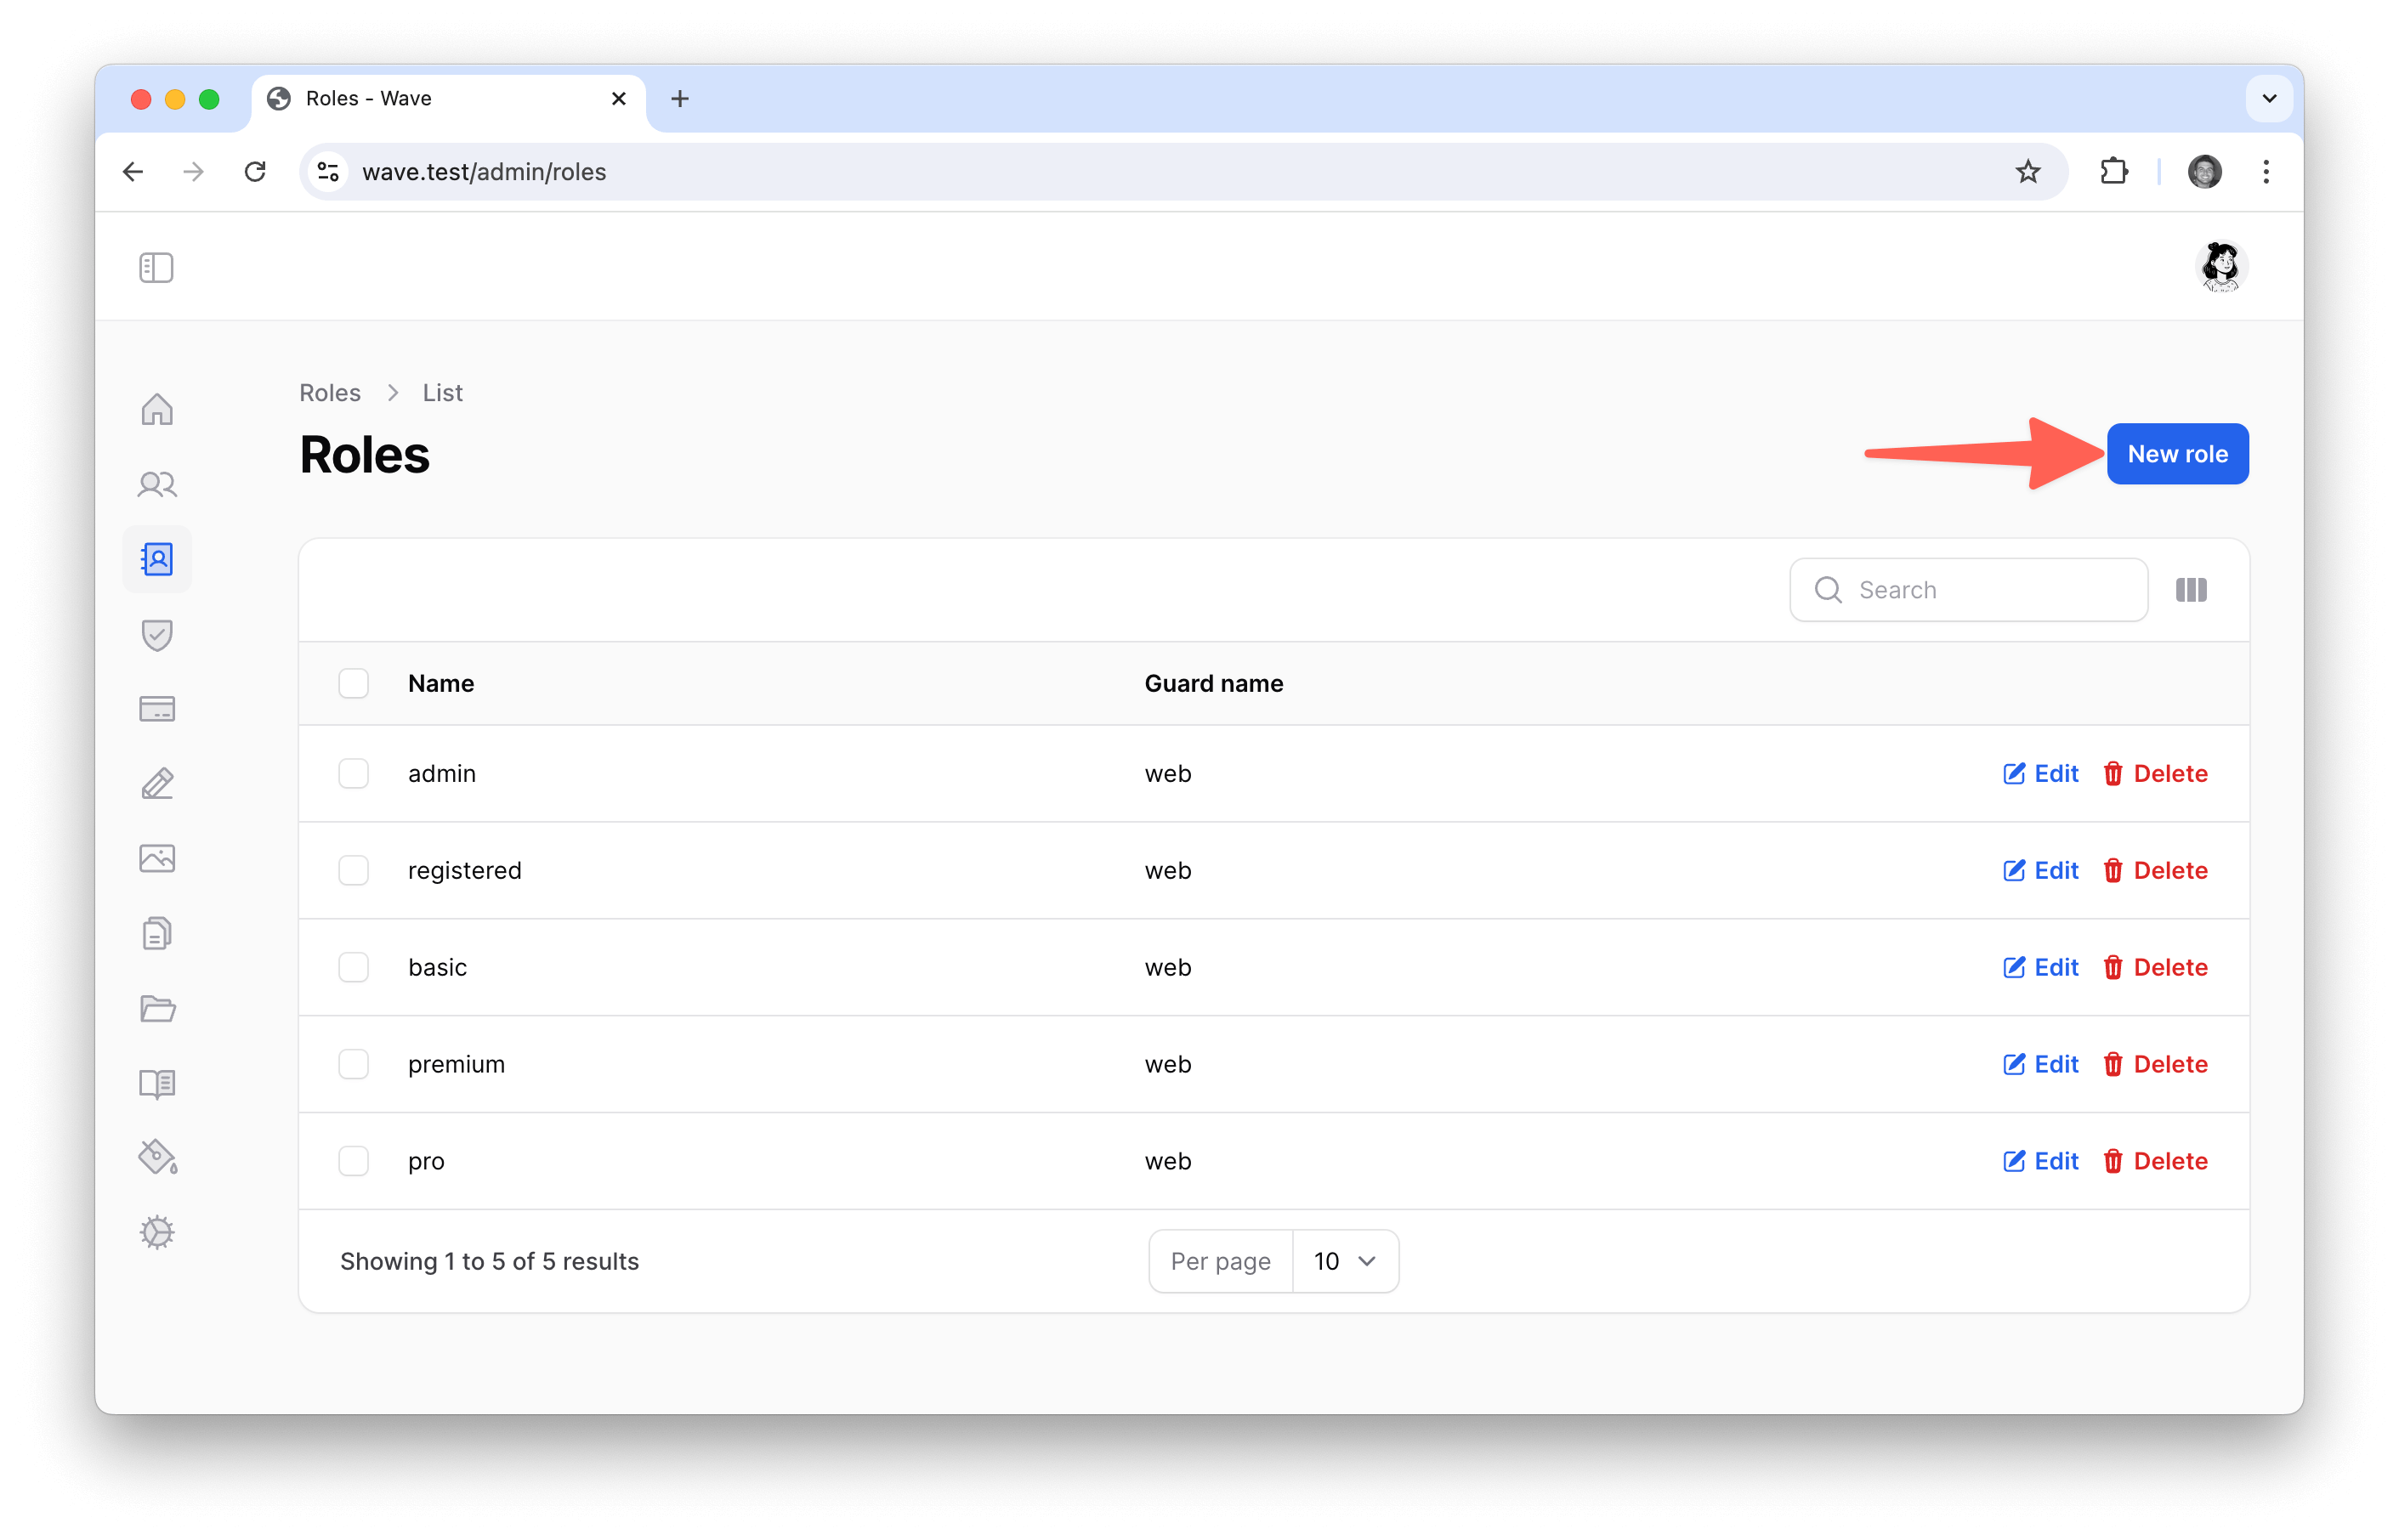
On this page you can add a new role named starter, with the guard as web, and a simple description.
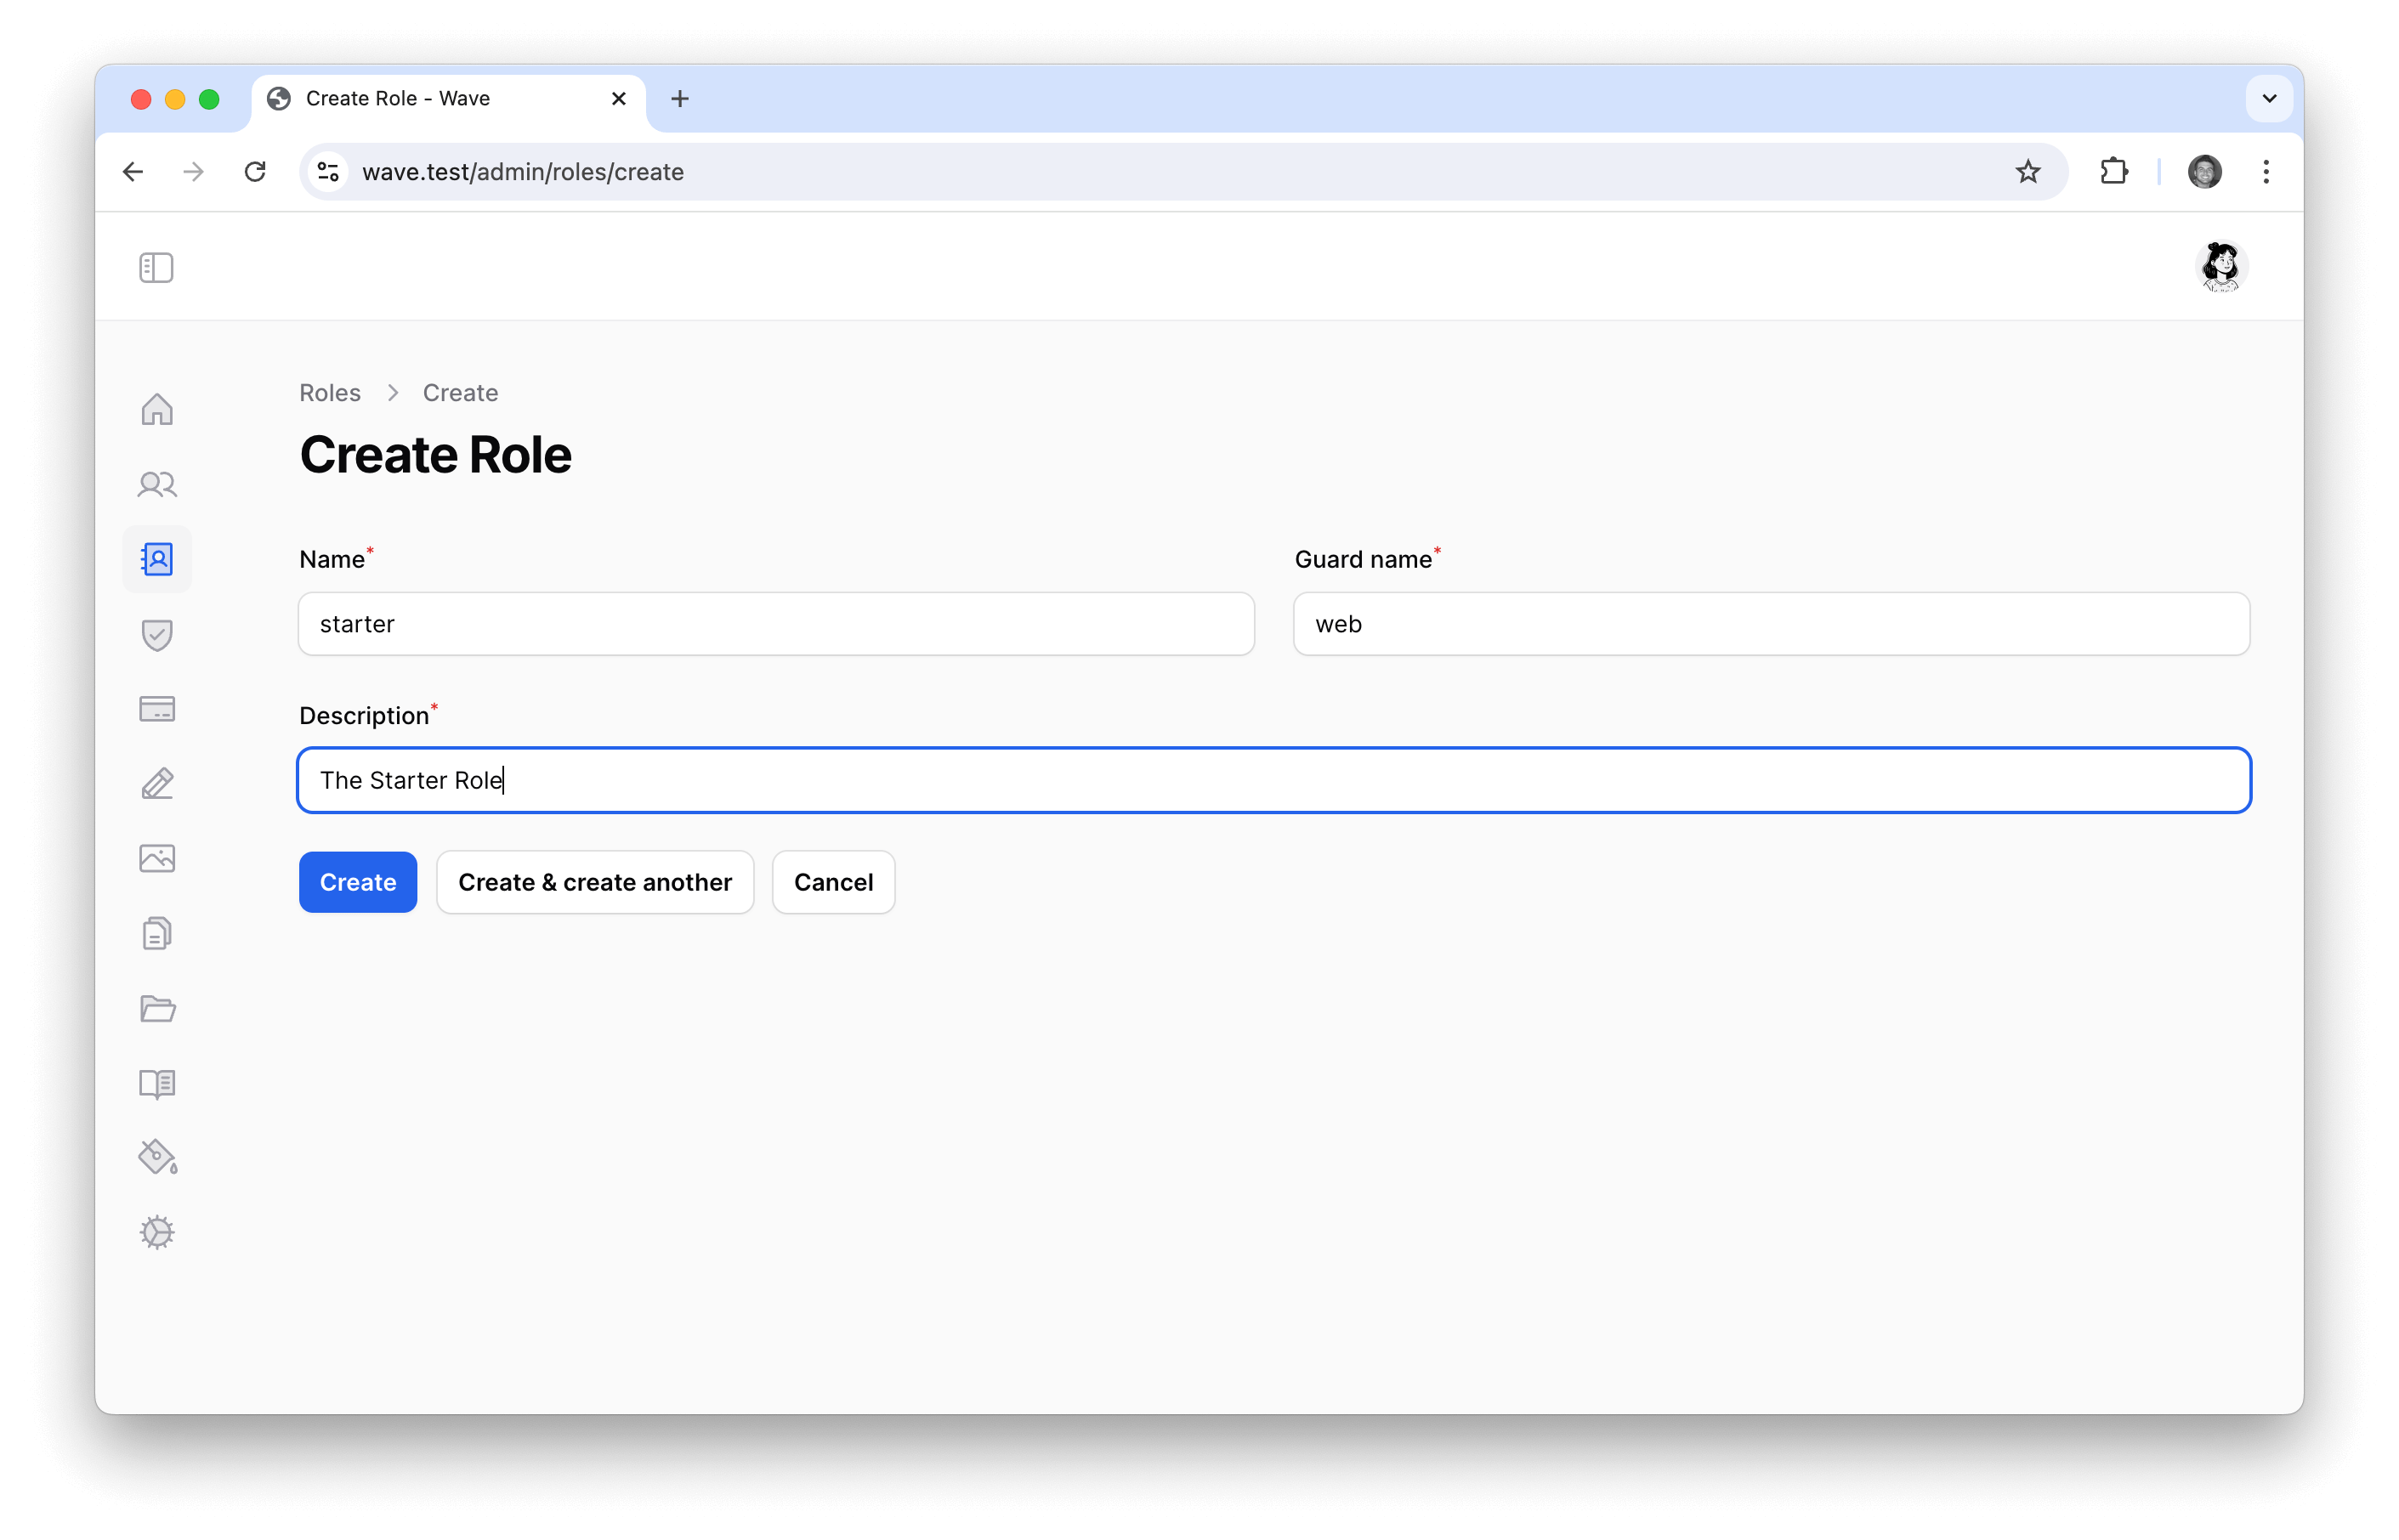
Now that the role is created we can create a new plan.
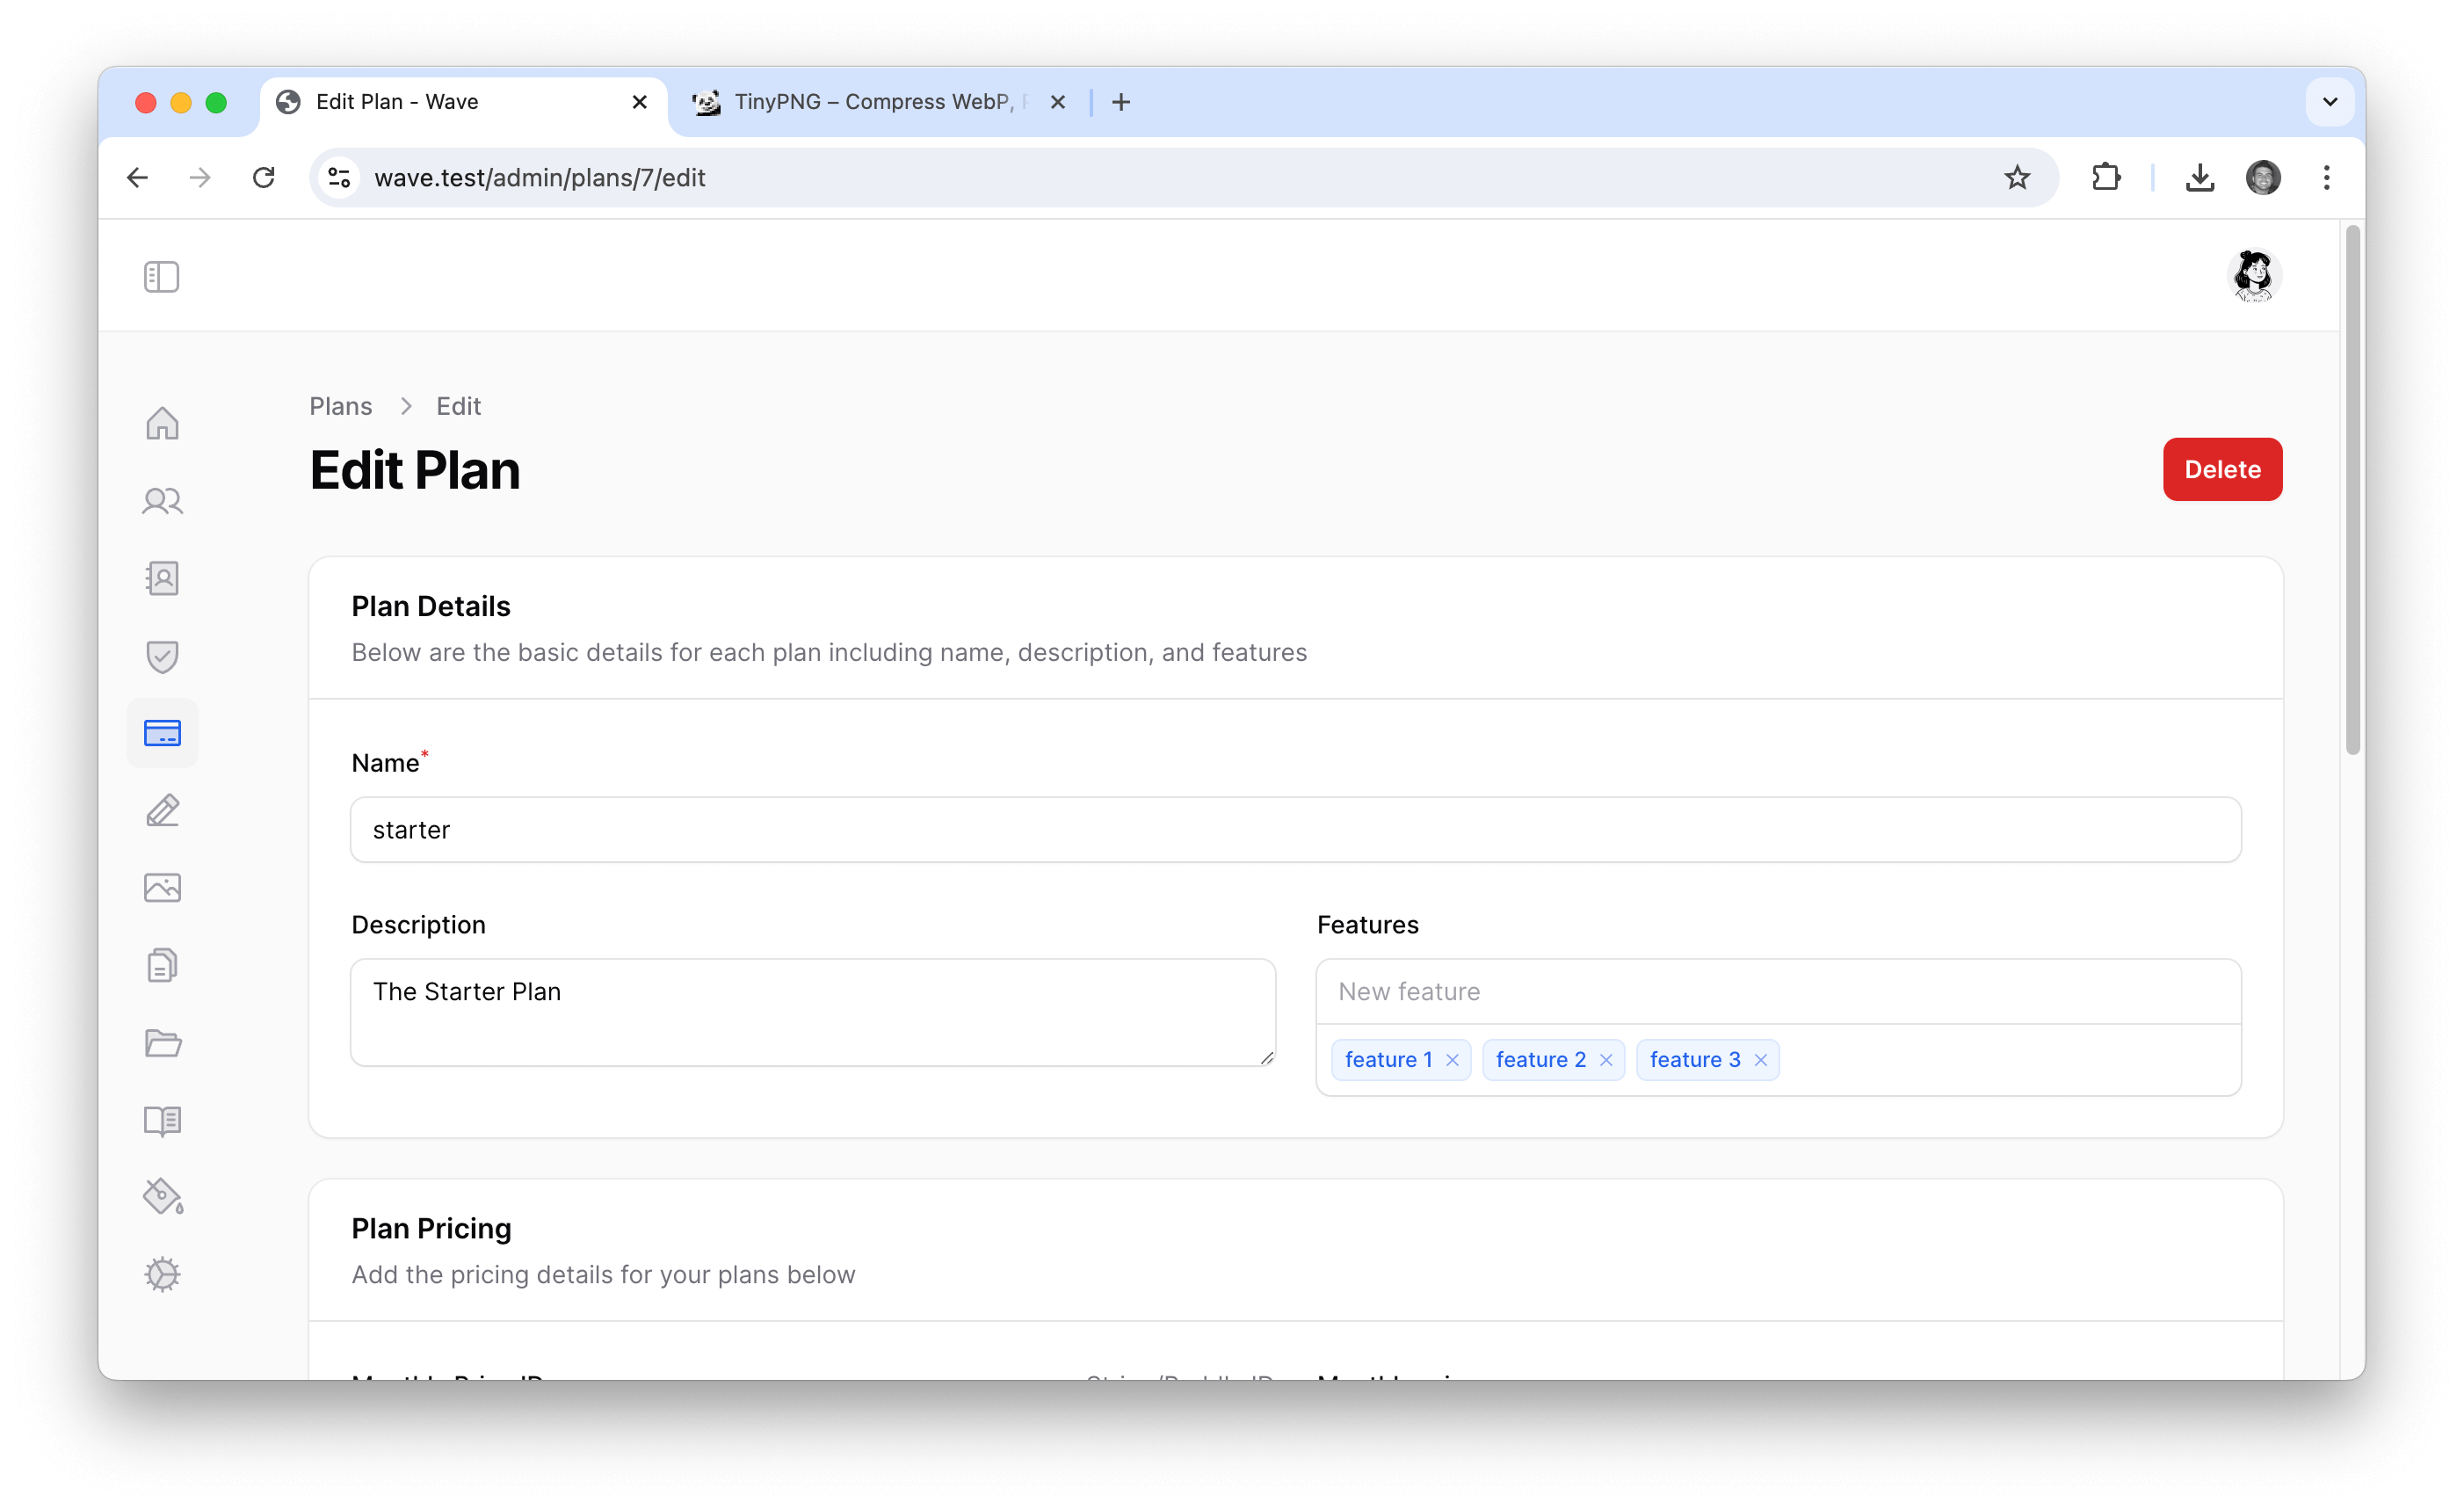
It's best to keep the names of the plans and the roles lowercase. This way when you reference it in code, you can keep it consistent.
Next, you can specify if this plan has a Monthly, Yearly, or Lifetime plan by adding the price (in dollars) and the Price ID. We'll cover how to get the Price ID from Stripe or Paddle later. For now, you can leave this blank.
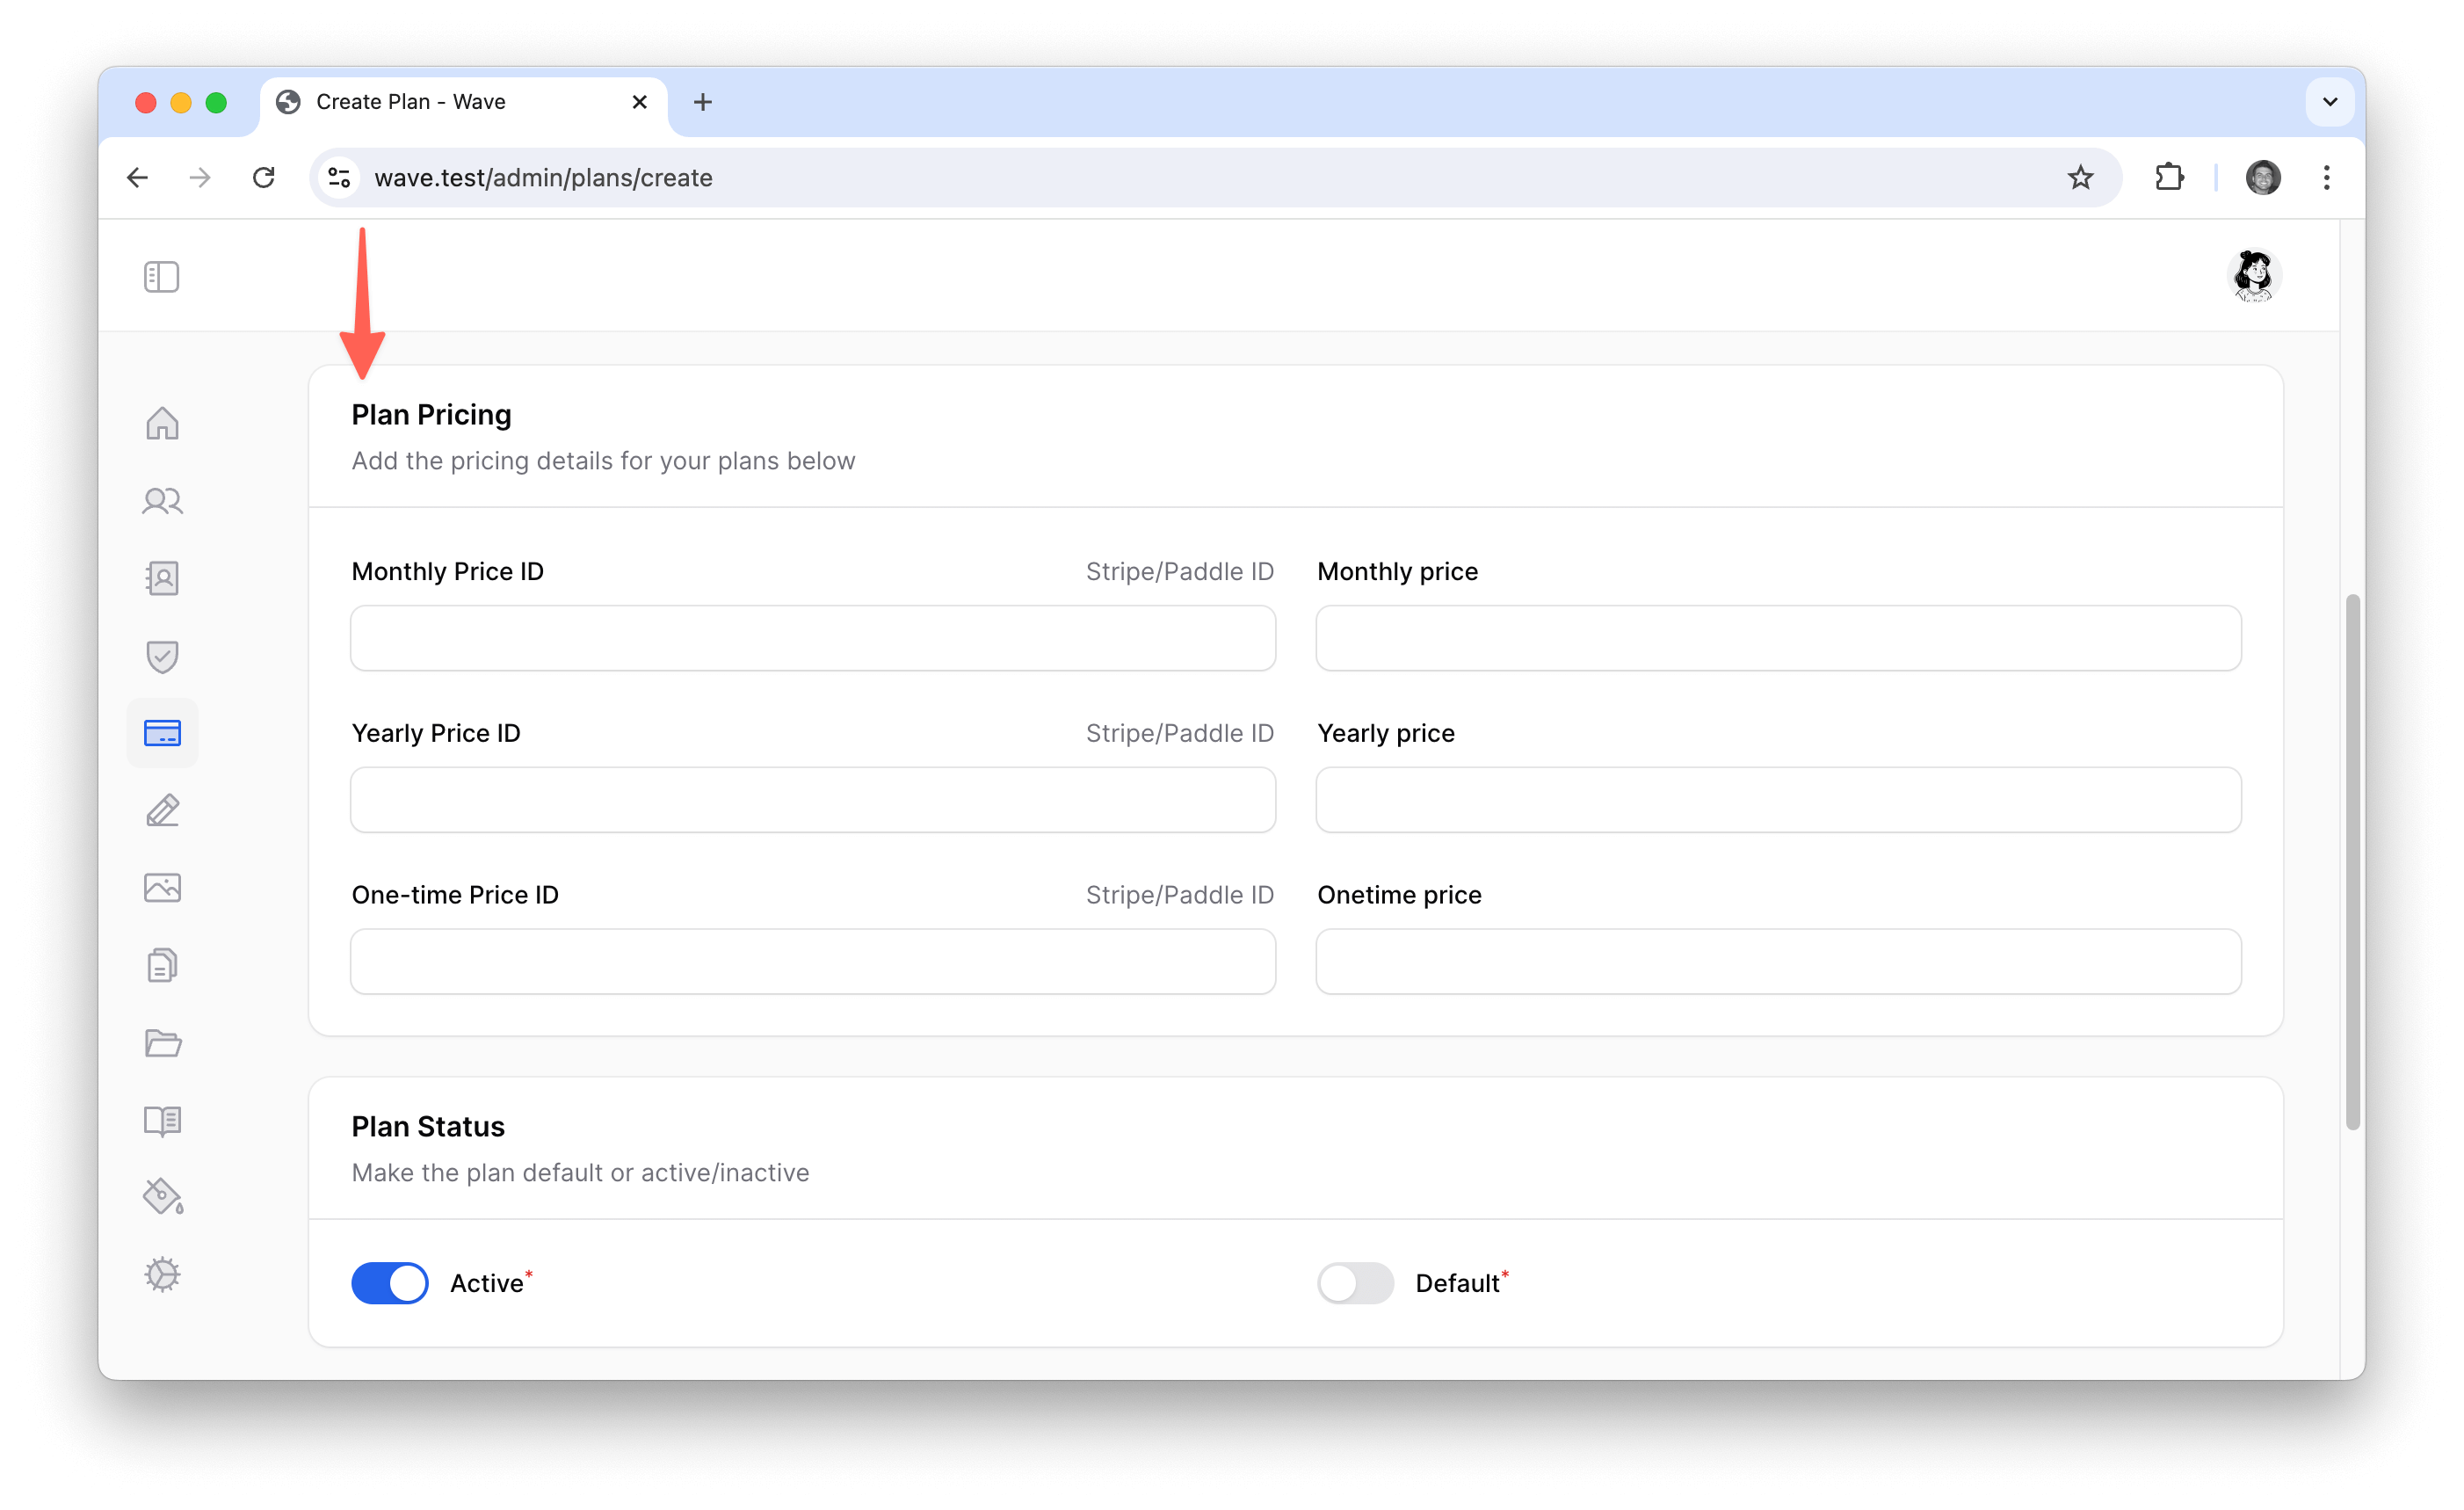
Next, you will associate the starter role with this new plan and click Create.
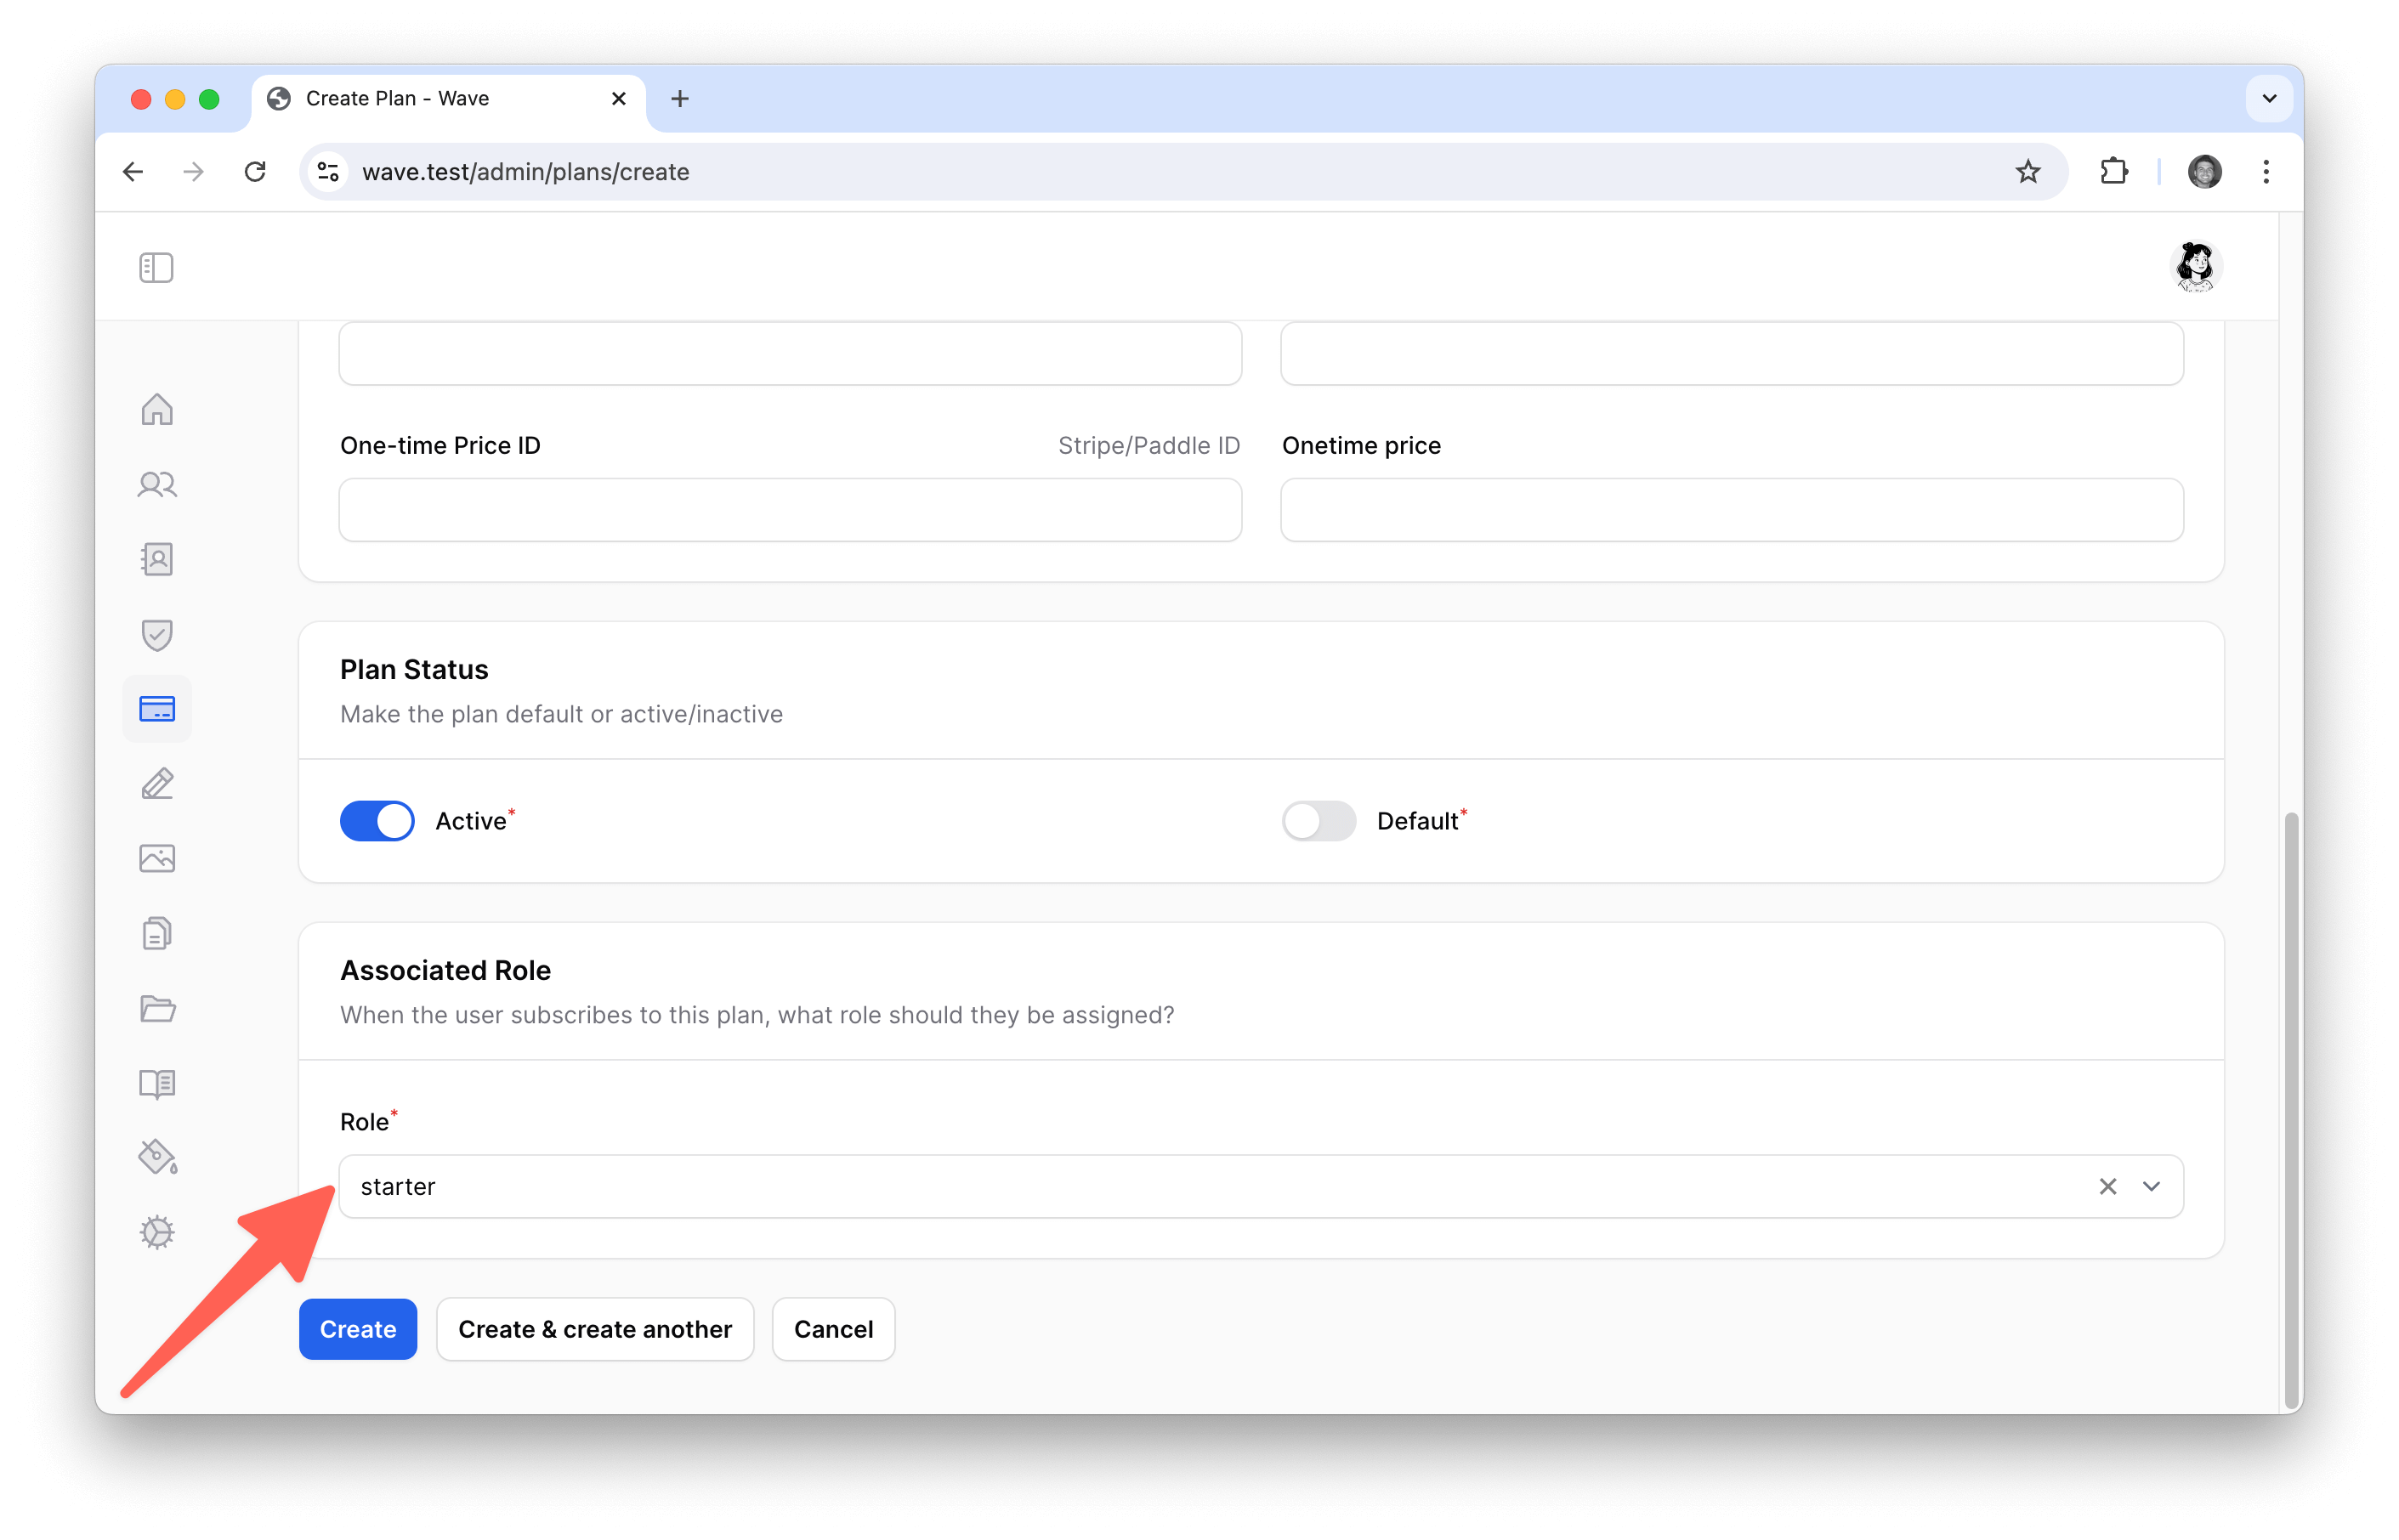
That's it. You've now created a custom Plan with an associated Role.
Getting Your Price ID from Stripe
From your Stripe dashboard click on the Product catalog menu item on the left. From here you can create a new product. Inside this product, you'll want to create a new price for this product/plan. You can define the Monthly, Yearly, or Lifetime price.
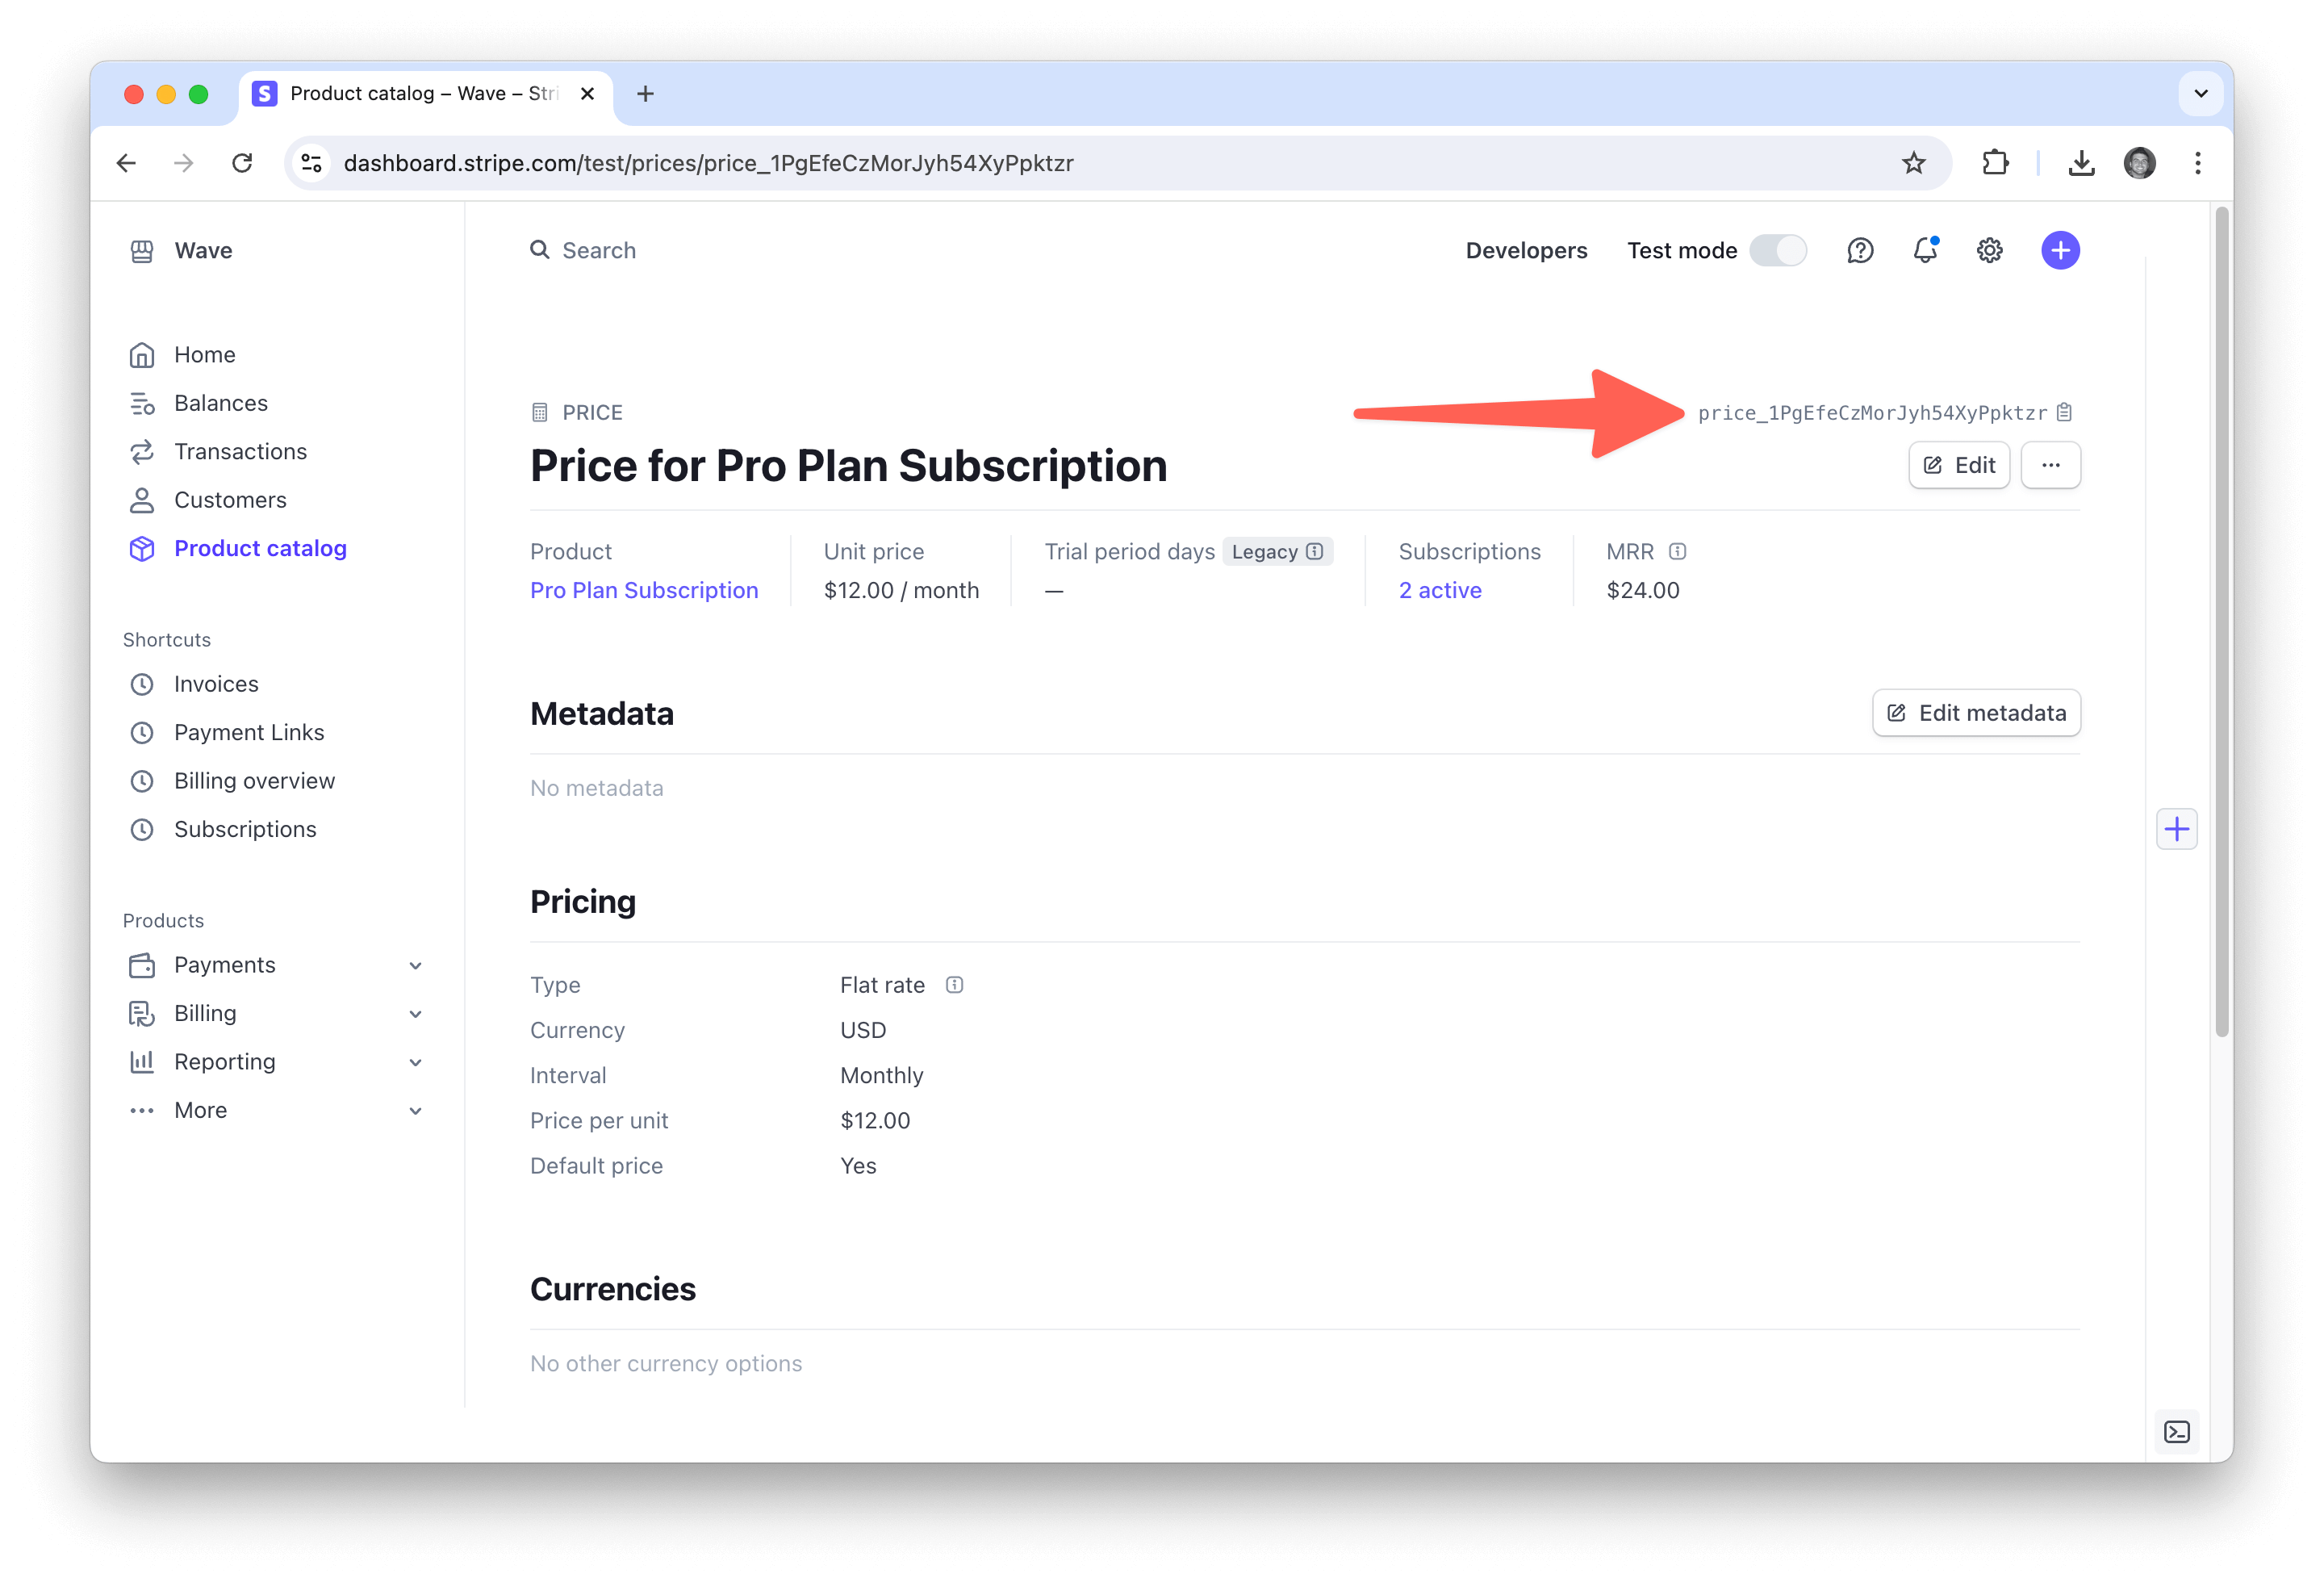
When you click on a specific price, you will see the Price Id. This is the ID that you will copy and paste into the Wave admin. It will be added to the PriceID field for each Plan.
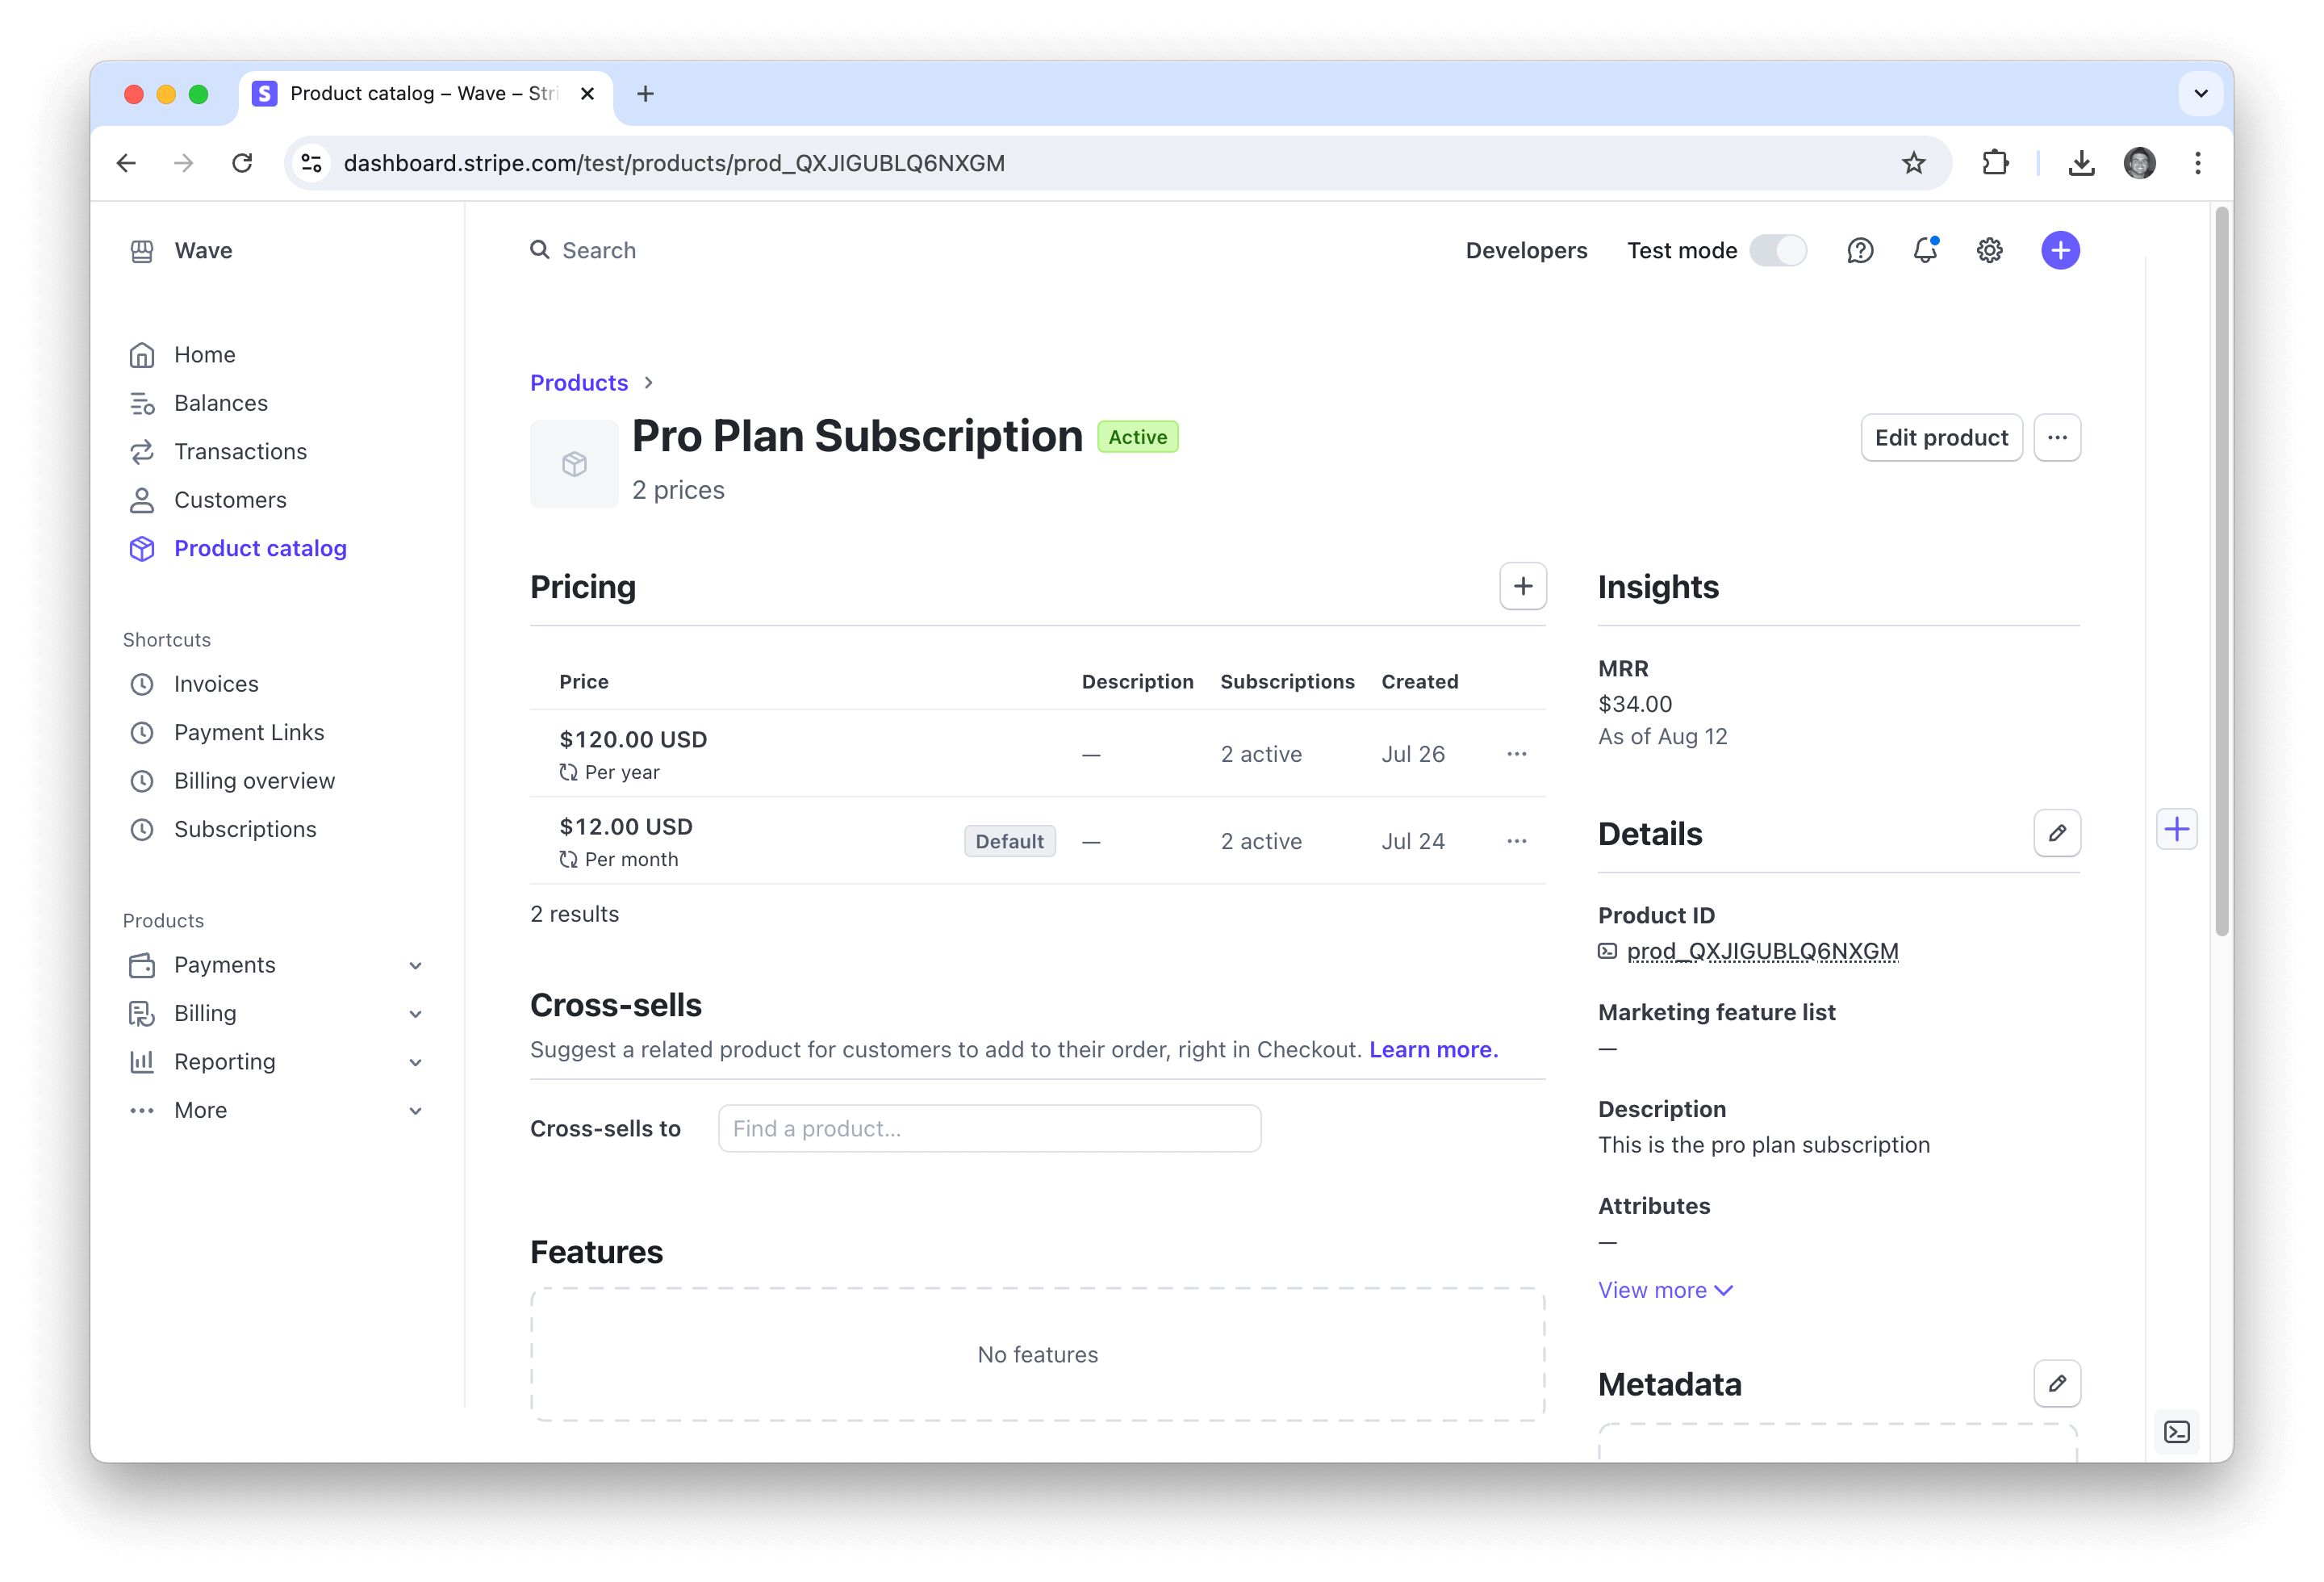
You can organize your plans in Stripe in two ways.
- Create a multiple products for each plan, where each one has the monthly, yearly, lifetime price inside the product.
- Create a single product and add all the prices inside that product
Either way will work, ist just depends on how you want to organize your products/plans.
Getting Your Price ID from Paddle
Next, if you are using Paddle, you will want to create a new Product in your Catalog and add a Price for each plan.
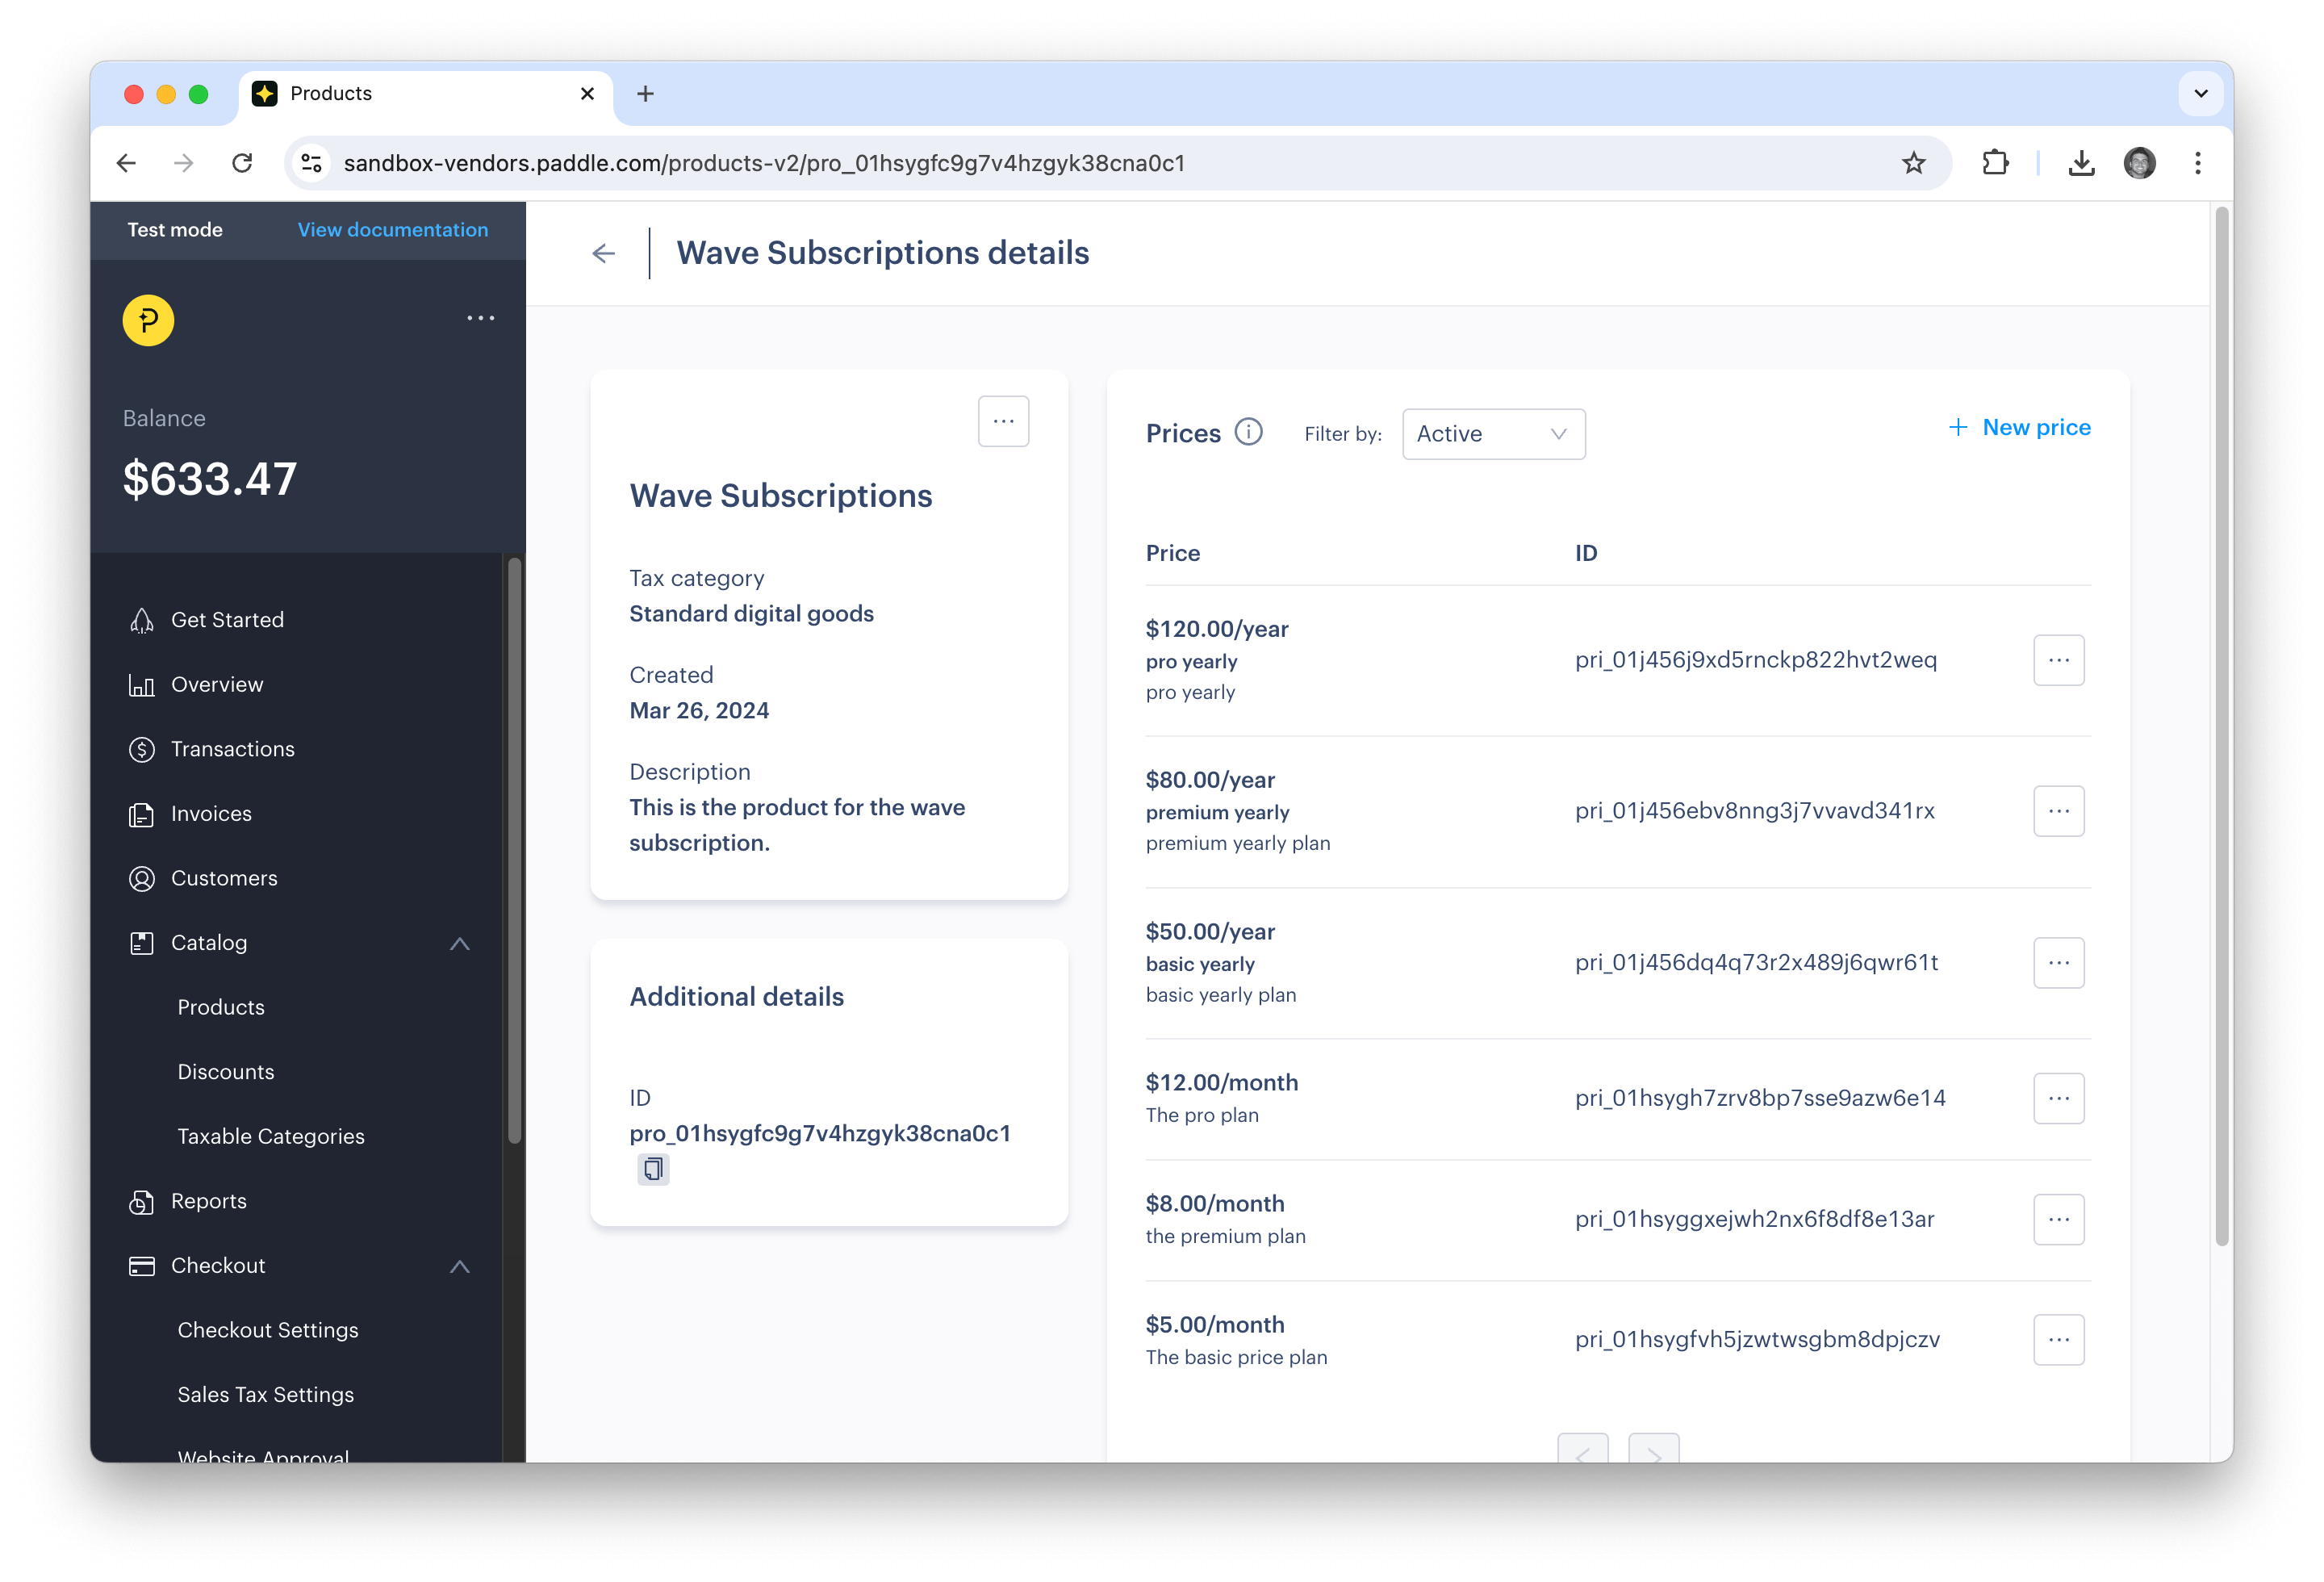
You'll see the price ID next to each of the prices pre_0.... This is the ID that you will copy and paste into the Wave admin. It should be added to the PriceID field for the specific Plan.
Next, we'll talk about User Roles and Permissions in a little more depth. Remember every Plan is associated with a User Role, and this is how we will determine what a user has access to in your application.