
After a few years as an employee, I decided to go on my own to be able to explore more, get out of my comfort zone and have more time for my side projects ( I’ll tell you later why this is bolded).
As a freelancer, you’ll find all kinds of interesting projects, from the most stupid ideas to the ones that will challenge you in a good way.
Fortunately, my first project as a freelance software developer was from the second category. It required building an Android library that would connect to a proxy service written in Go. Basically the library was a bridge between the Go code and Android applications that would use that library.
Well, at first, I wasn’t so happy about this. After a few years working only with React, React-Native, Elixir, PHP, NodeJs, and Angular, this was something new for me. But, that’s why I decided to become a freelancer and I took this challenge.
When you struggle with a problem, that’s when you understand it. Elon Musk
In this article, we’ll build a Go file as an Android library (.aar) and import it in an Android application.
To accomplish the project requirements, It was necessary to use Gomobile which is a tool for building and running mobile apps written in Go. Adding it is very simple:
go get golang.org/x/mobile/cmd/gomobile
After running the command from above, test if everything is ok with the following command:
gomobile
You should be able to see the following output:
 View Website
 View Website
 View Website
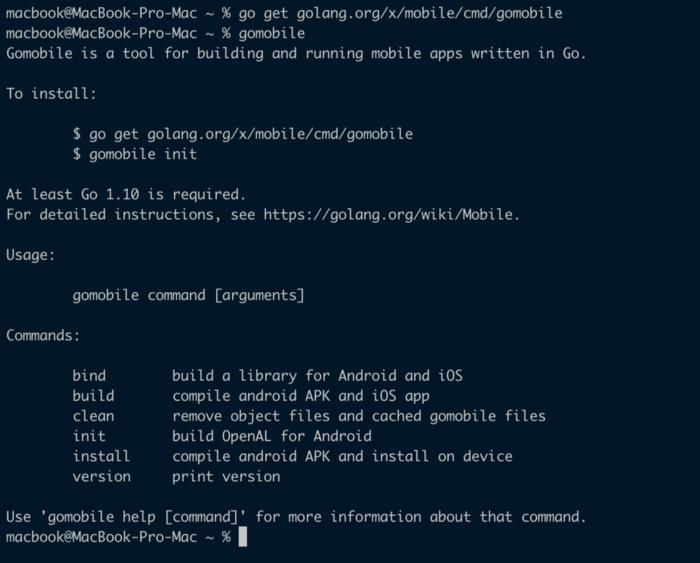
Great, the first step is accomplished. You can see that gomobile has many useful commands, but we will use just bind command.
Now, let’s write some Go code.
Create a new folder in your Go workspace. I am using github.com/andreirat as my base path. You can create a new folder from the command line:
mkdir -p $GOPATH/src/github.com/your_github_username/hello
Let’s create a file inside that folder:
nano $GOPATH/src/github.com/your_github_username/hello/hello.go
Inside the hello.go file, add the following code:
package hello

import "fmt"

func SayHello() string {
   return "Hello!"
};

func SayHi(name string) string {
   return fmt.Sprintf("Hi, %s!", name)
}
Now, let’s create an Android application that will use our Go file. For this, we need Android Studio.
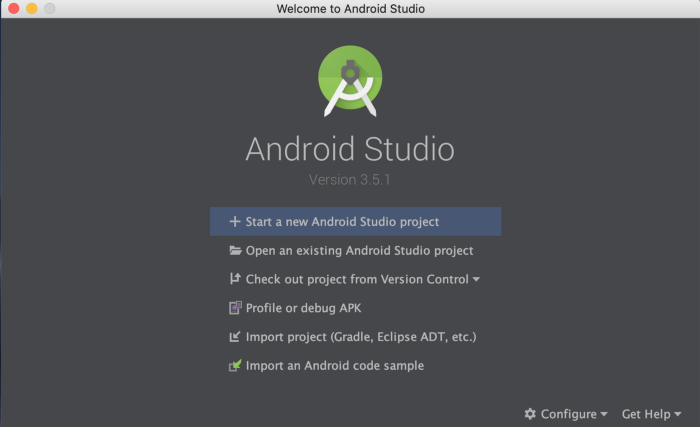
Click on Start a new Android Studio project
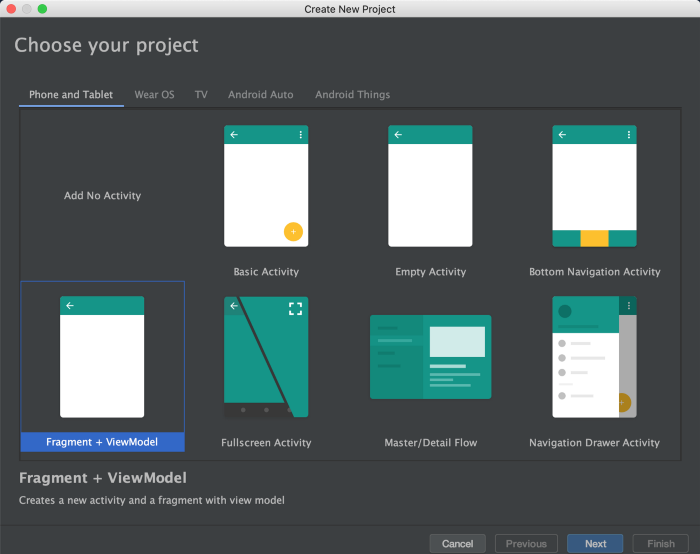
Select Fragment + ViewModel. You can choose any other activity, it works the same.
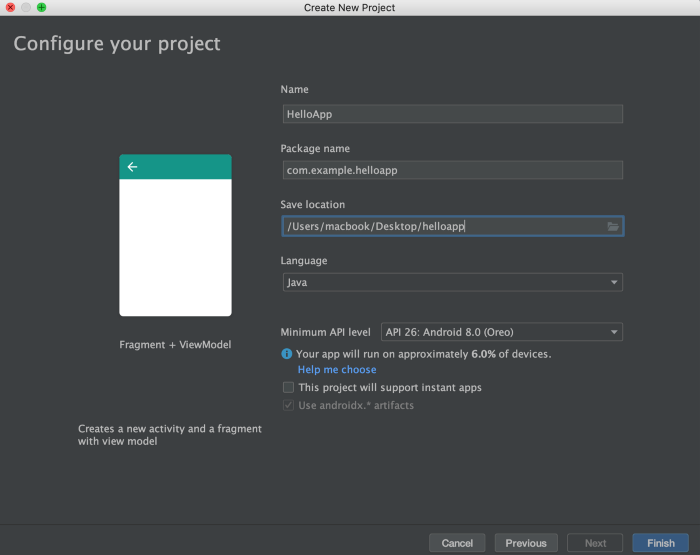
Give it a name and select the language. I am doing this in Java, but it works the same with Kotlin.
Now that the Android application is created, the next step is to use gomobile bind command to create the .aar file.
Open a terminal, navigate to your Android application root folder and run the following command, this will create hello.aar file inside /app/libs/.
gomobile bind -o app/libs/hello.aar github.com/your_github_username/hello
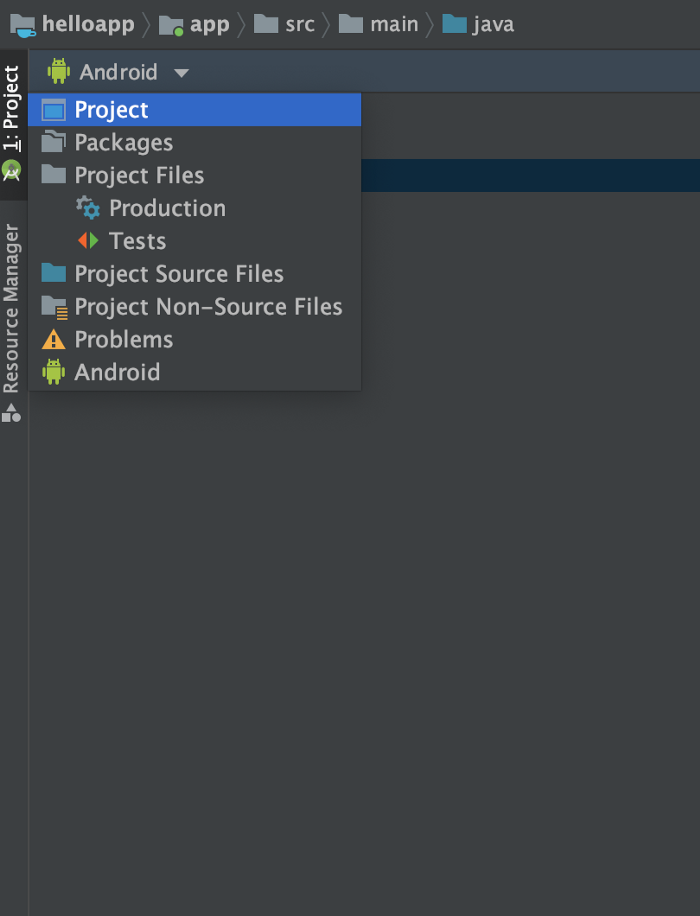
In Android Studio, switch to project view:
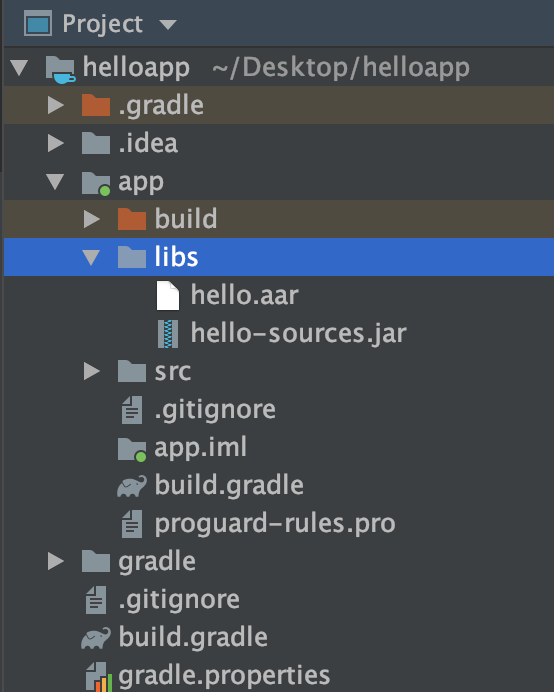
Navigate to /app/libs and there you will find the Android app library recently created with gomobile.
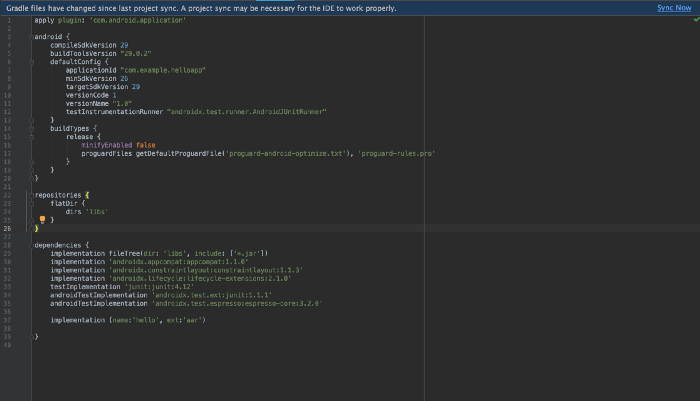
Now that the file it’s created, it needs to be imported. Open the file /app/build.gradle and add the following line to your dependencies:
implementation (name:'hello', ext:'aar')
Inside the same file, add the following code. Android Studio needs to know where to find the file, in our case inside the /libs folder.
repositories {
    flatDir {
        dirs 'libs'
    }
}
Your gradle.build file should look something like this.
 Click on
 Sync Now and the library should be imported and ready to use. The next step is to call the methods written in Go.
Open MainFragment.java and change the function onCreateView.
@Nullable
@Override
public View onCreateView(@NonNull LayoutInflater inflater, @Nullable ViewGroup container,
                         @Nullable Bundle savedInstanceState) {
    View root = inflater.inflate(R.layout.main_fragment, container, false);
    final TextView textView = root.findViewById(R.id.main_text);
    mViewModel = ViewModelProviders.of(this).get(MainViewModel.class);

    mViewModel.getText().observe(this, new Observer<String>() {
        @Override
        public void onChanged(@Nullable String s) {
            textView.setText(s);
        }
    });
    return root;
}
Next, open MainViewModel.java modify the code as follows:
package com.example.helloapp.ui.main;

import androidx.lifecycle.ViewModel;
import androidx.lifecycle.LiveData;
import androidx.lifecycle.MutableLiveData;

// Import the library
import hello.Hello;

public class MainViewModel extends ViewModel {

    private MutableLiveData<String> mText;

    public MainViewModel() {
        mText = new MutableLiveData<>();

        // Call SayHello function from Go file.
        String message = Hello.sayHello();

        // Call SayHi function from Go file.
        String hiMessage = Hello.sayHi("Andrei");

        // Return hiMessage or message to try both methods.
        mText.setValue(hiMessage);
    }

    public LiveData<String> getText() {
        return mText;
    }
}
Run the app. Our message should be displayed on the screen.
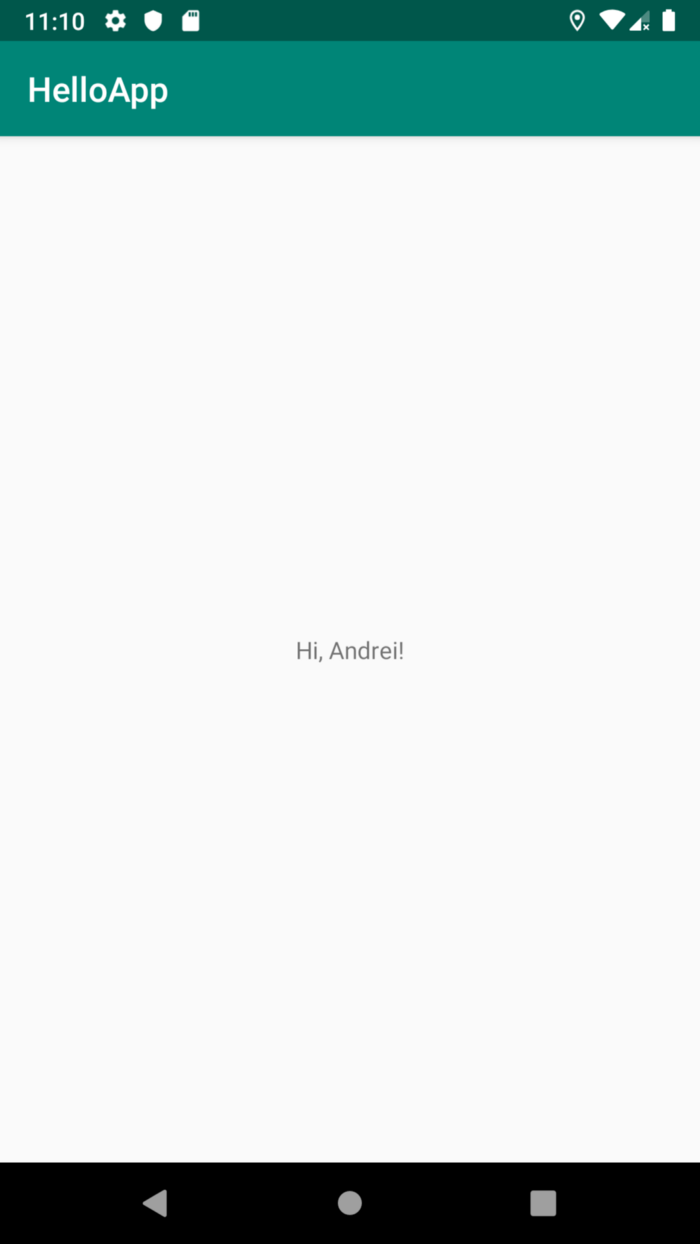 Awesome, now we have an Android app that prints a message from Go. This is just a basic example that can be developed more. Feel free to explore.
Remember the bolded phrase from the beginning of this article? Well, it’s bolded because exploring more and getting out of the comfort zone is required to help you, not only in your personal development, but also in your career, especially if you are a freelancer. Also, it will help you bring more clients.
Explore more, find what you like and always return something to the community.
If you have any questions or just wanna chat, you can find me on LinkedIn or Instagram.
Comments (0)