


This is a step by step guide on how to create a new droplet via your Digital Ocean control panel, manually install and configure your LAMP stack, deploy Laravel and then install Voyager.
We will go though the following steps:
- Create a droplet
- SSH to the droplet
- Install Apache, PHP and MySQL
- Install Composer
- Install Laravel
- Configure Apache
- Configure MySQL
- Install Voyager
At the end we would have a fully functional Laravel installation.
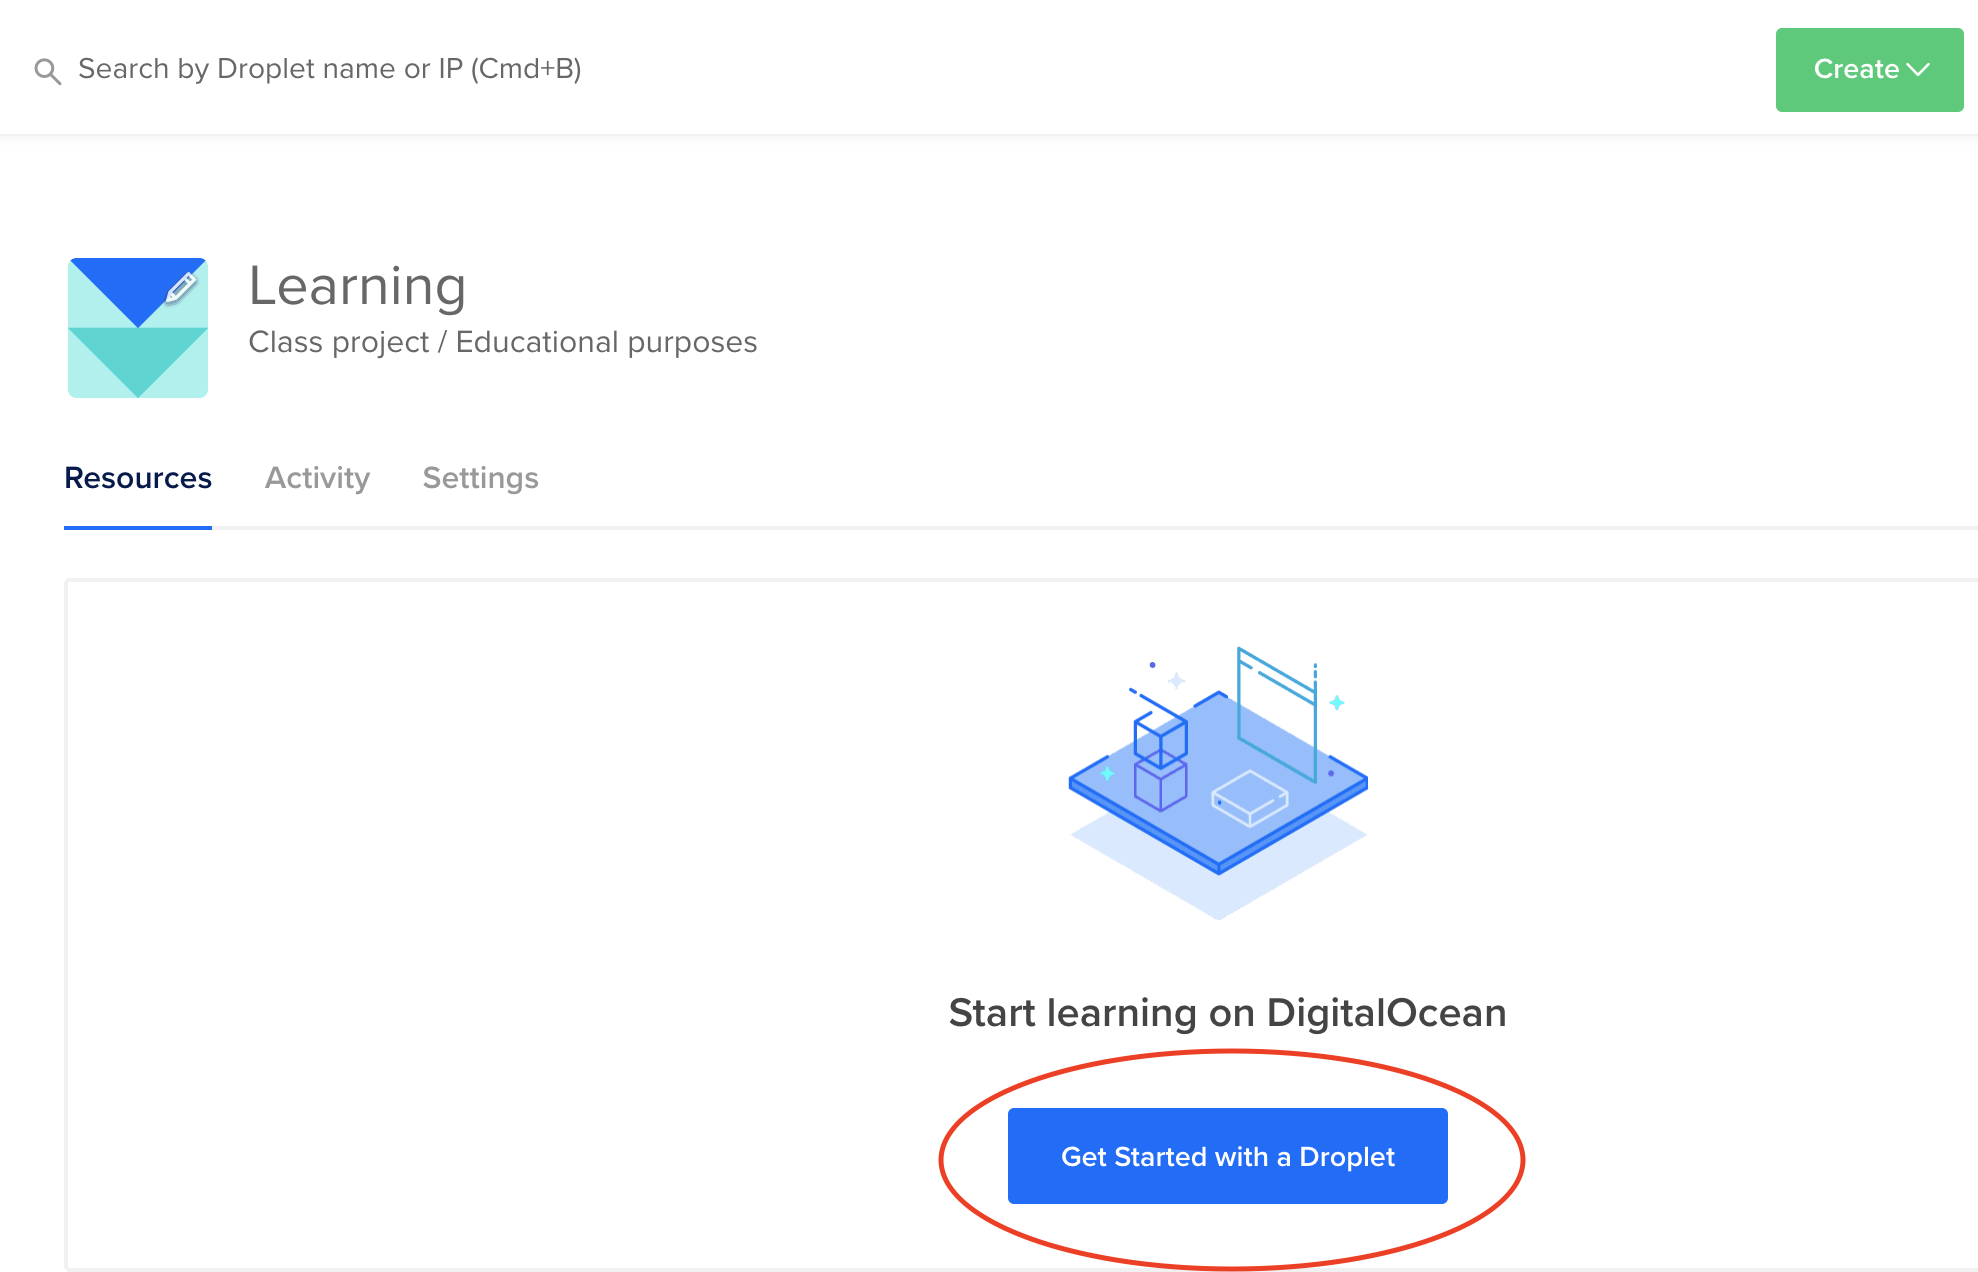
Create a Droplet
Login to your Digital Ocean account:
https://cloud.digitalocean.com/login
Hit the Create a Droplet button:
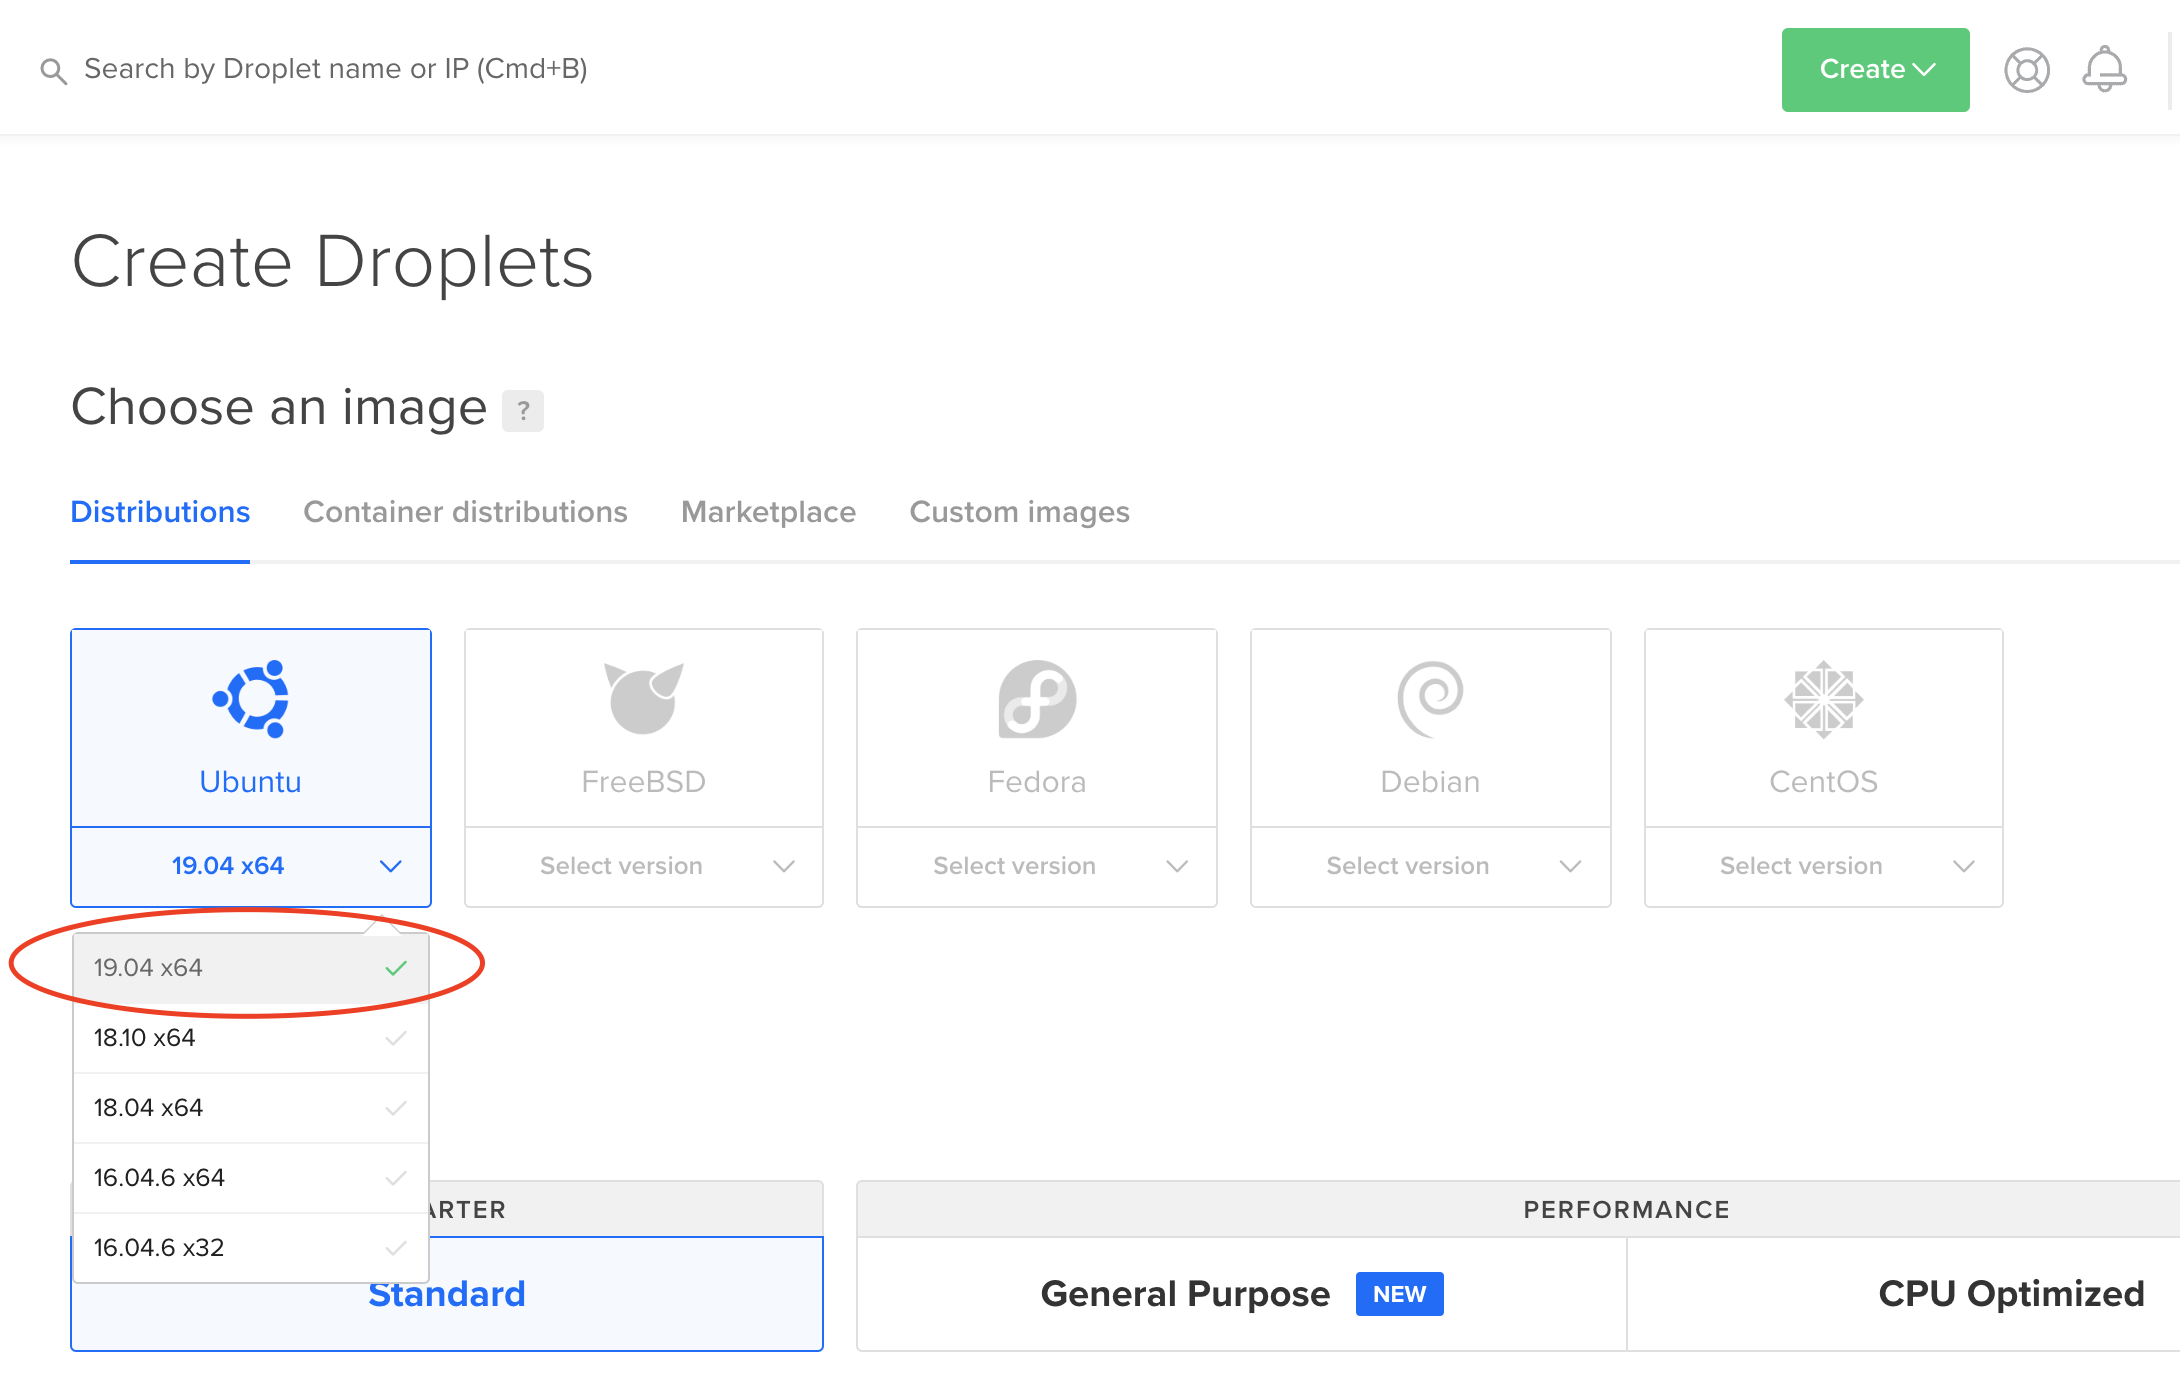
Choose the Ubuntu 19.04
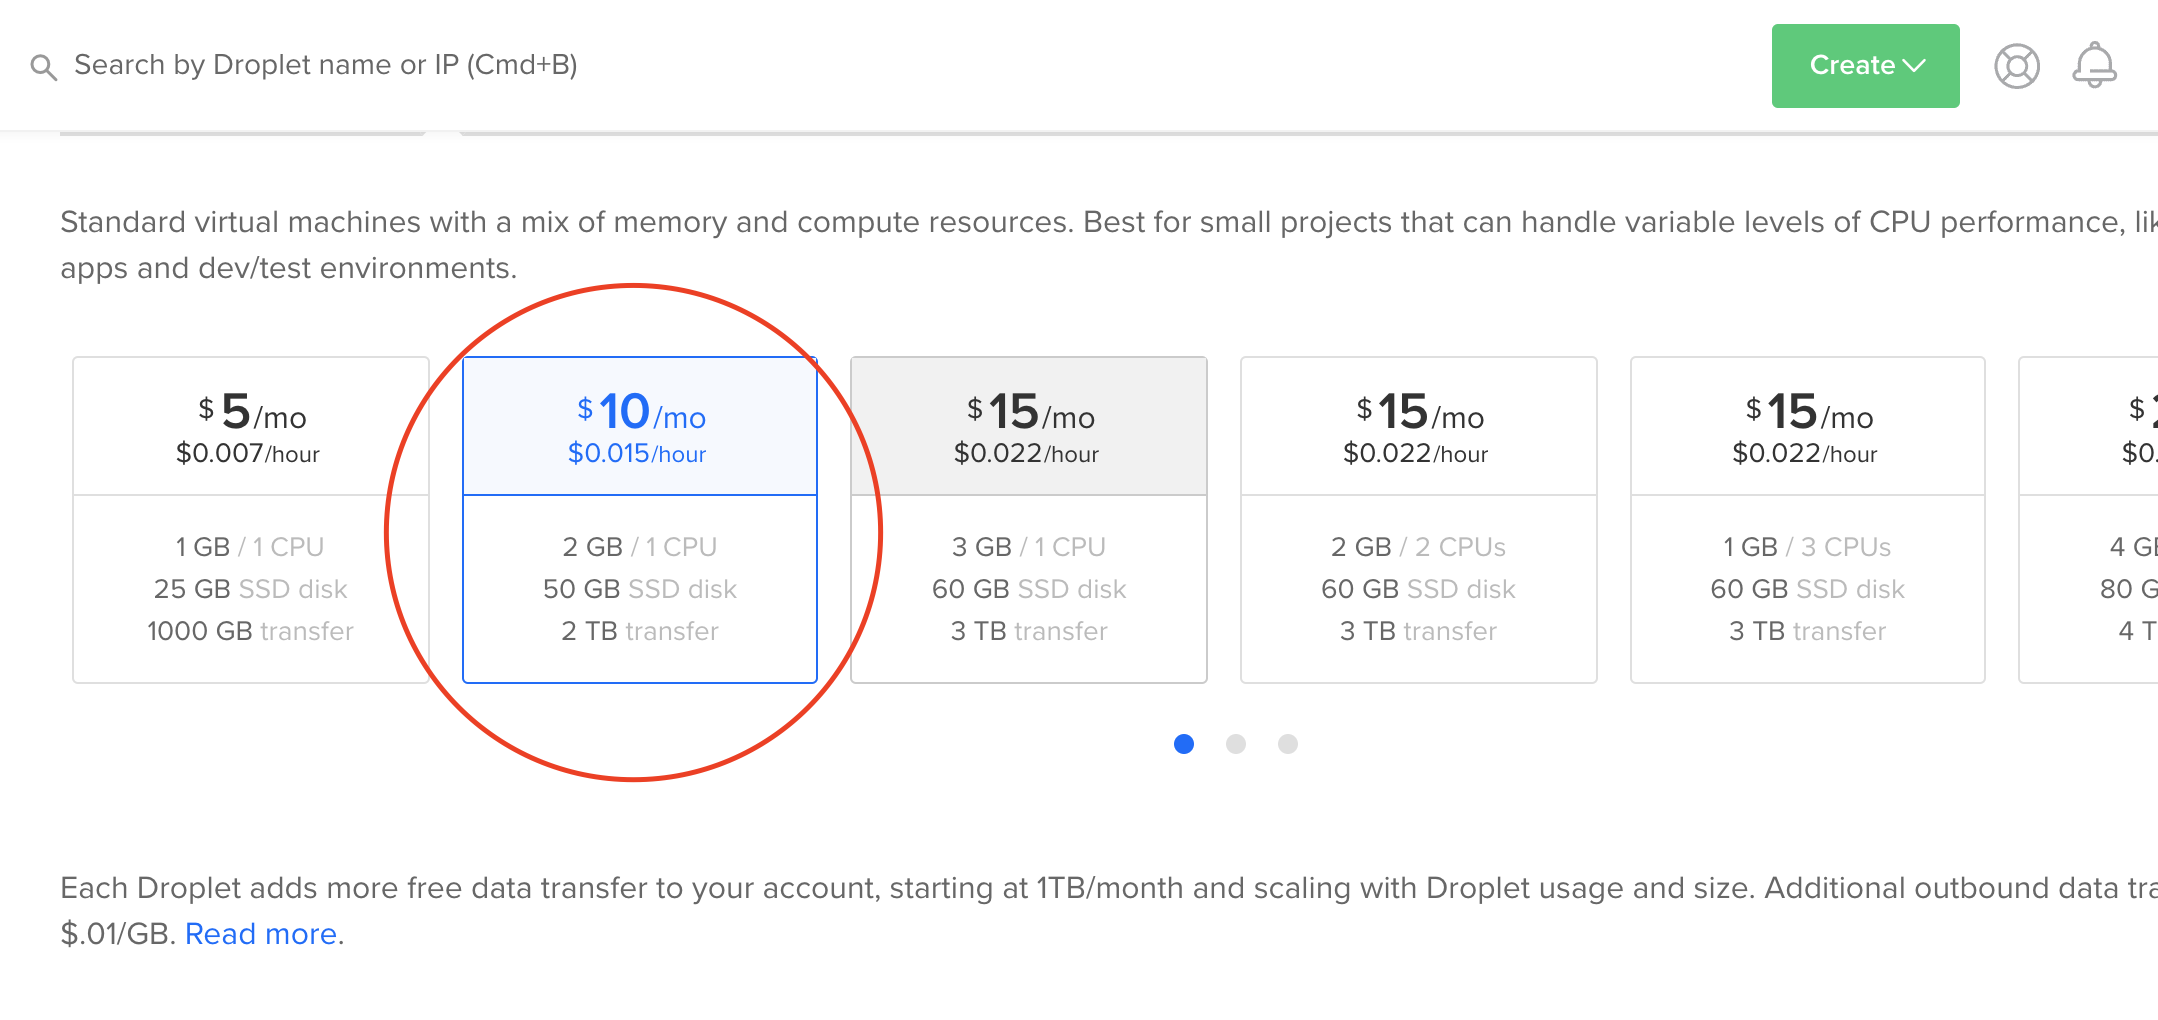
Choose the size of your Droplet, I would recommend having at least 2GB of RAM
After that choose your region
 View Website
 View Website
 View Website
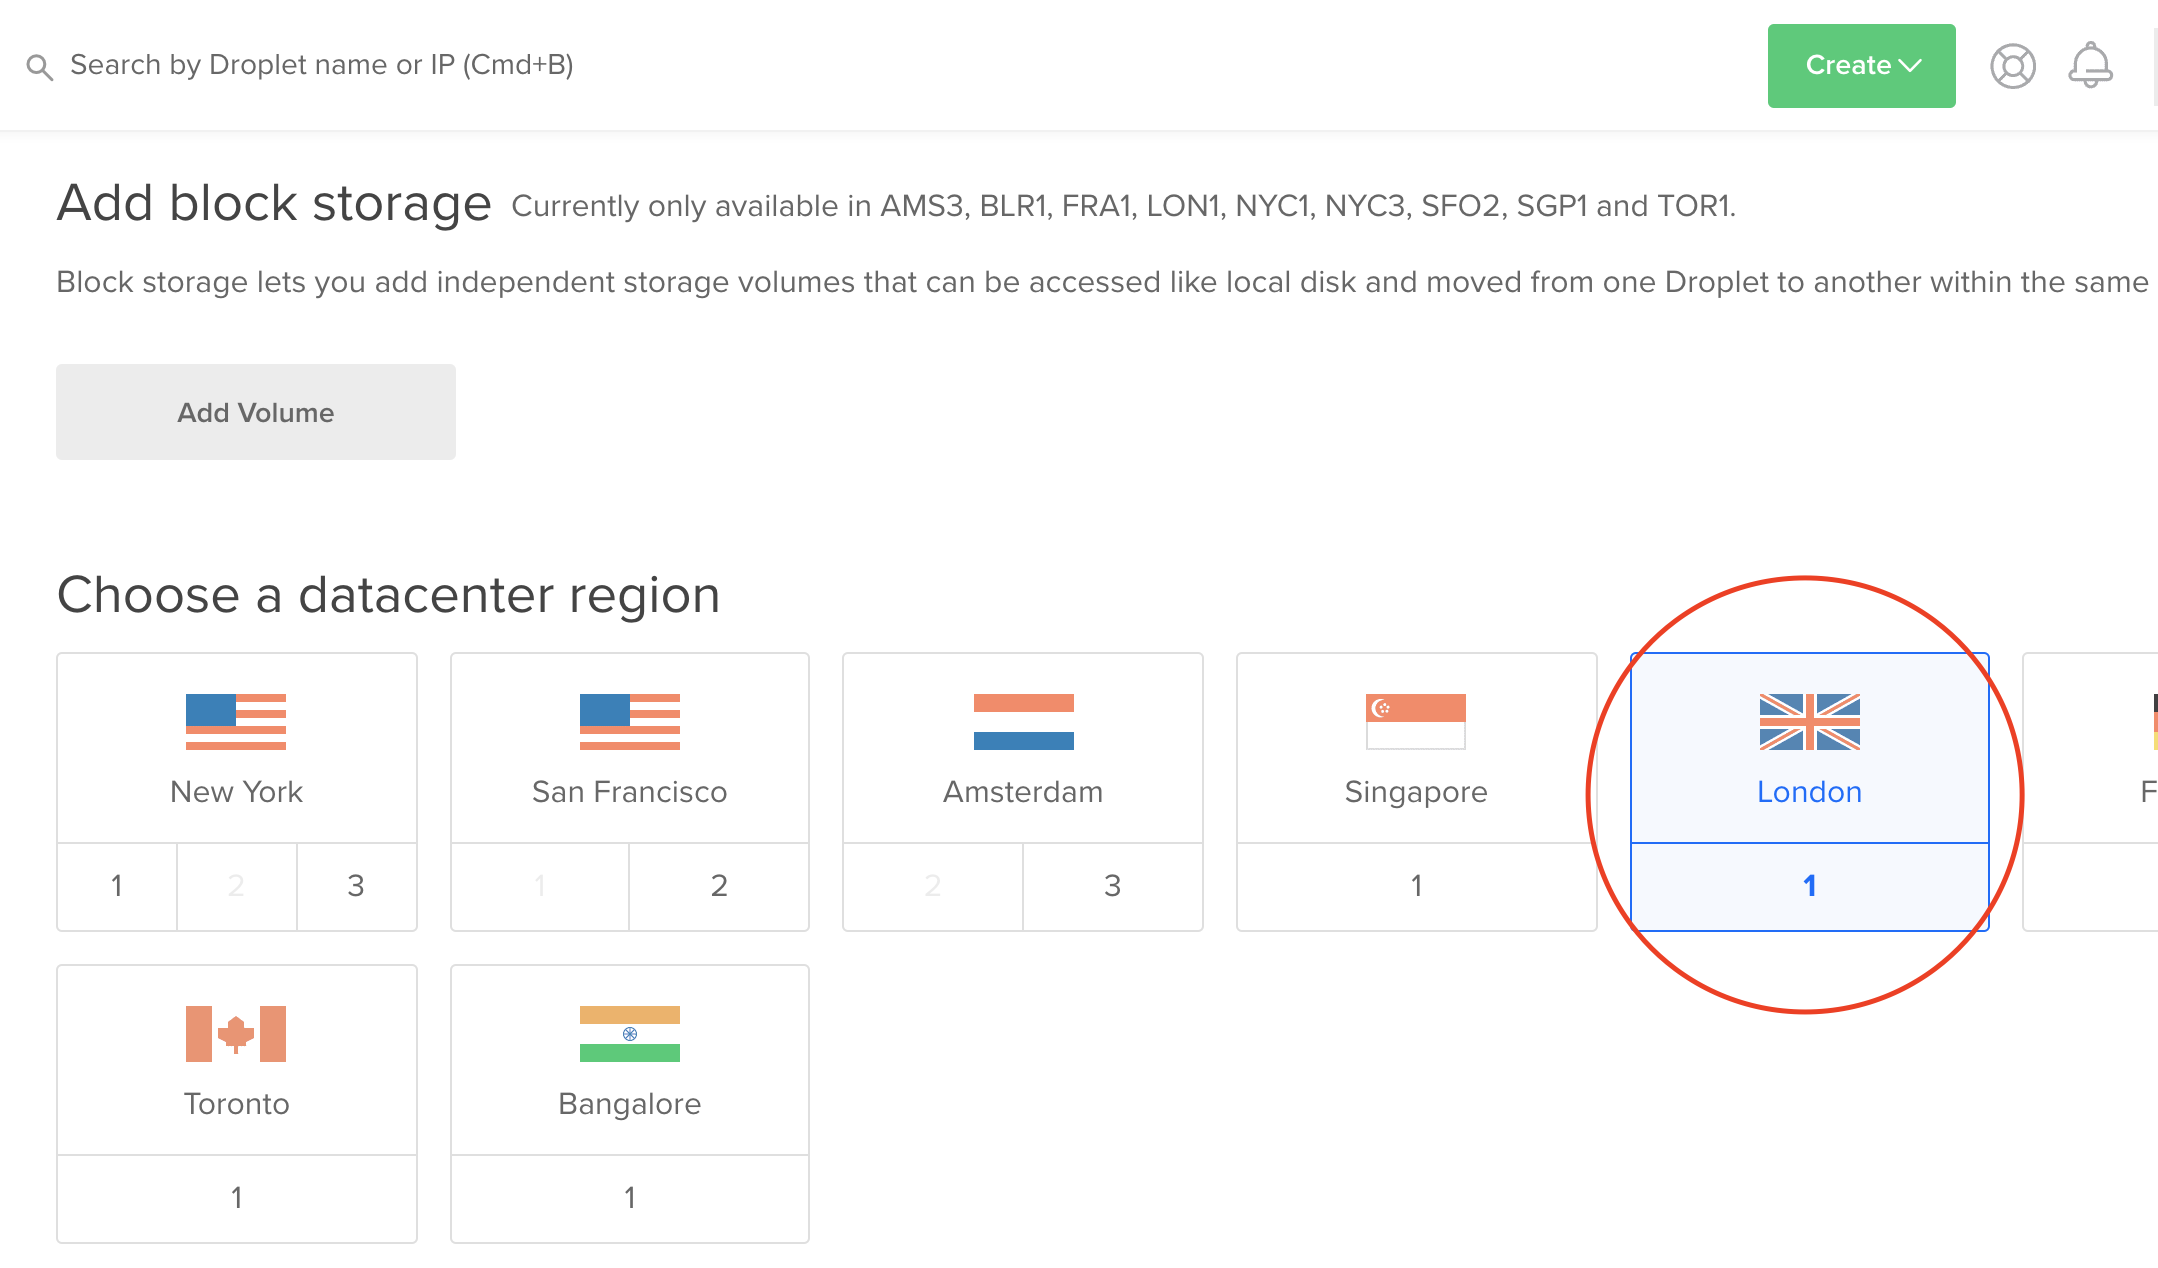
Lastly choose a name for your VM and hit the create button
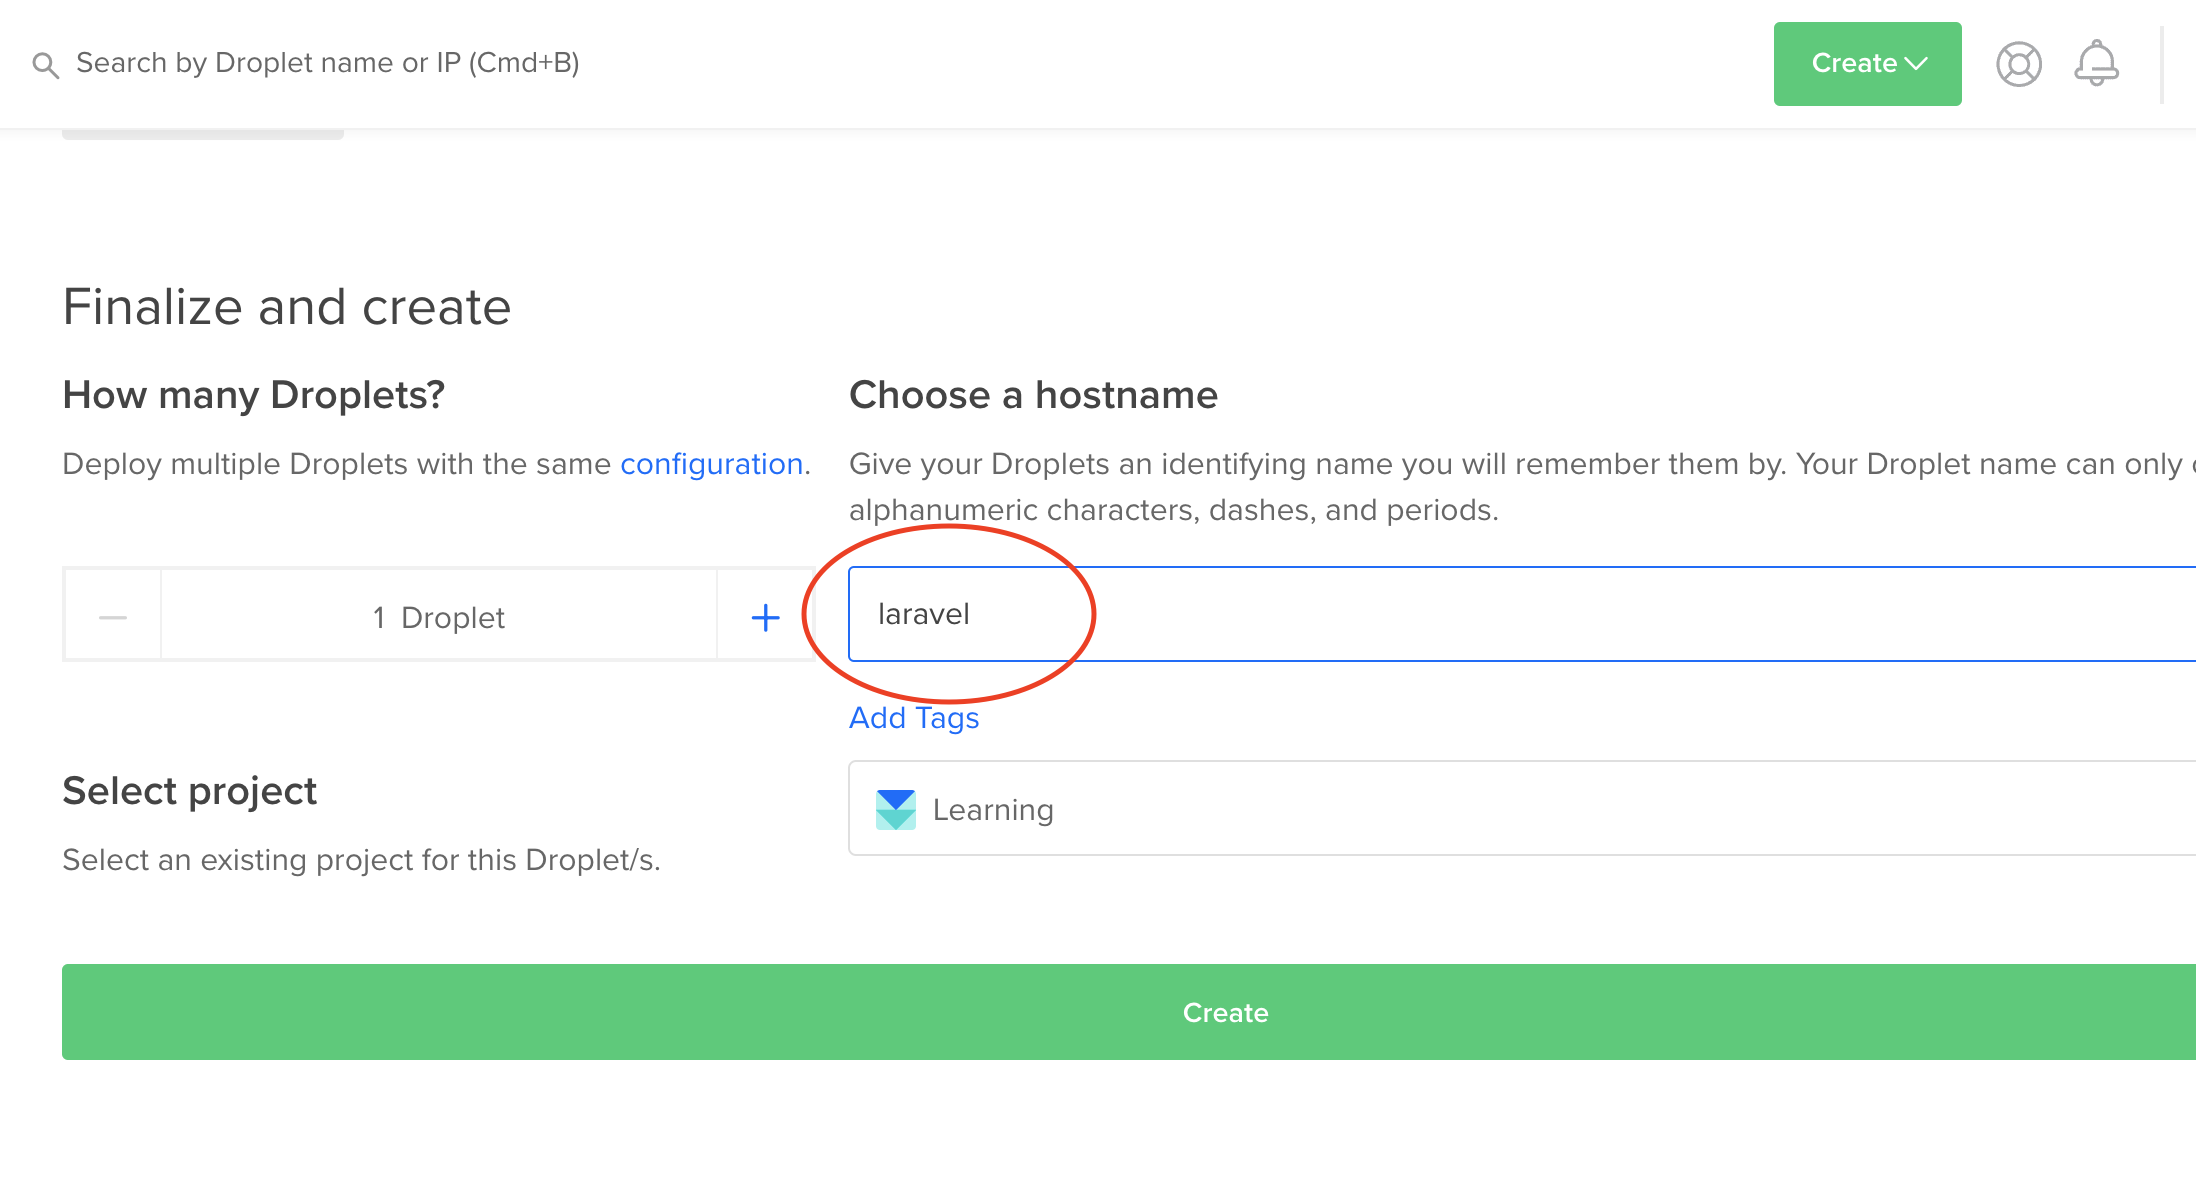
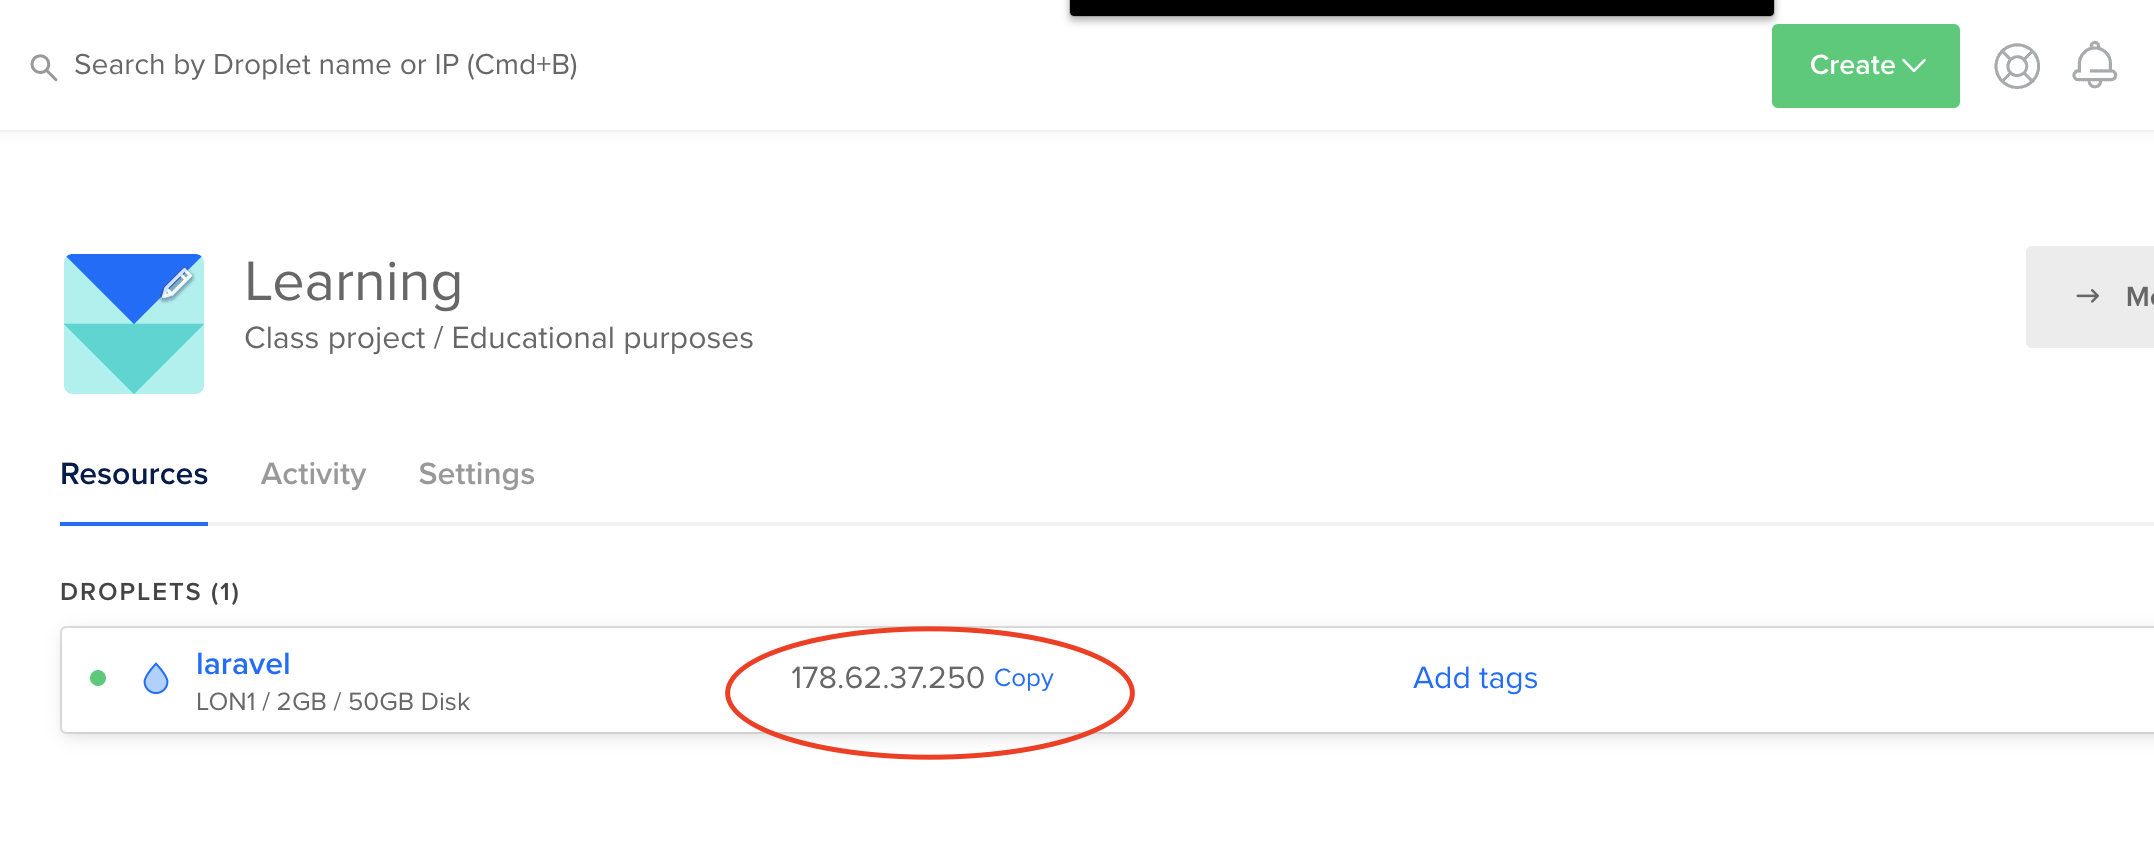
Finally wait a minute or two and your server would be ready. You can then get your server IP that we would use to access the server
Access the VM
We will use SSH to access the newly created droplet.
- For Linux and Mac you can use the builtin terminal.
- For Windows you could use putty
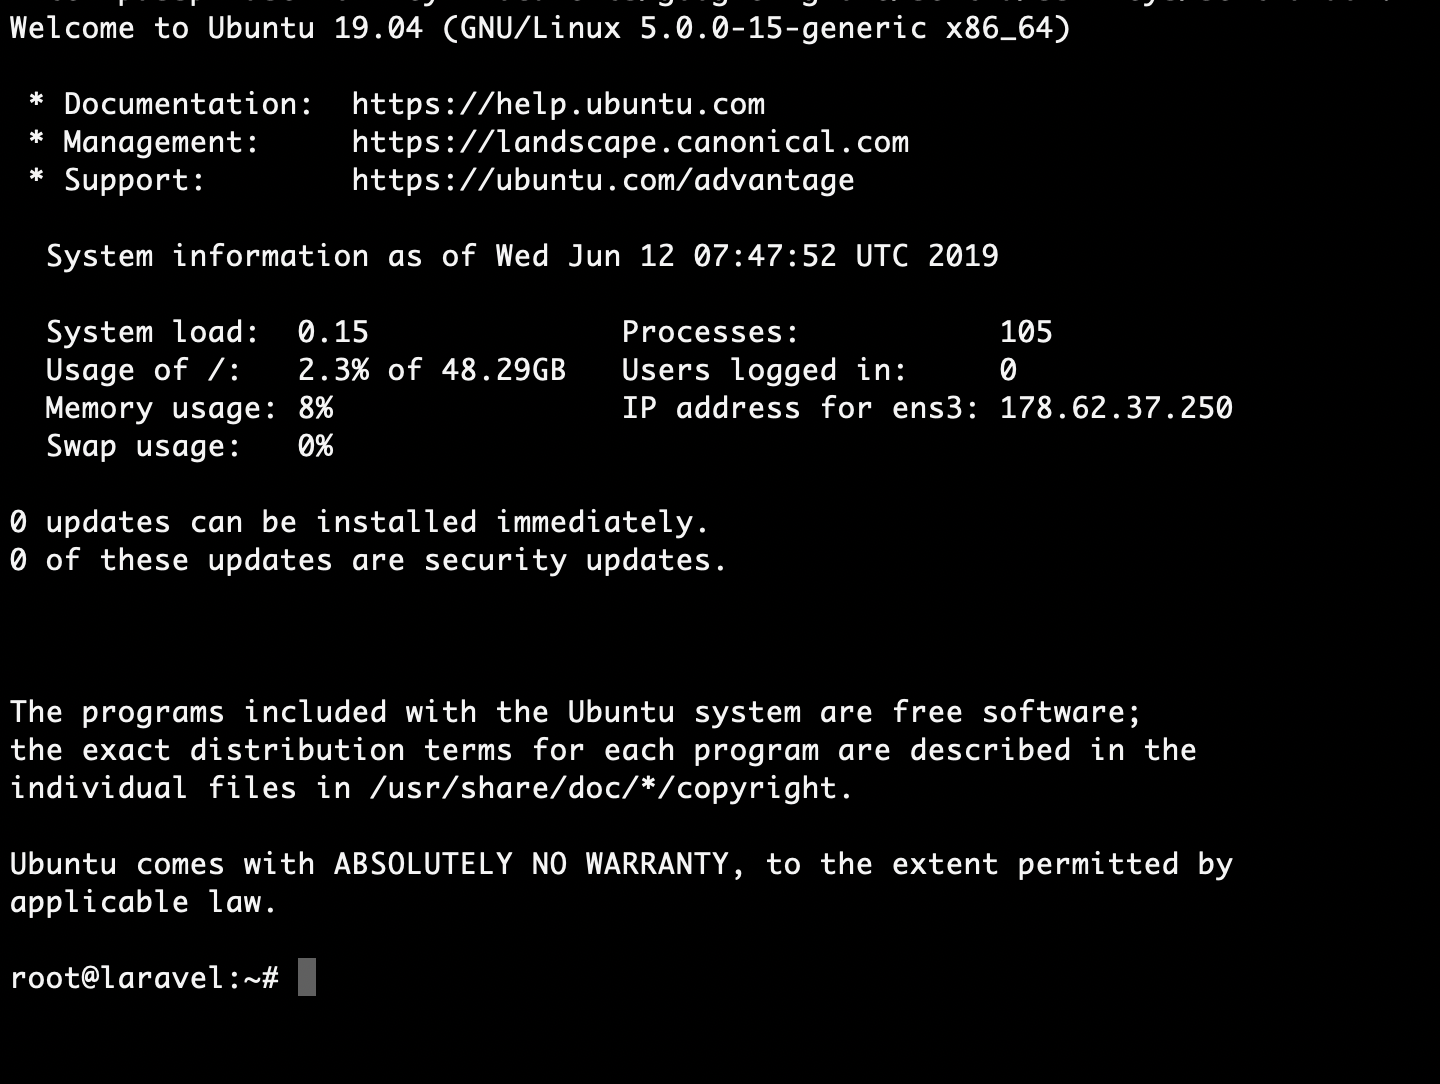
Run the command below (change the IP accordingly) and then enter your password:
ssh root@178.62.37.250If you managed to access the server successfully, you should see the following:
Install Apache, PHP and MySQL
As we now have the VM up and running and we've managed to successfully SSH, we can now proceed with the setup.
We would need to first update the system
apt updateThen with this command here we would install all of the required PHP modules, Apache and MySQL in one go:
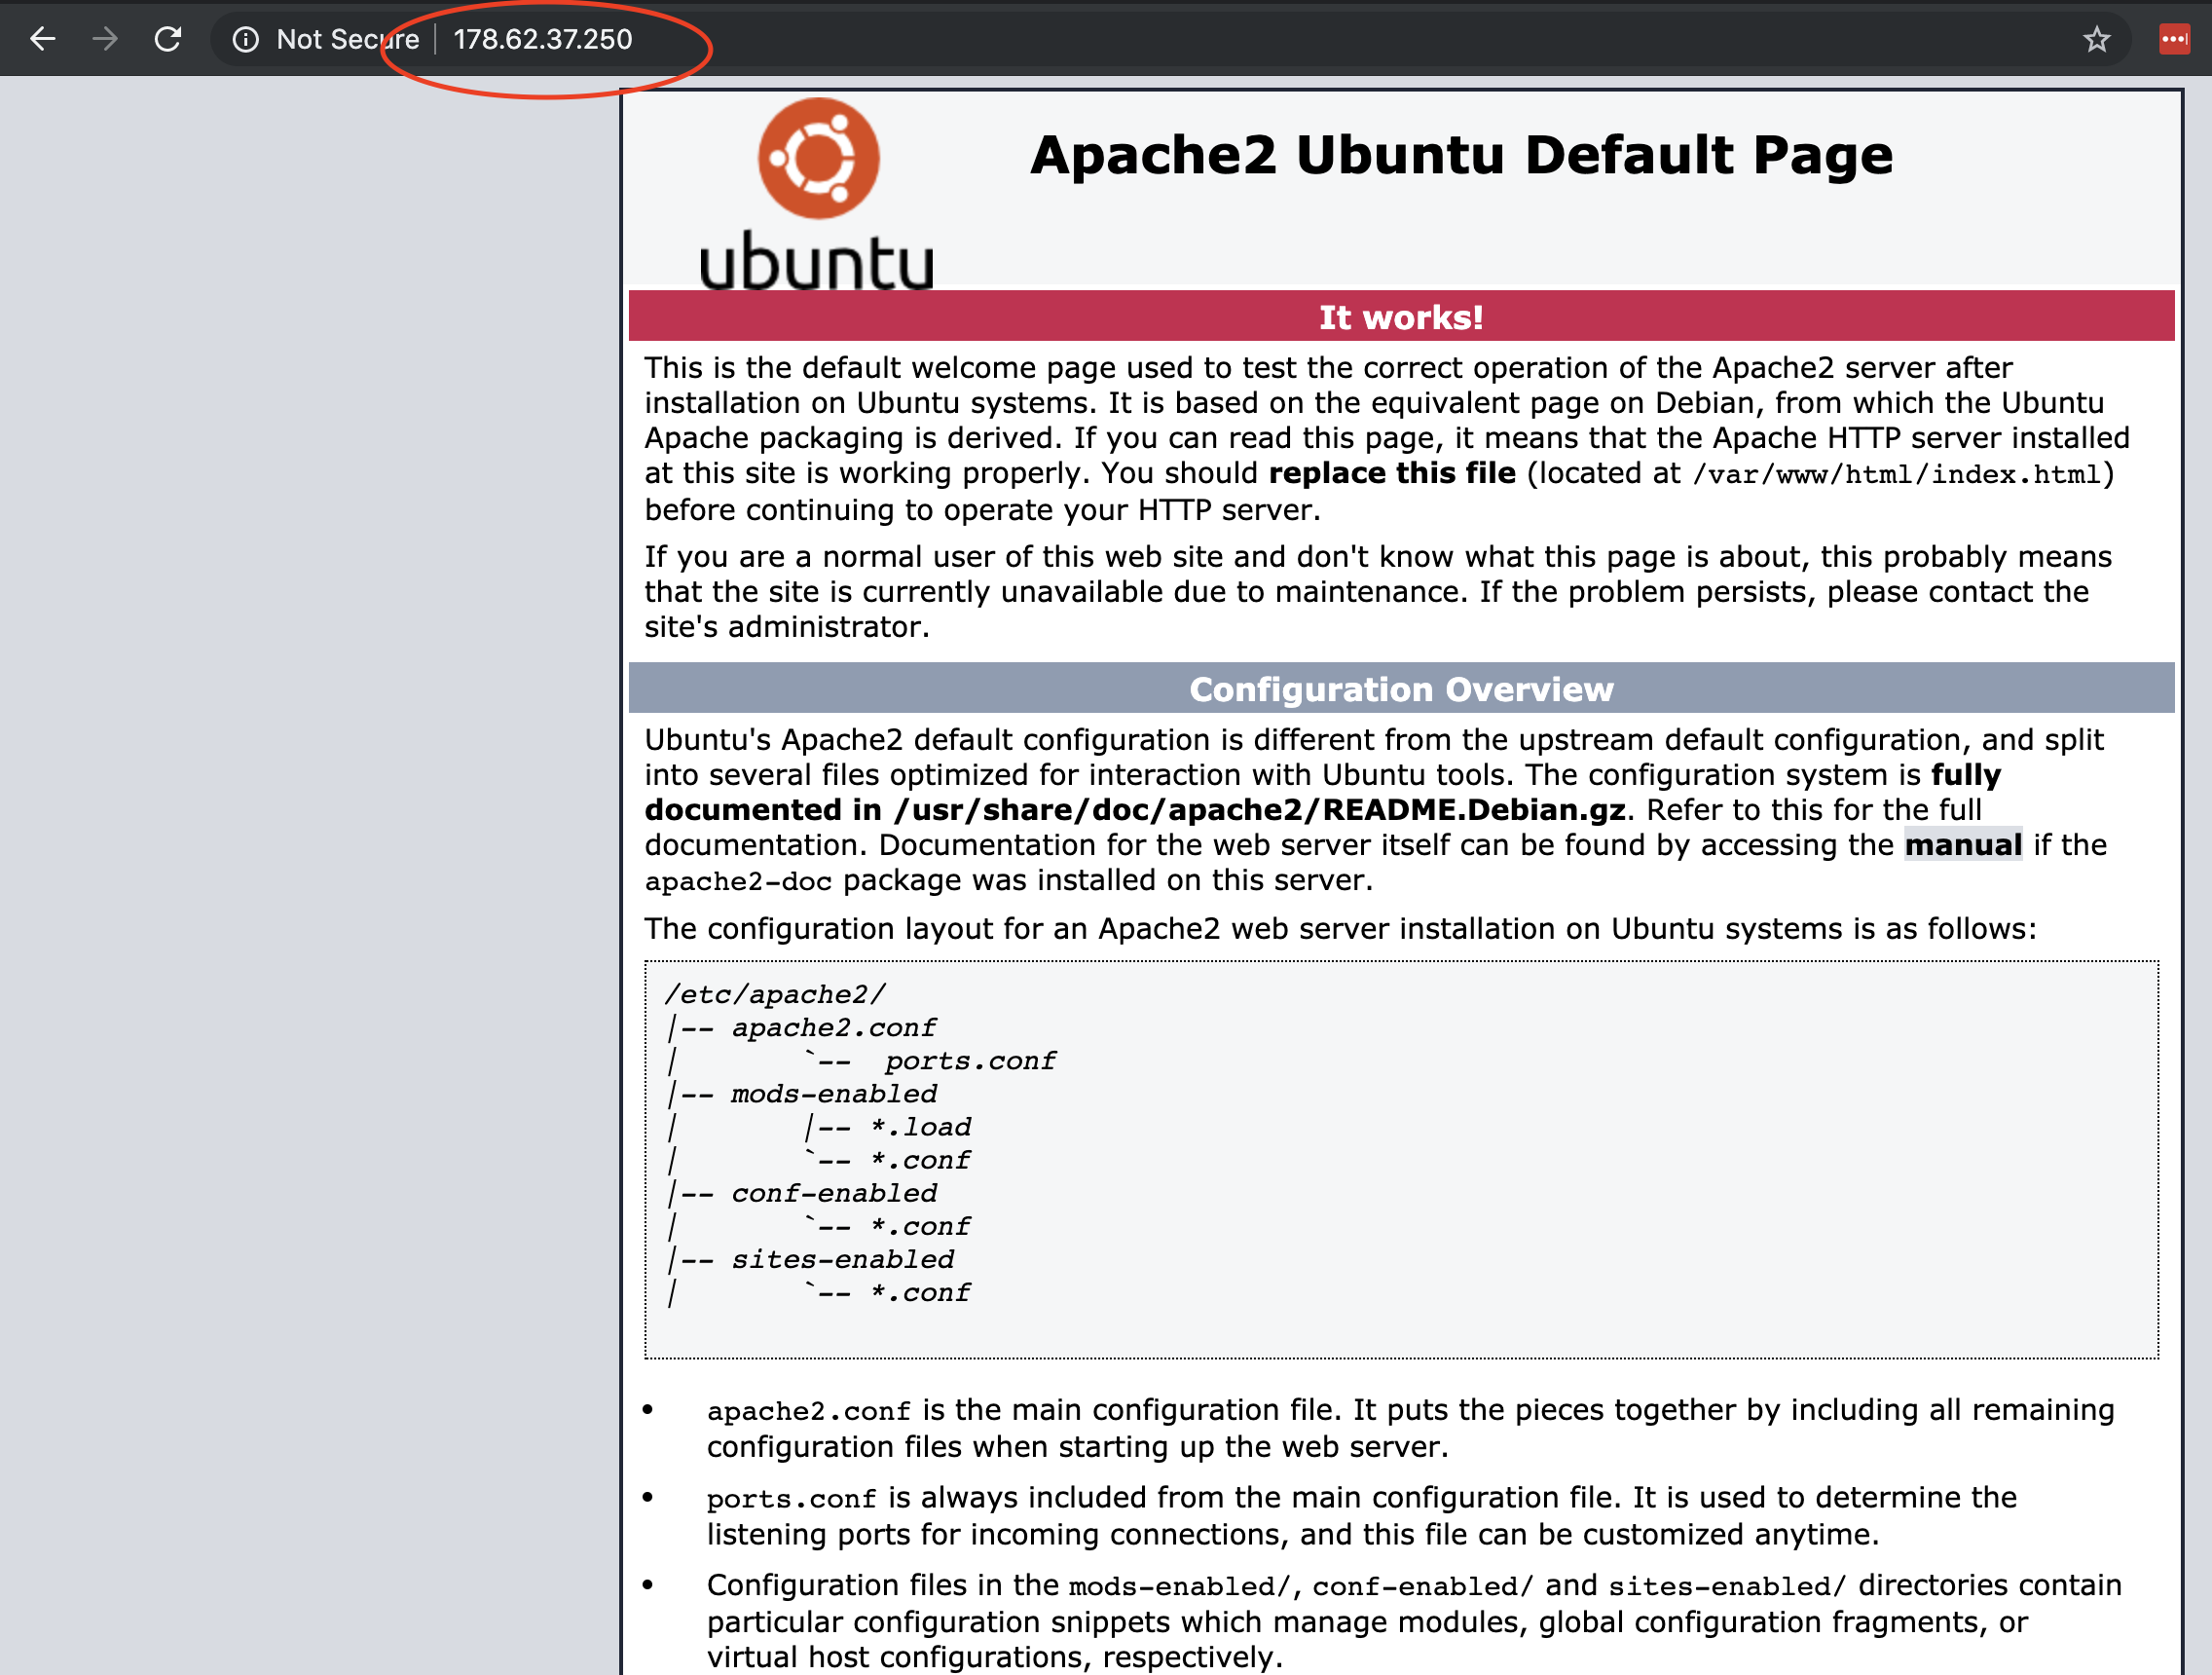
apt install apache2 apache2-utils curl mysql-server mysql-client php libapache2-mod-php php-mysql php-common php-mbstring php-xmlrpc php-soap php-gd php-xml php-mysql php-cli php-mcrypt php-zip -yNow you have all of the required components to start with the Laravel deploy. You can test that apache is running by accessing your IP:
Install Composer
We will use Composer to deploy our Laravel project:
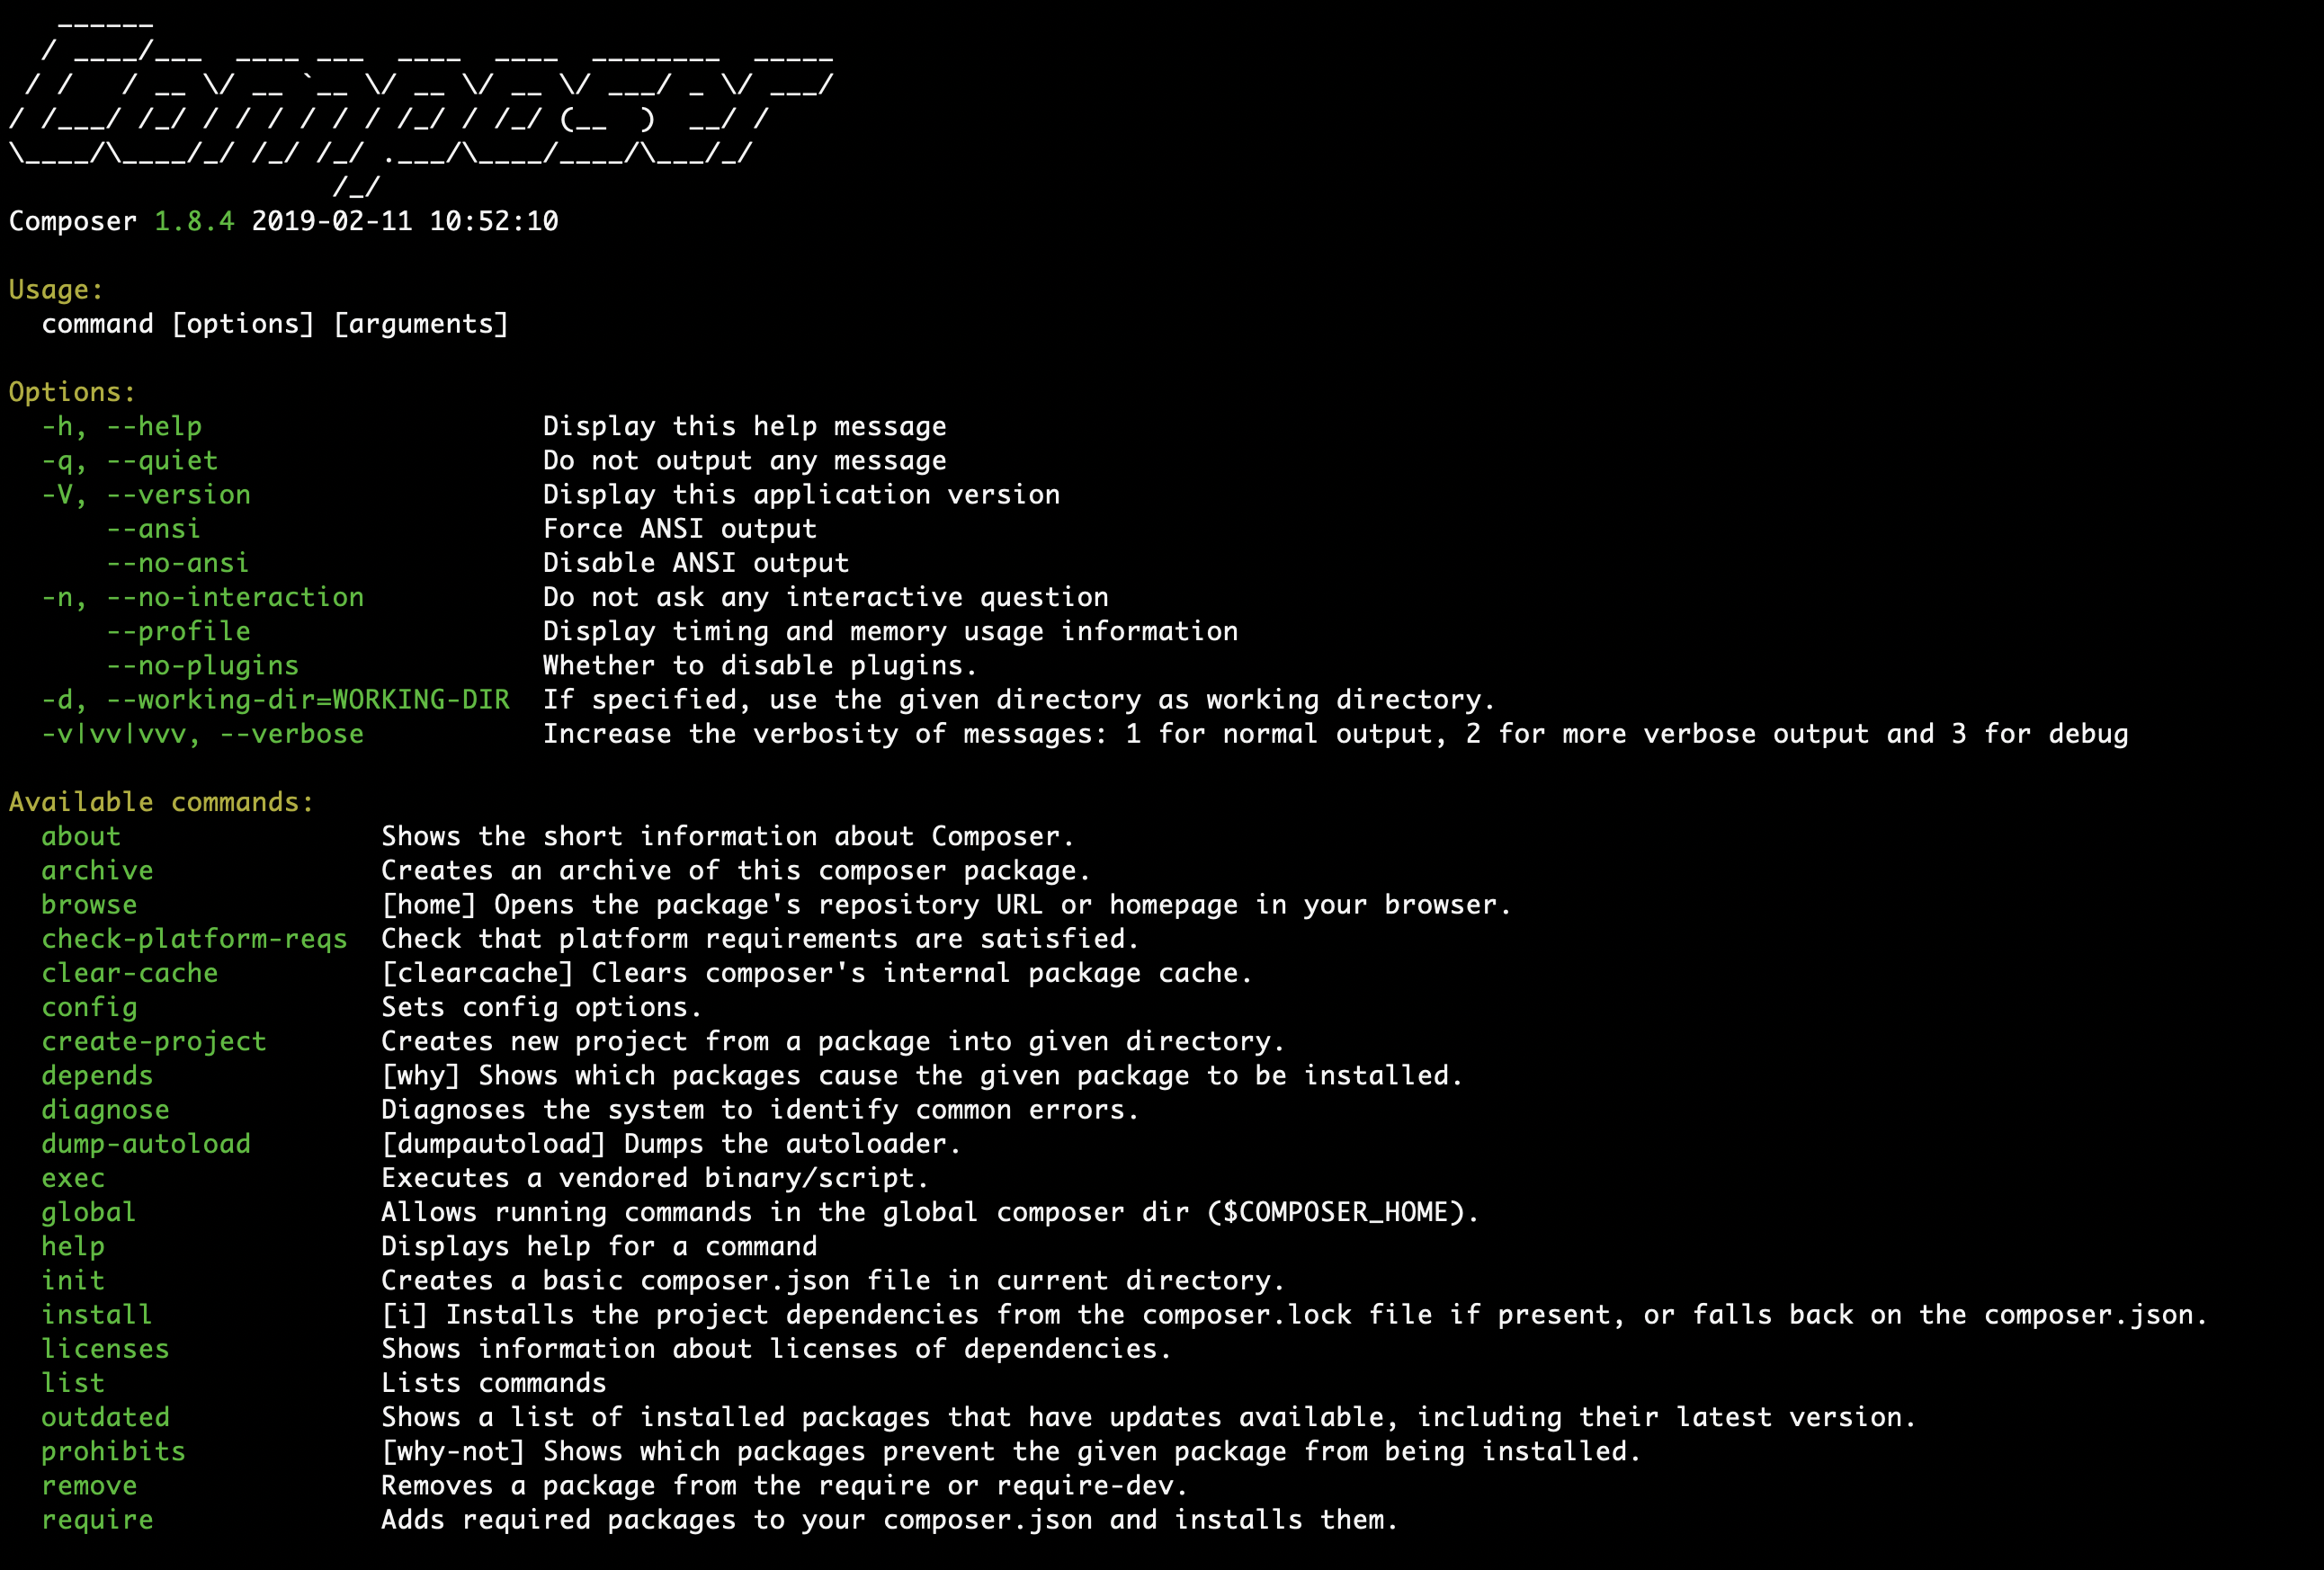
apt install composerThen to test if composer is working, run:
composerYou should get this output here:
Install Laravel
With all that out of the way, we can now deploy our Laravel project.
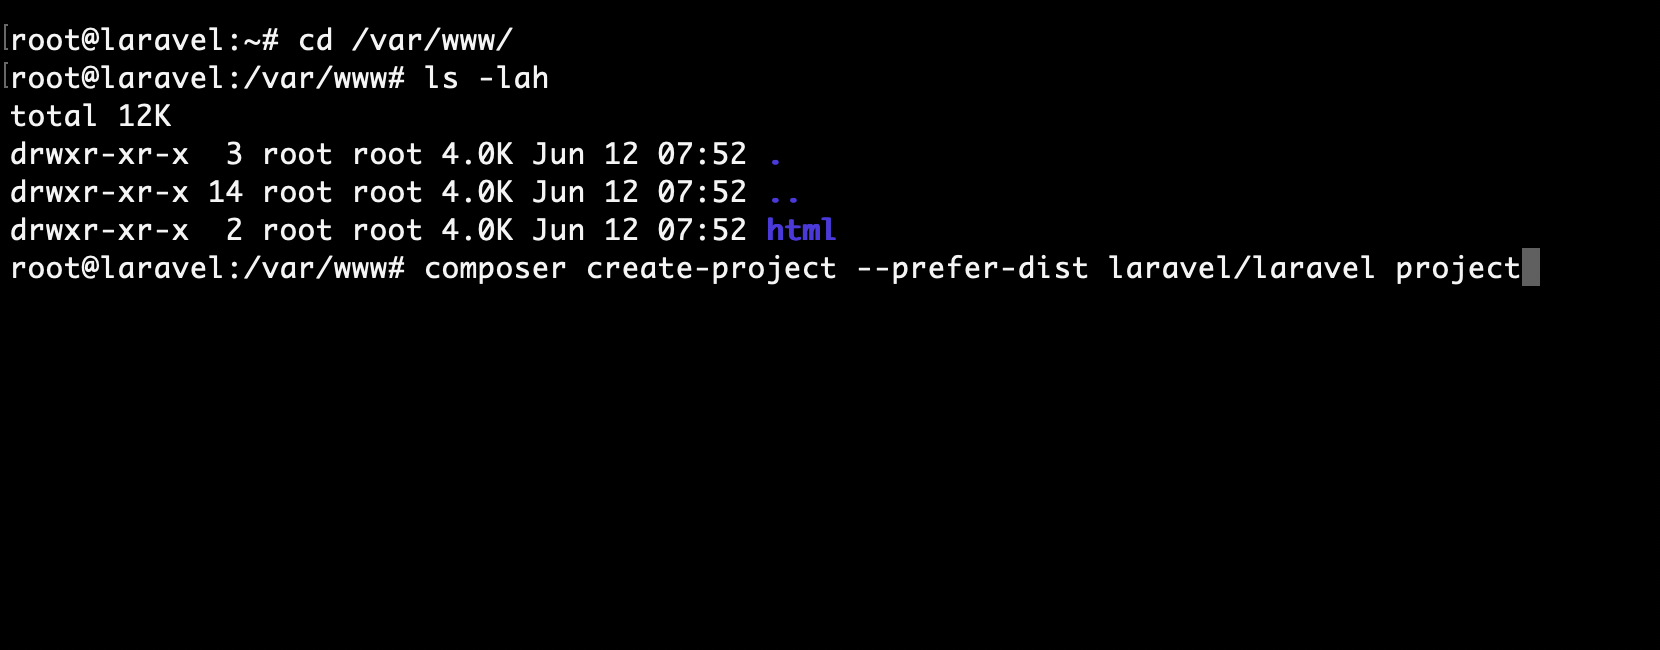
First go to the /var/www/ folder:
cd /var/www/And run this command to create your Laravel project:
composer create-project --prefer-dist laravel/laravel projectOnce this has been completed, we need to adjust our permissions:
chown -R www-data:www-data /var/www/project/Example:
Configure Apache
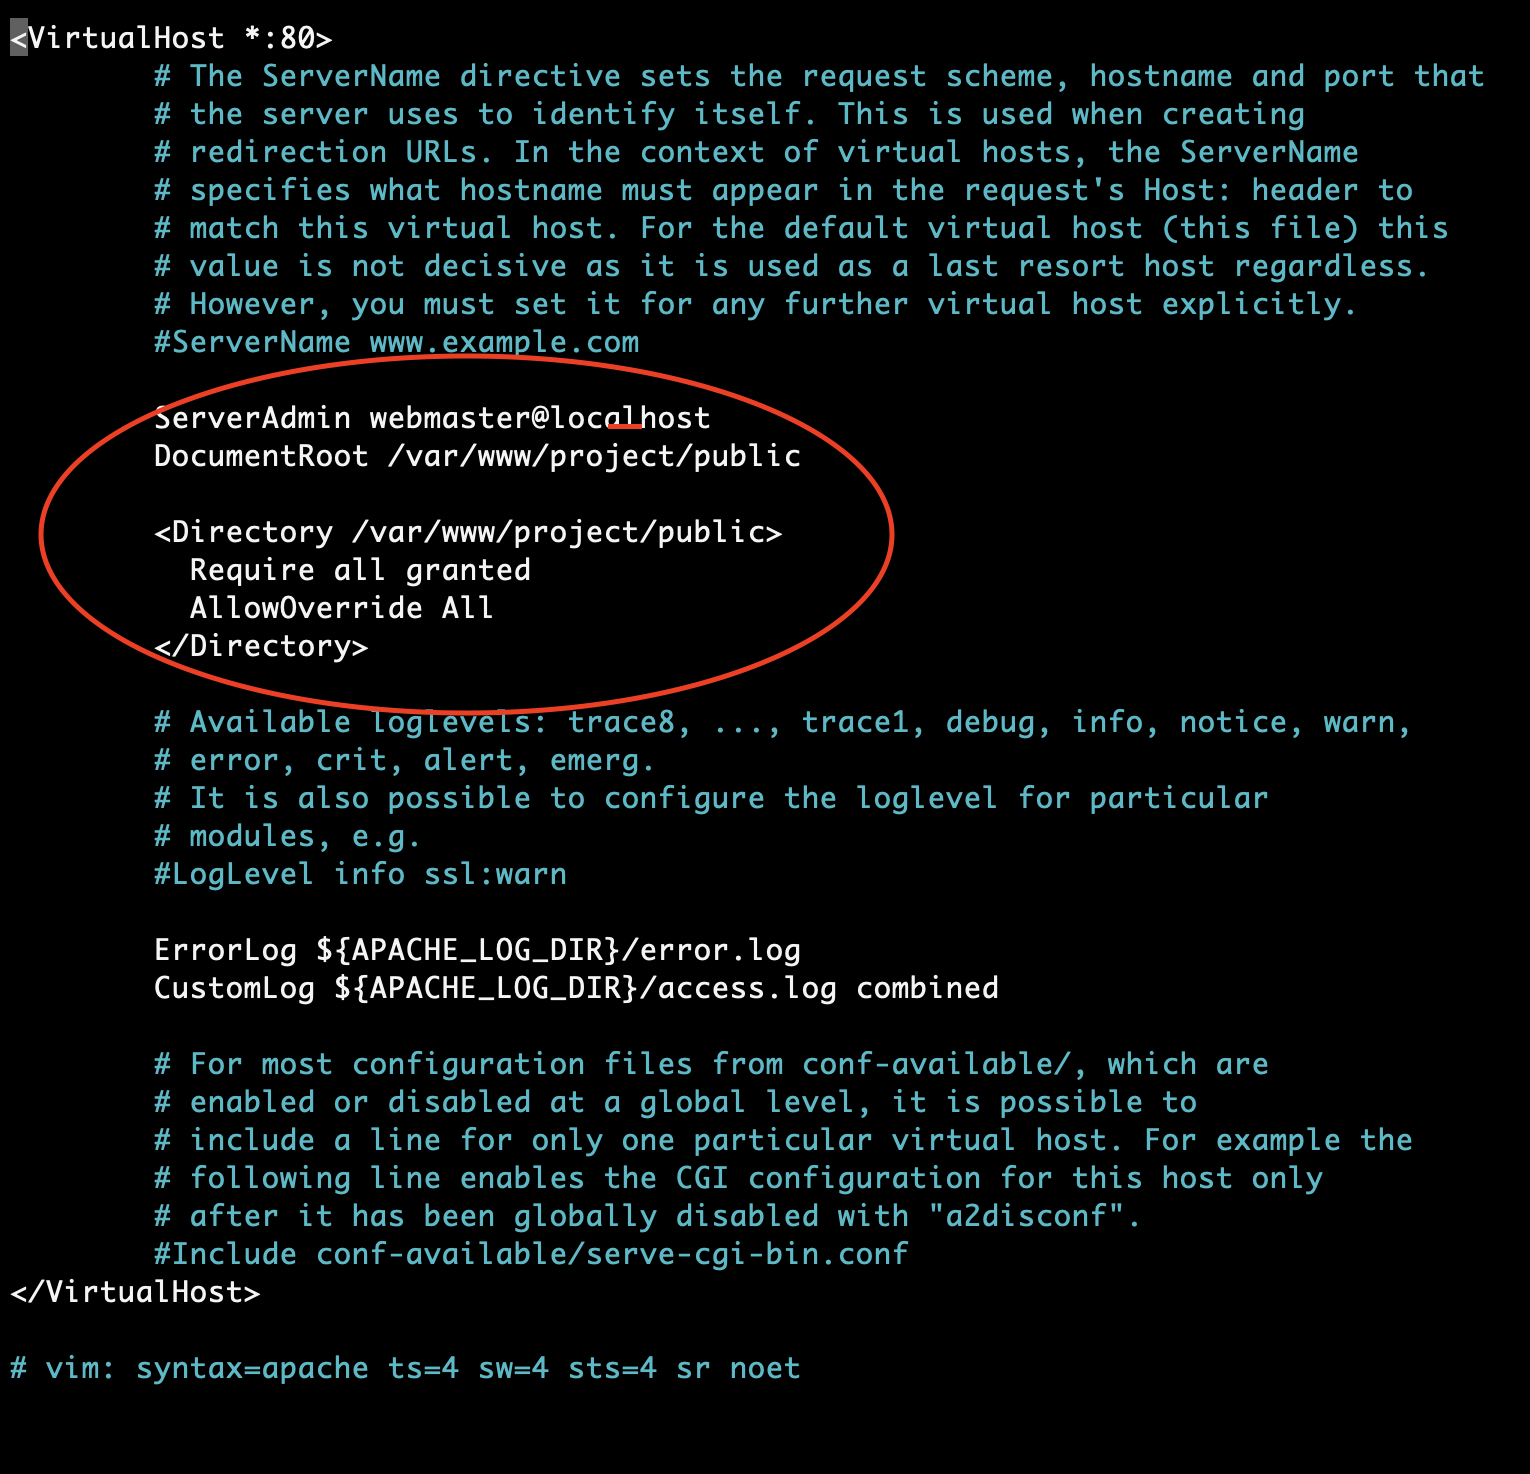
Once the project has been created, we would have to configure Apache. We need to adjust the configuration a little bit so that the document root points to our Laravel project folder and make sure that the Apache server accepts the .htaccess file.
Open the following file with your favourite text editor:
nano /etc/apache2/sites-enabled/000-default.confAdjust the document root with the correct path to your Laravle public folder:
DocumentRoot /var/www/project/publicSetup the server to accept the .htaccess file
   <Directory /var/www/project/public>
        Require all granted
        AllowOverride All
   </Directory>
At the end your Config should look something like this:
After that we have to enable mod_rewrite, we can do that with this command here:
a2enmod rewriteAfter those changes make sure to run a config test and then restart apache
apachectl configtestRestart Apache:
apachectl restartMake sure that you can now access your new project via your browser by just visiting your IP:
Configure MySQL
More often than not you would need a database for your project, so let's go ahead and configure MySQL.
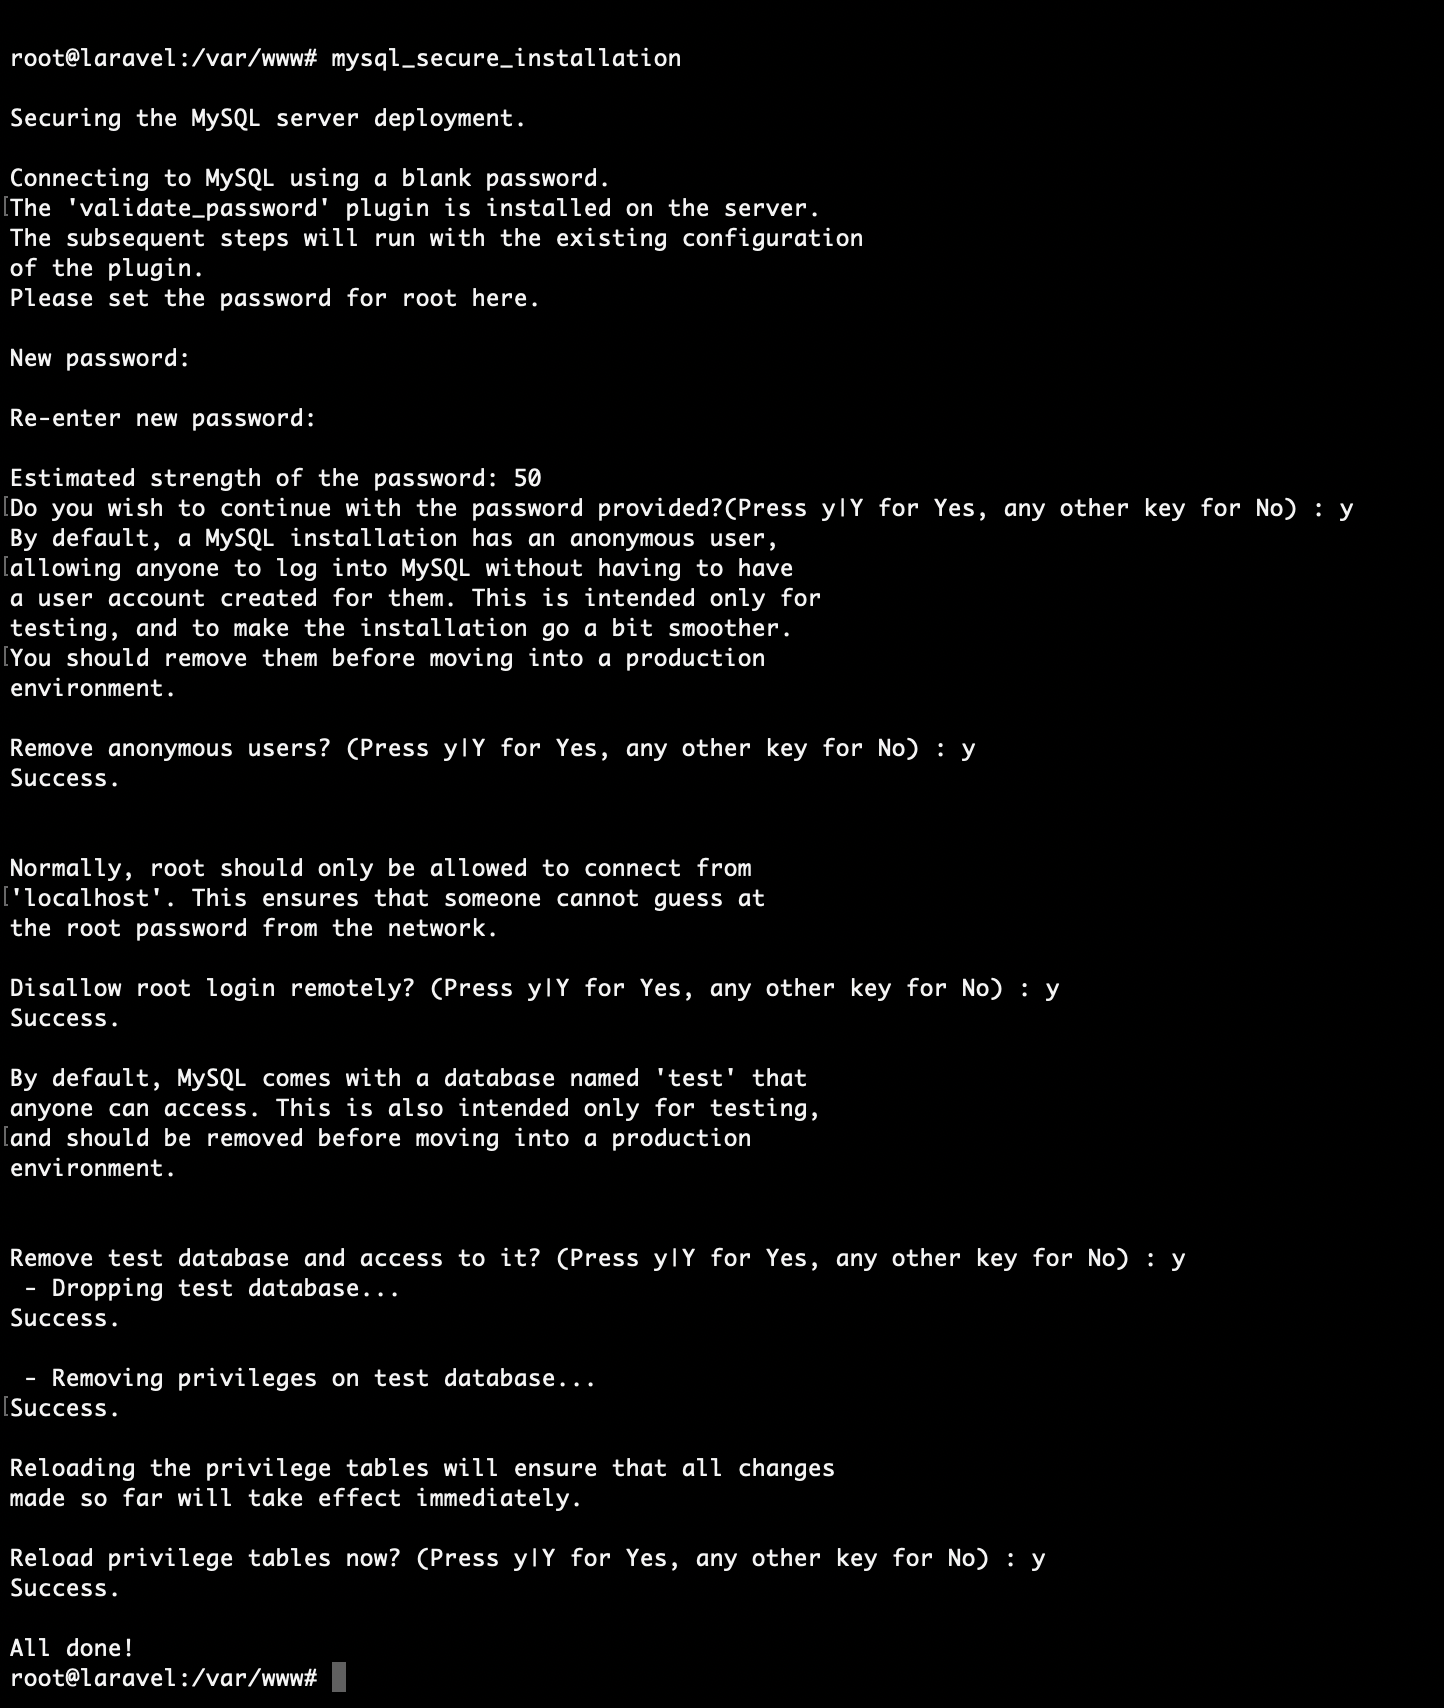
First run this command to secure the installation:
mysql_secure_installationThe output that you would get would look something like this:
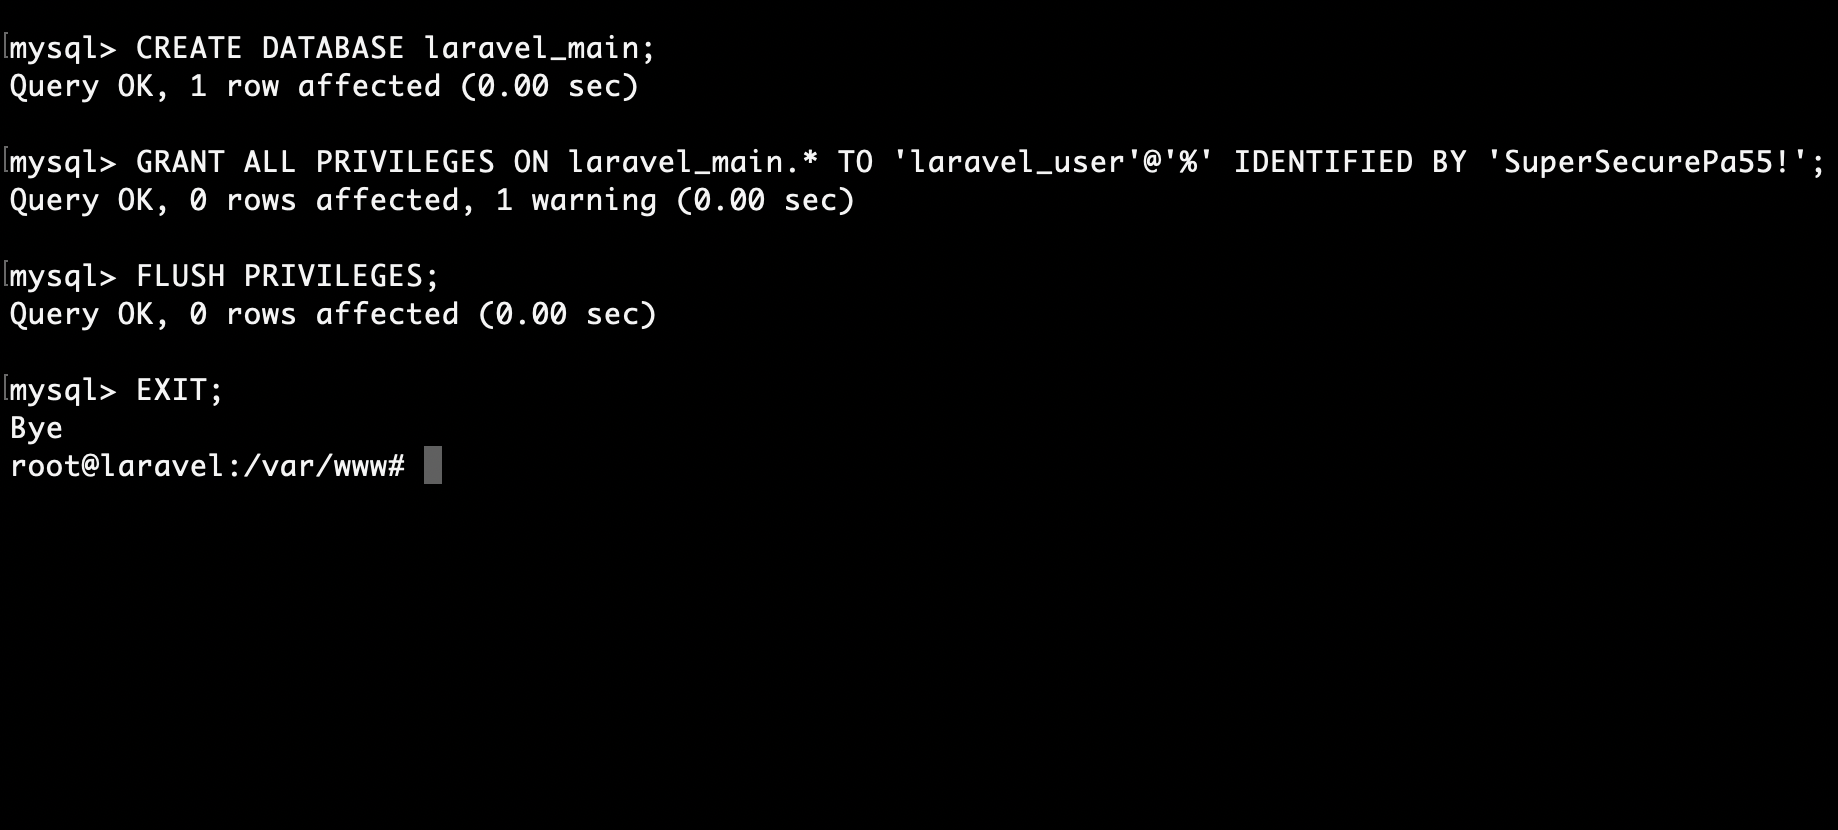
Now let’s create a database and a user for our Laravel app.
First access MySQL
mysql -u root -pThen create your database and user:
mysql> CREATE DATABASE laravel_main;
mysql> GRANT ALL PRIVILEGES ON laravel_main.* TO 'laravel_user'@'%' IDENTIFIED BY 'SuperSecurePa55!';
mysql> FLUSH PRIVILEGES;
mysql> EXIT;
Example:
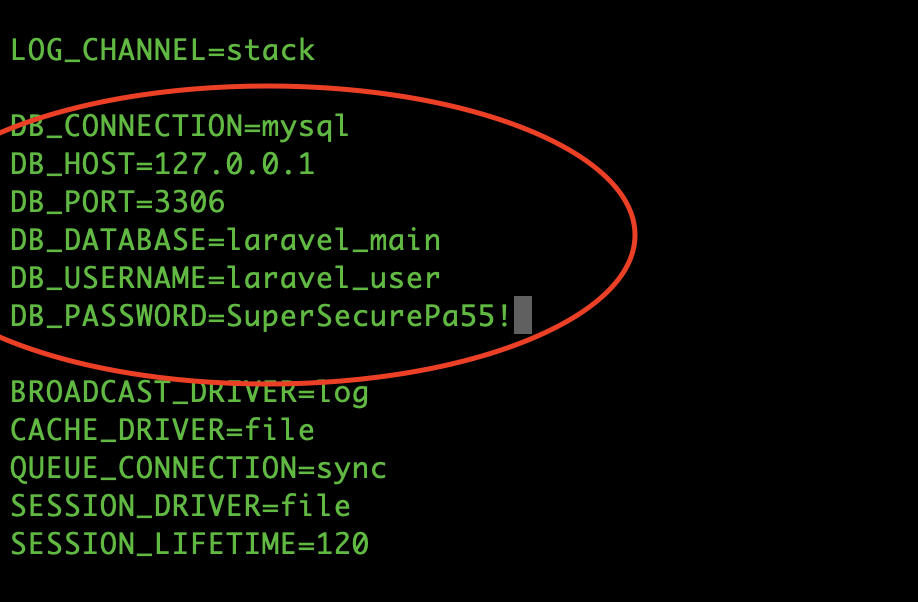
Now that we have our new database and username, we have to adjust our .env file so that our Laravel can connect to the new database. Open your .env file with your favourite text editor and adjust the database details:
nano /var/www/project/.envAdjust the Database section:
Install Voyager
If we want to go one step further now we could even install Voyager:
Go to your project dir /var/www/project
cd /var/www/projectThen run this command:
composer require tcg/voyagerAlso Update your APP_URL in your .env file to your server IP.
Next, add the Voyager service provider to the config/app.php file in the providers array:
'providers' => [

// Laravel Framework Service Providers...

//...

// Package Service Providers

TCG\Voyager\VoyagerServiceProvider::class,

// ...

// Application Service Providers

// ...

],
To install Voyager without dummy data simply run
php artisan voyager:installIf you prefer installing it with the dummy data run
php artisan voyager:install --with-dummyThat's pretty much it! Now when you visit your http://your-IP/admin via your browser you would get the voyager login panel:
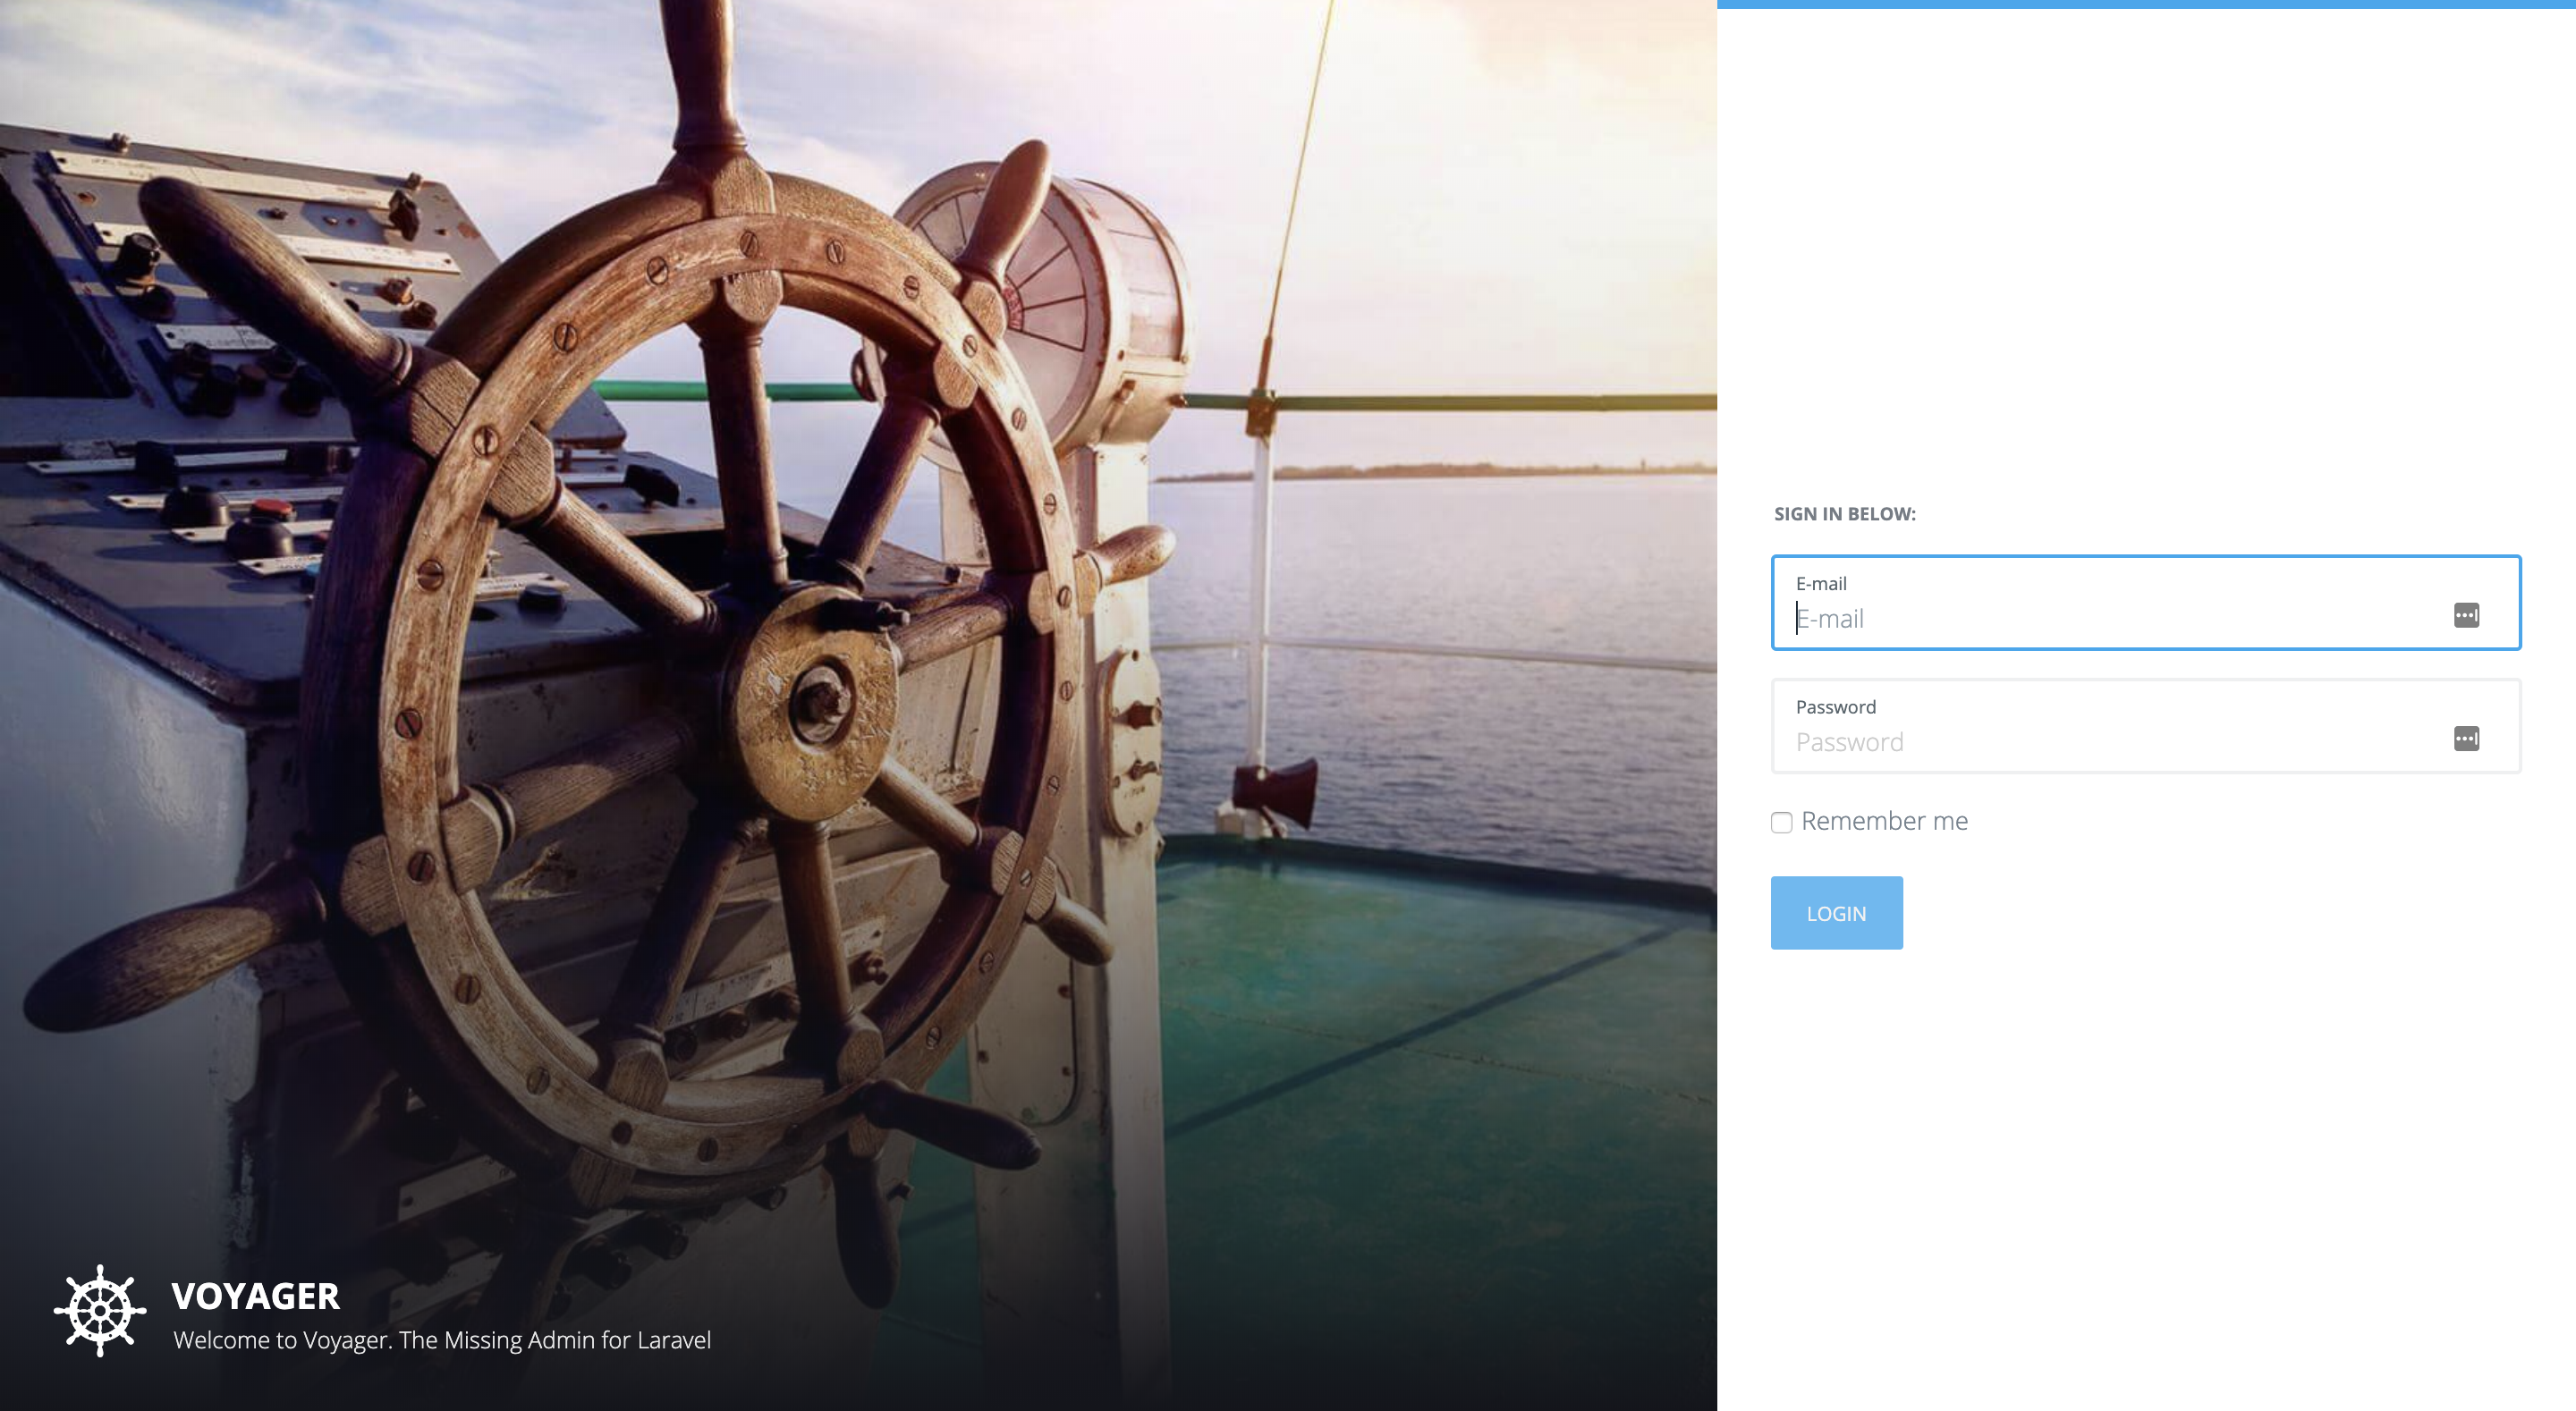
The default login details for voyager are:
Username: [email protected]
Password: password
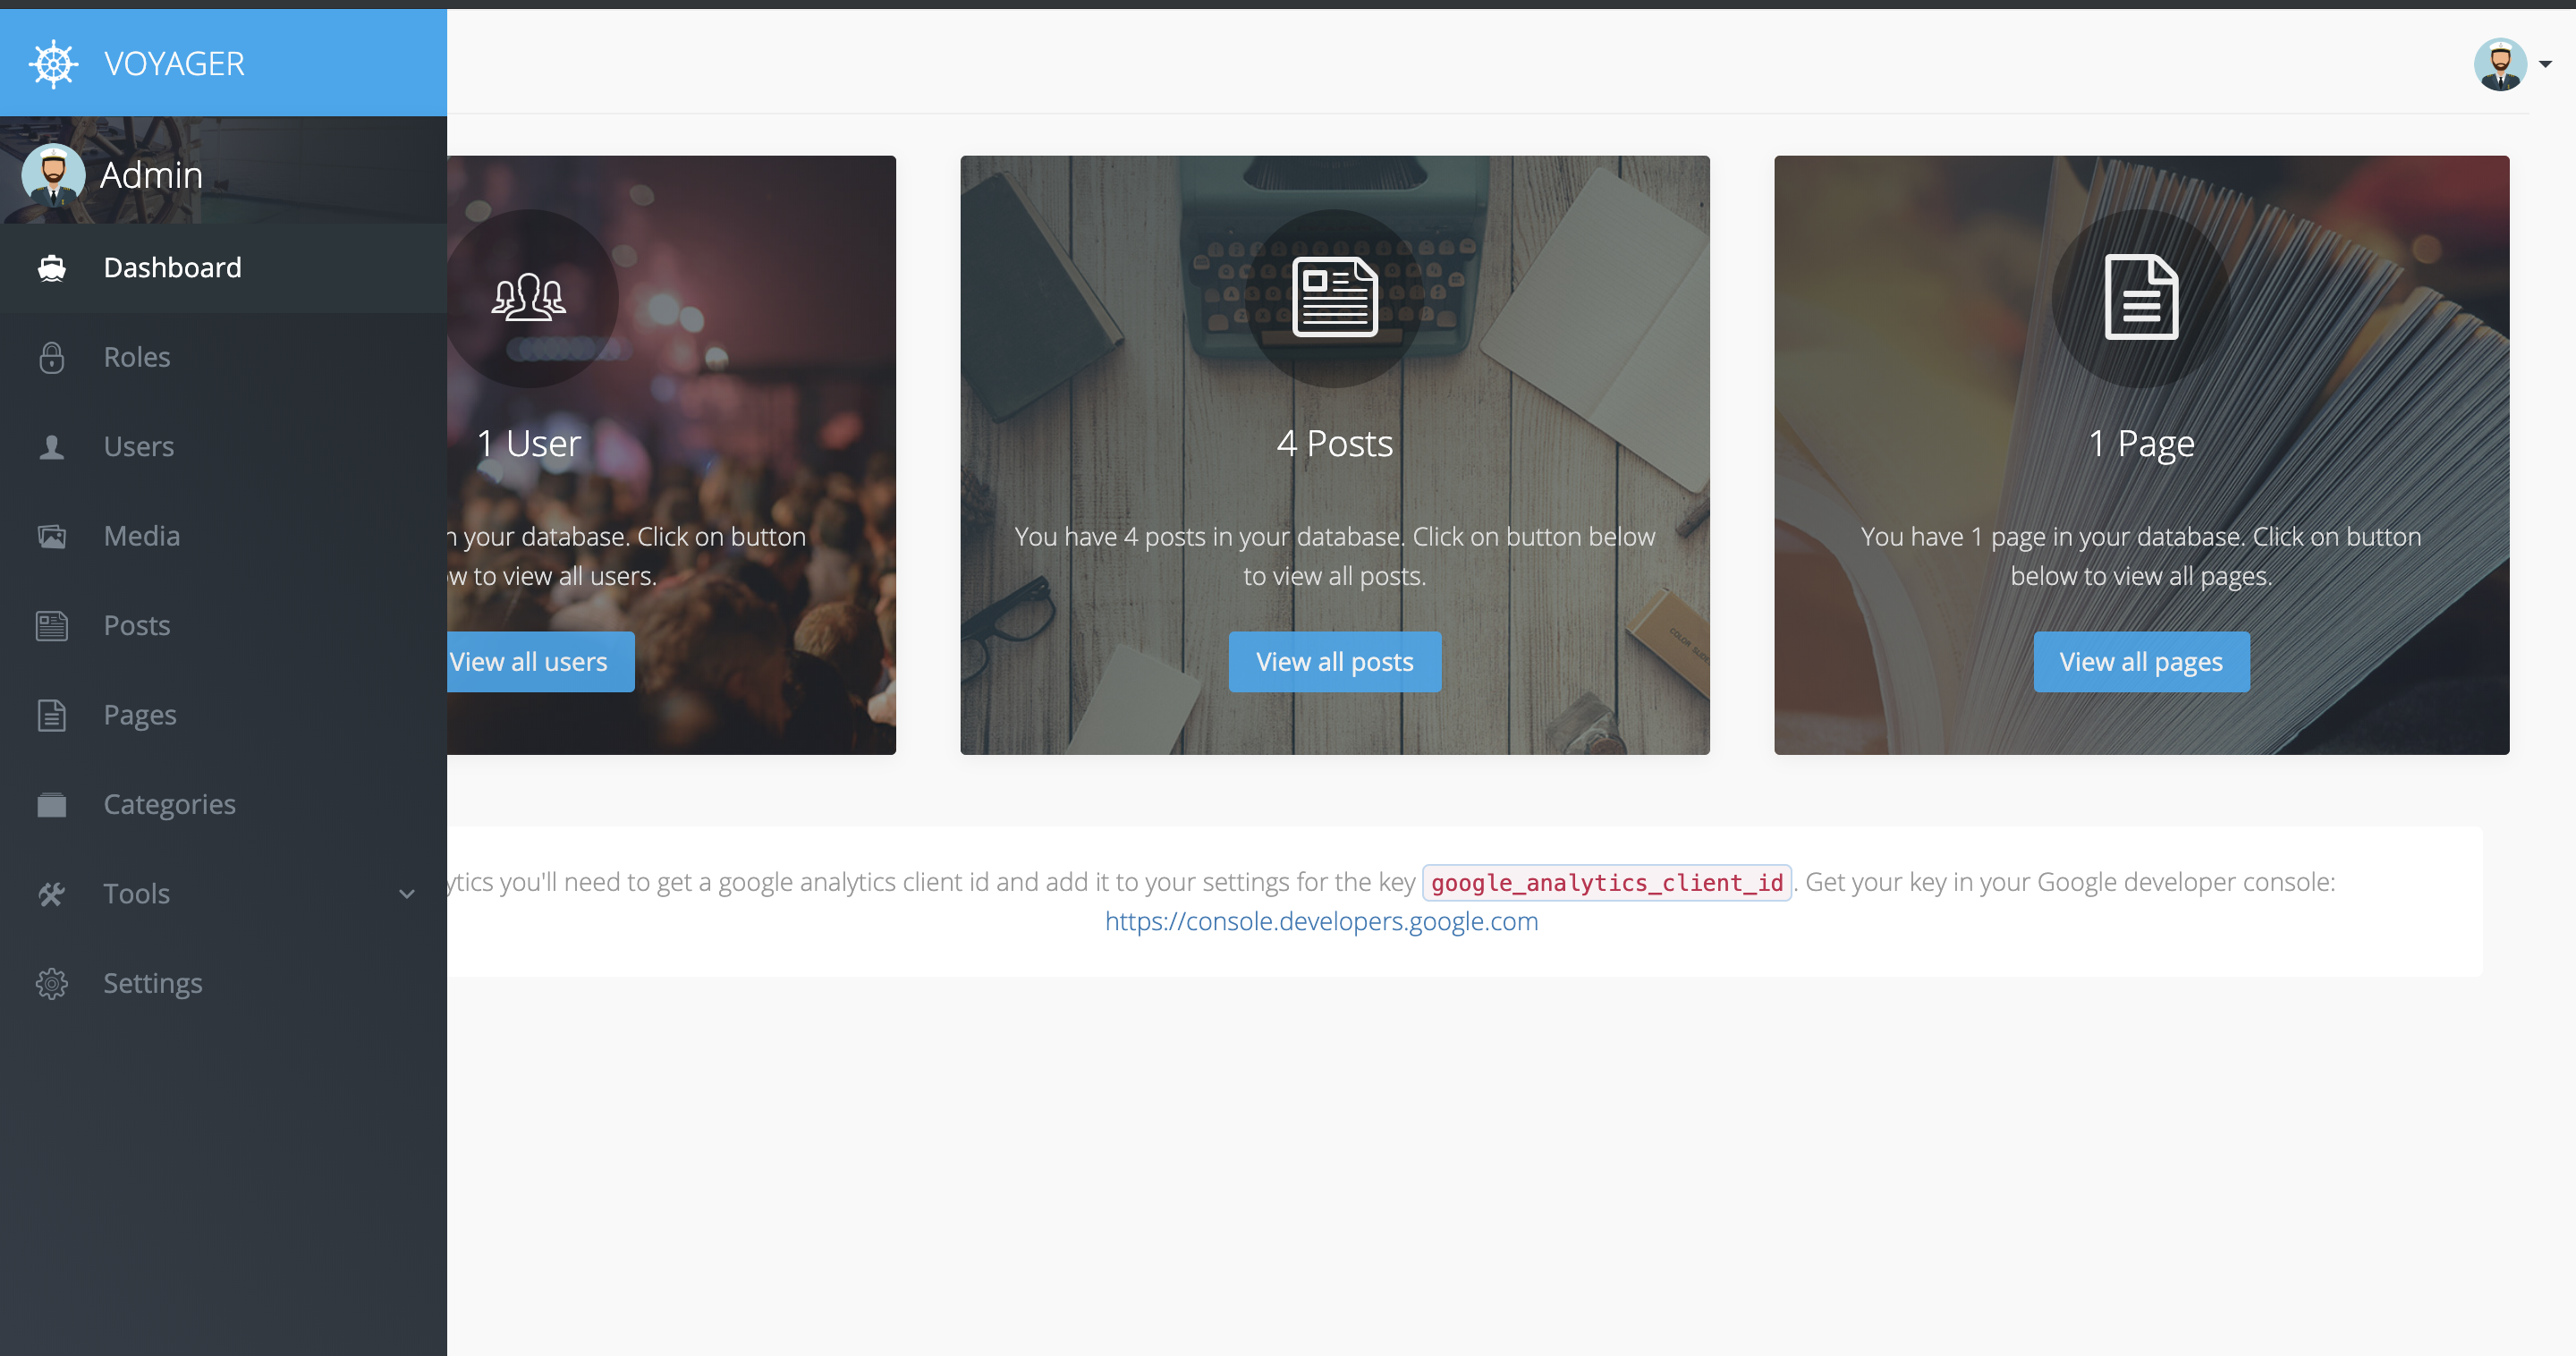
Conclusion
That's pretty much it! Now you have a running Digital Ocean droplet with a LAMP stack along with Laravel and Voyager.
Feel free to reach out to me in case you get stuck :)
Comments (0)