


Introduction
Welcome to part 5 of my Introduction to Docker blog post series! So far we have covered the following:
- Part 1: I quickly went through installing docker and what containers are
- Part 2: I played with Docker containers a little bit by running a couple of Docker containers
- Part 3: I did a quick introduction to the Docker images and some basic operations
- Part 4: I showed you how to create a simple Dockerfile
If you've not read the previous posts I encourage you to do so!
In this post, I'll show you how to set up and work with Docker Swarm mode!
I'll be using DigitalOcean for all of the demos, so I would strongly encourage you to create a DigitalOcean account follow along. You would learn more by doing!
To make things even better you can use my referral link to get a free $100 credit that you could use to deploy your virtual machines and test the guide yourself on a few DigitalOcean servers:
 View Website
 View Website
 View Website
Once you have your account here's how to deploy your first droplet/server:
https://www.digitalocean.com/docs/droplets/how-to/create/
I'll be using Ubuntu 18.04 so I would recommend that you stick to the same so you could follow along.
What is Docker Swarm mode?
According to the official Docker docs, a swarm is a group of machines that are running Docker and joined into a cluster. If you are running a Docker swarm your commands would be executed on a cluster by a swarm manager. The machines in a swarm can be physical or virtual. After joining a swarm, they are referred to as nodes. I would do a quick demo shortly on my DigitalOcean account!
The Docker Swarm consists of manager nodes and worker nodes.
The manager nodes dispatch tasks to the worker nodes and on the other side Worker nodes just execute those tasks. For High Availability, it is recommended to have 3 or 5 manager nodes.
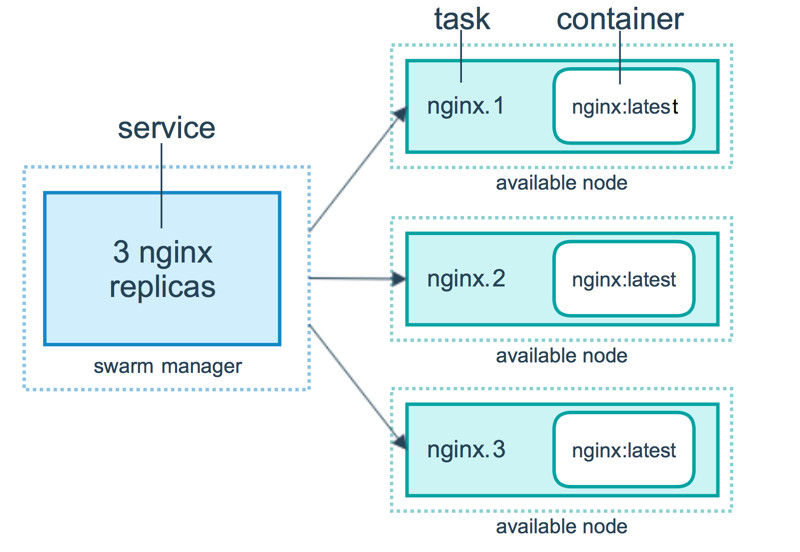
Docker Services
To deploy an application image when Docker Engine is in swarm mode, you have create a service. A service is a group of containers of the same image:tag. Services make it simple to scale your application.
In order to have Docker services, you must first have your Docker swarm and nodes ready.
Building a Swarm
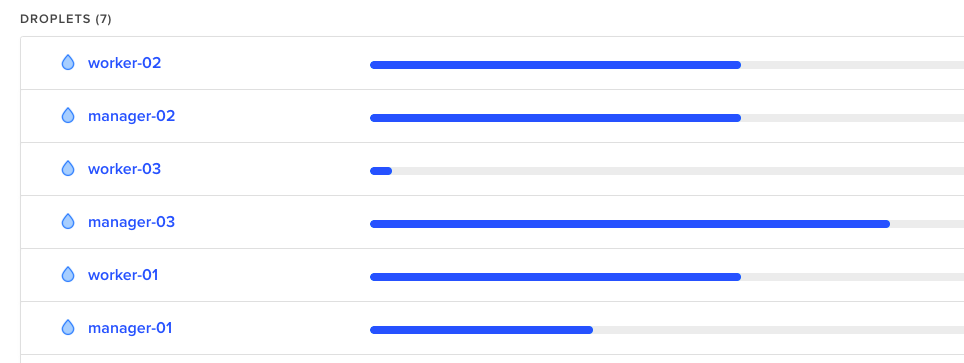
I'll do a really quick demo on how to build a Docker swarm with 3 managers and 3 workers.
For that I'm going to deploy 6 droplets on DigitalOcean:
Then once you've got that ready, install docker just as we did in the Introduction to Docker Part 1 and then just follow the steps here:
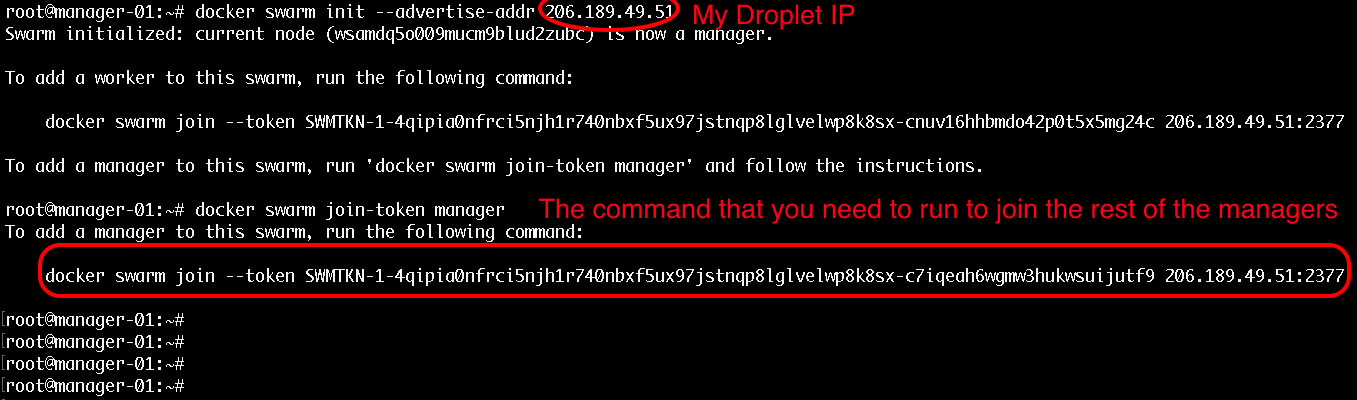
Step 1
Initialize the docker swarm on your first manager node:
docker swarm init --advertise-addr your_dorplet_ip_hereStep 2
Then to get the command that you need to join the rest of the managers simply run this:
docker swarm join-token managerNOTE: This would provide you with the exact command that you need to run on the rest of the swarm manager nodes. Example:
Step 3
To get the command that you need for joining workers just run:
docker swarm join-token workerThe command for workers would be pretty similar to the command for join managers but the token would be a bit different.
The output that you would get when joining a manager would look like this:
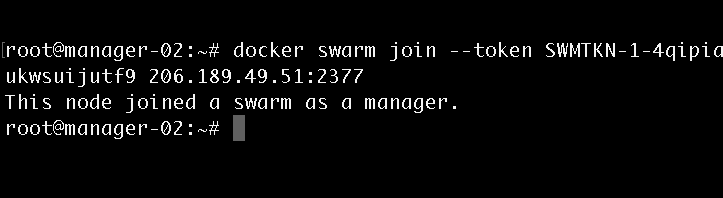
Step 4
Then once you have your join commands, ssh to the rest of your nodes and join them as workers and managers accordingly.
Managing the cluster
After you've run the join commands on all of your workers and managers, in order to get some information for your cluster status you could use these commands:
- To list all of the available nodes run:
docker node lsNOTE: This command can only be run from a swarm manager!
Output:

- To get information for the current state run:
docker infoOutput:
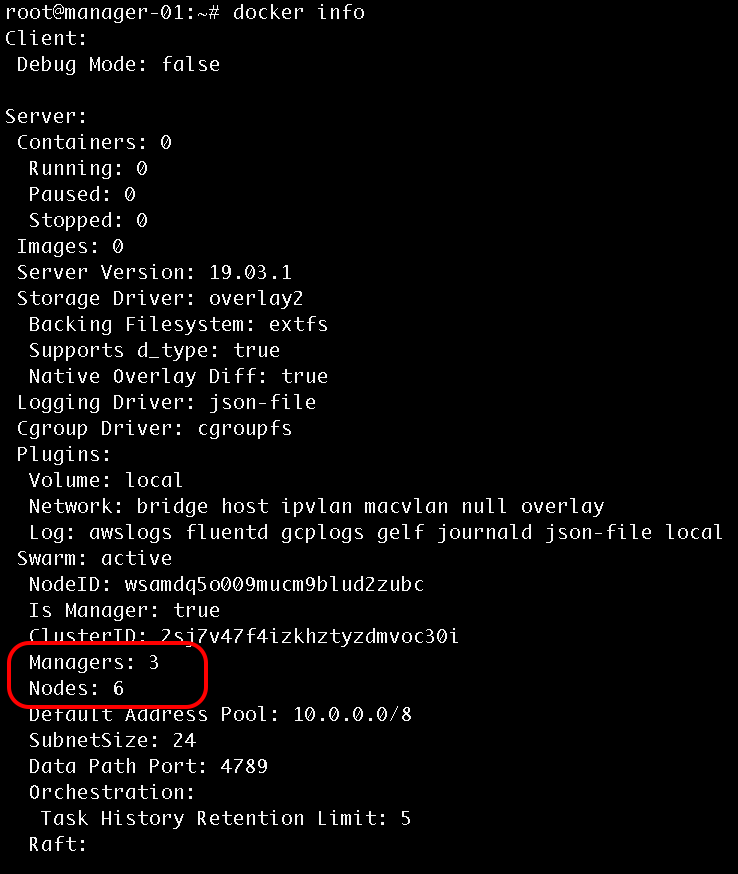
Promote a worker to manager
To promote a worker to a manager run the following from one of your manager nodes:
docker node promote node_id_hereAlso note that each manager also acts as a worker, so from your docker info output you should see 6 workers and 3 manager nodes.
Using Services
In order to create a service you need to use the following command:
docker service create --name bobby-web -p 80:80 --replicas 5 bobbyiliev/php-apacheNote that I already have my bobbyiliev/php-apache image pushed to the Docker hub as described in the previous blog posts.
To get a list of your services run:
docker service lsOutput:

Then in order to get a list of the running containers you need to use the following command:
docker services ps name_of_your_service_hereOutput:
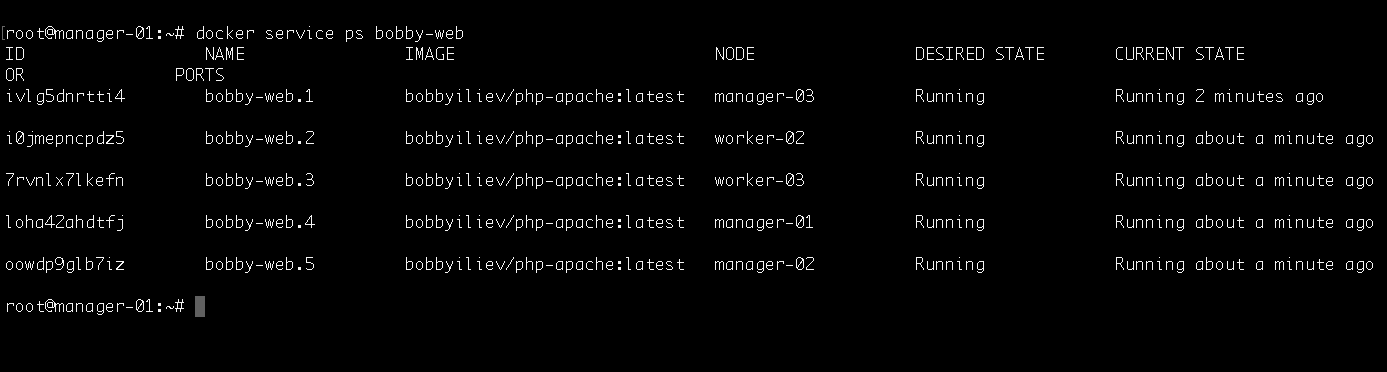
Then you can visit the IP address of any of your nodes and you should be able to see the service! We can basically visit any node from the swarm and we will still get the to service.
Scaling a service
We could try shitting down one of the nodes and see how the swarm would automatically spin up a new process on another node so that it matches the desired state of 5 replicas.
To do that go to your DigitalOcean control panel and hit the power off button for one of your Droplets. Then head back to your terminal and run:
docker services ps name_of_your_service_hereOutput:
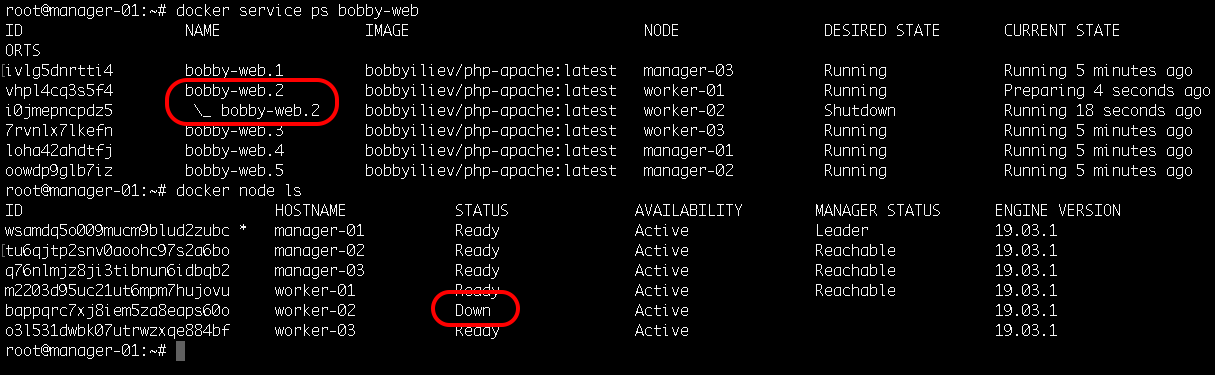
In the screenshot above, you can see how I've shutdown the droplet called worker-2 and how the replica bobby-web.2 was instantly started again on another node called worker-01 to match the desired state of 5 replicas.
To add more replicas run:
docker service scale name_of_your_service_here=7Output:
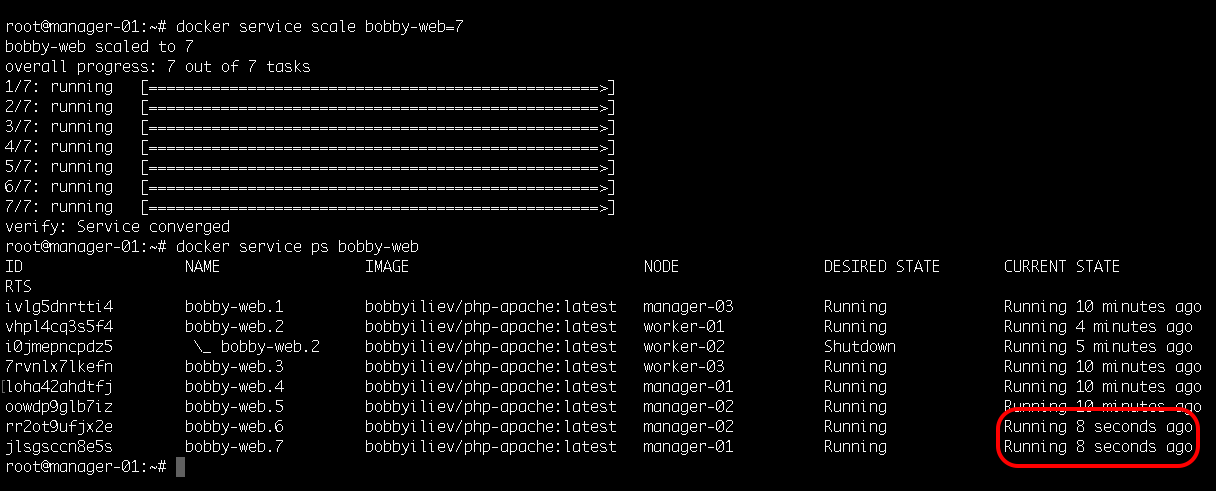
This would automatically spin up 2 more containers, you can check this with the docker service ps command:
docker service ps name_of_your_service_hereThen as a test try starting the node that we've shutdown and check if it picked up any tasks?
Tip: Bringing new nodes to the cluster does not automatically distribute running tasks.
Deleting a service
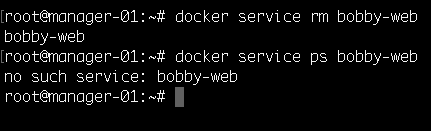
In order to delete a service, all you need to do is to run the following command:
docker service rm name_of_your_serviceOutput:
Knowledge Check
Once you've read this post, make sure to test your knowledge with this Docker Swarm Quiz:
https://quizapi.io/predefined-quizzes/common-docker-swarm-interview-questions
Conclusion
Now you know how to initialize and scale a docker swarm cluster! For more information make sure to go through the official Docker documentation here.
Well done for going through all 5 parts of this Docker introduction! This is the last part of my Introduction to Docker blog post series! I hope that it was helpful and you've managed to learn some cool new things about Docker!
As always let me know if you have any questions!
Comments (0)